Video-
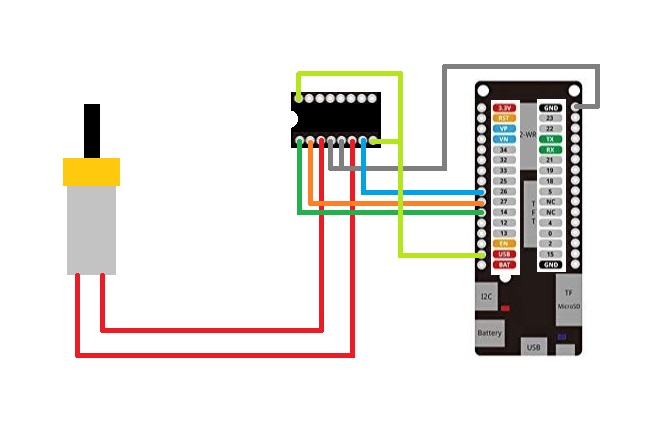
So a few weeks ago, I made a post about using an L293D with an ESP32 for controlling a motor with a simple hack.
the hack was - "we can hook two L293D in parallel to increase its output current and then we can connect high current motor with it"
https://www.hackster.io/Oniichan_is_ded/l293d-with-esp32-wemos-lolin-d32-v2-hacked-edition-ea2086
In order to try this hack on the next level,
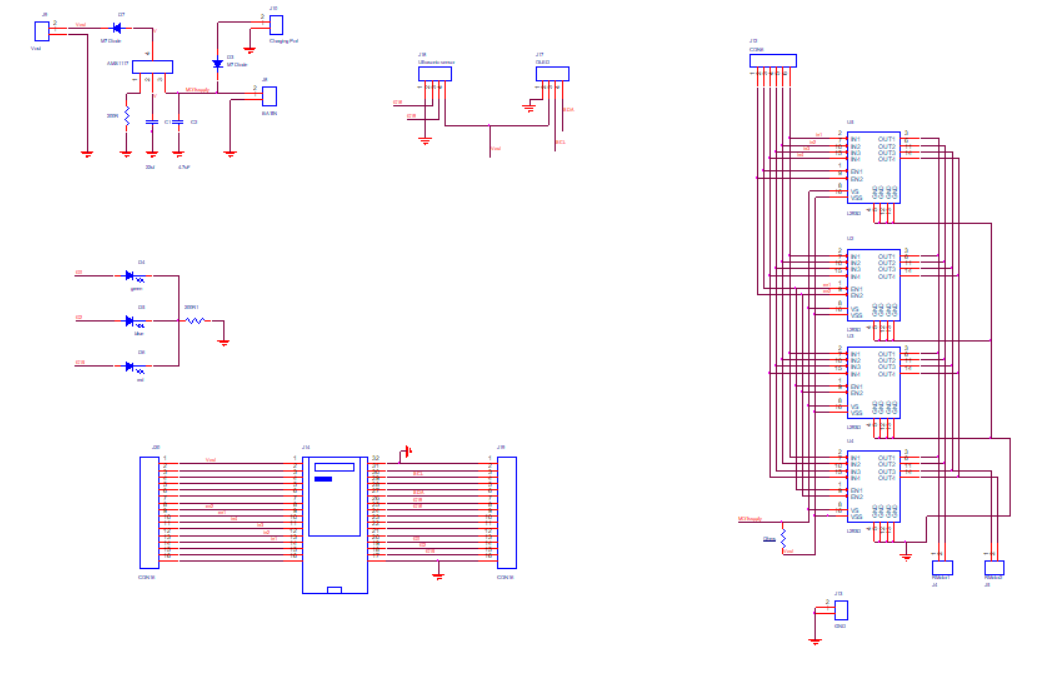
I designed a PCB in which I connected 4x L293D in parallel along with an AMS1117 voltage regulator circuit and ultrasonic sensor pinout so we can add an ultrasonic sensor on this PCB.
Thanks UTSOURCE.net to offer electronic components for this project!you can check UTSOURCE.net, they deal in all kinds of electronics components like for example L293D and other discreet electronics components that I'm using in this project.
PCBs for this project was provided by JLCPCB, do check them out from here-http://jlcpcb.com/
the goal here is to drive this HIGH torque Gear DC motor.
Basically, a single L293D is capable of providing 1A at 12V, so two L293D will provide 2A, 3 will provide 3, and 4 will provide 4A which is enough to drive any high power Motor. (Read its datasheet for more INFO)
This was the basic theory behind this crazy experiment, this is crazy because generally if we have to drive high Power motor, we move on from L293D to L298N or much powerful driver or even make our own by connecting P and N channel Mosfets in H bridge config.
But if we just use the good old L293D in this way, we can drive a high power motor. Here's the circuit
BOM (bill of materials)
we gonna need the following components for the soldering process.
- 4x L293D
- 1x ESP32 lolin V2
- male headers
- female headers
- battery con
- 12V battery
- a dc motor
- ams1117
- m7 diode
- 100uf cap
- 10uf cap
- 200 Ohms resistor
- 500 Ohms resistor
- 3 LEDs
- Custom PCB
the soldering process is pretty easy and straight forward,
first, solder the ams1117 circuit, then add headers for ESP32 and breakout Headers along with motor connectors,
then just add L293D along with other remaining parts and that's basically it.
ADDING HEATSINKSo our circuit is basically ready but I'm gonna drive a high power motor with this setup so naturally, things might get a little hot so I'm gonna add a heatsink to L293D.
with Thermal Tape! and for the heatsink, I used a 2mm thick Aluminium sheet piece
I've loaded the test sketch to this setup which is basically a blink sketch for motor,
it will drive in one direction and then change the direction.
For the test run, just connect the motor with motor terminals and connect a 12V battery with it.
TEST RUN!Watch the video for Test Run video and other info-
This Motor driver can be used in a Robot Project (I'm currently working on a robot project and will post about this in the future so stay tuned for that)
Leave a comment if you run into any problem!


_ztBMuBhMHo.jpg?auto=compress%2Cformat&w=48&h=48&fit=fill&bg=ffffff)


Comments