Here is a step by step guide on how to build your own pair of wooden sunglasses.
First and most important I used a laser engraver/cutter for this project. The result will be very difficult to replicate if you are unable to use one. A CNC machine might work but has not been tested. Please also read through all steps and notes before attempting yourself and/or buying materials.
Also only currently have adobe illustrator files, attempting to make CAD files soon.
Item list:Hardwood (1/8th inch thick)
- Sunglasses lens (taken from cheap glasses)
- Hinges (taken from cheap glasses)
- Wood glue (your choice)
- Epoxy
Sandpaper
- Dremel (optional)
- Mineral oil or Polyurethane
- 2x4 piece (~ 7 " long)
- Epilouge laser engraver/cutter
- Clamps
- Autodesk files/ adobe illustrator
- Clothing steamer (or a steam producing device)
1. The first thing you need is to locate preferably an already thin sheet of any hardwood. I used Oak, Cherry, and Walnut for this project but you can use any hardwood.
2. You will next have to plane the sheet of hardwood down to roughly and 1/8 inch, this is difficult on small pieces with a hand planer. An industrial stationary planar works best. This pieces will then be put into the laser engraver when completed
3. Take your 2x4 pieces and cut it roughly 7 inches long. Take a pair of preexisting sunglasses and place them as shown in picture 1 and trace the curve of the frame onto the block. Proceed to cut block drawn line with aband saw or choice of saw.
4. Hinges are one of if not the largest issue I have run into during this project. I have gone through multiple ideas and if you have any please let me know. my most recent choice of hinges come from cheap plastic glasses on amazon or in stores that have a simple metal hinge. NOT PLASTIC.
This is the current hinges in my glasses from my old ProAcme Wayfair style glasses off amazon. They are metal with a screw and I just took them off the plastic glasses.
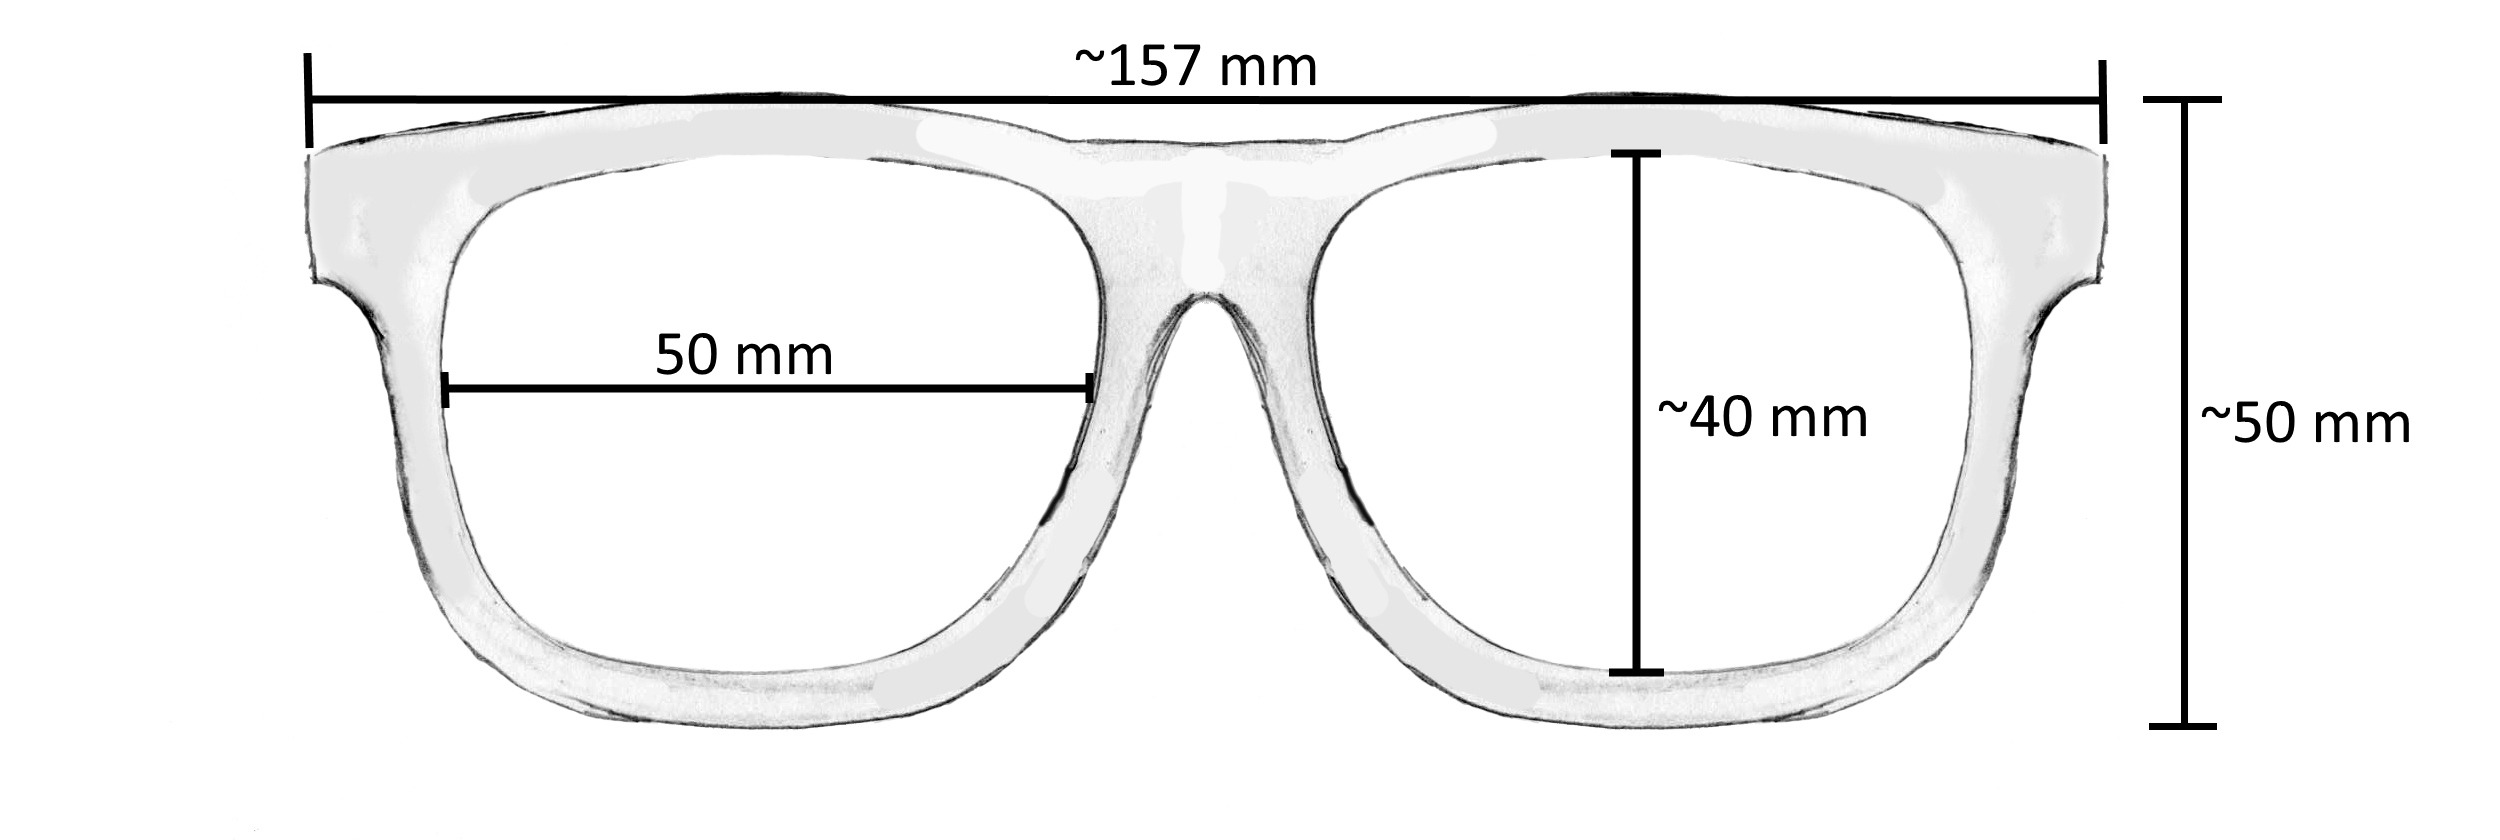
5. Lenses. My assortment of colored lenses came from 5 dollar Walmart Wayfair sunglasses. These glasses are common gasses, especially for cheap ones. Lenses color is up to you but like the hinges, these lenses are just popped out the cheap glasses. Check dimensions of CAD file inner pieces where the lenses fit before buying. Most fit, but some are too small. You can also buy after cutting the wood to see if they will fit.
Build1. Open up the provided CAD/illustrator file, it contains a model for the front, middle, and back frames (middle is smaller than the rest to fit the lenses). There will also be a model for the side pieces (4 of them in total), together with one full set of glasses. The line thickness is set to my laser cutter to make sure the thickness is optimal for your machine. Measure your pieces of wood that you will be cutting and make a new file with the dimensions of the wood. Import each component of the glasses and arrange how you desire, try to optimize space if you plan on cutting more than one pair. If you have multiple sheets I recommend splitting the sides and front.
2. Cutting. Once you have edited the files and are ready to cut in the laser engraver (assuming you know how to) place your wood in the laser engraver WOOD GRAIN GOING HORIZONTAL NOT VERTICAL. Unless you plan on having one horizontal piece lamented to a vertical one. Make sure your program is cutting horizontal also. Proceed to cut out the individual pieces.
3. Blanks. Now you have your blanks and should have two identical frame pieces with a third being smaller to house the lenses. You should also have 4 side pieces NOT JUST 2.
4. Laminating. This is one of the most crucial parts. First Laminating wood is taking pieces and gluing them together with wood glue and clamping them tight and letting them dry (look it up if you want a better definition). First, take your side pieces and line them together cover the entire side of one with a thin layer of wood glue, place the second piece on top of the glue and clamp tight on both ends and middle. Wipe away excess glue.
41/2. Laminating pt 2. This step is crucial you will first need to take your three frame pieces and steam them until they are able to be bent slightly or pressed into the mold with ease. I personally built a steaming chamber but other options will work. Once the three pieces are steamed take the back and cover one face with wood glue and proceed to place the thinner middle piece on top of it. Cover the middle pieces exposed face with glue, but BEFORE you place the front on top of the middle piece take your lenses and place them correctly in the middle piece facing towards you (rounded part facing towards you. Then proceed to place the front over the lenses and press hard on to the middle piece around the lenses. Next, quickly take your three-layer thick frame and place it into the 2x4 bender. Place the rounded part down and press until it all curves to the shape. Try to let the sides slide as little as possible, the sides will stagger which is inevitable but try to keep as even as possible. Proceed to clamp the block together as tightly and uniformly as possible, let dry for a minimum of 12-24 hours.
5. Sanding. This part is all builder preference I put a good amount of time into sanding mine to have no uneven edges, burn marks, and to be smooth to the touch. A Dremel works really well for grind it down then fine sandpaper such as 220 or 320 grit makes it smooth to the touch. Fine sandpaper is recommended for a better finish. (look at my final product photos for sanding transformation) TAPE OFF THE LENSES
6. Attaching Hinges. This mostly depends on the route you go with your hinges but for mine, I measured and drilled tiny holes in the sides and the frame to accommodate the extrusions of the metal hinges. The hinges fit into these holes snugly and were coated with epoxy on both the frame and the sides. LET DRY FOR AT LEAST 24 HOURS. epoxy you don't want to move, this stuff is strong but until its completely solid the sides will leverage it off the frames really easily. As a tip glue the sides first then stand the frames up using clamps or something and glue the sides so that they fold nicely and touch the ground when the glasses are standing.
Edit: I recommend, if you are using similar style hinges to the ones I used, to drill the holes for the extrusions on the hinges and fill the holes fully is gel super glue. This removes all the excess waste epoxy and cleans up the look of the hinge. I would still recommend waiting a decent amount of time before moving the hinge to ensure that the superglue had ample time to dry.
7. Finishing. I highly recommend for this part to use mineral oil, its easy to use and apply, waterproof and is safe for constant skin contact. Take a paper towel wet a part with mineral oil and rub it on. Leave the excess to soak in for an hour or so. Wipe off the excess and sand with a fine-grit and repeat as many times as you will like.
Edit: I no longer recommend mineral oil since it dries out over time. I recommend using a simple Polyurethan finish. Most polyurethanes are inert once dry so there is no need to worry about skin contact, but make sure you do get skin safe polyurethane. I recommend two to three coats with a light sanding in between coats to ensure a nice smooth finish. Also, it is up to you if you want a glossy or matte finish polyurethane. I have tested the glasses with the new finish and they hold up a lot better and in all conditions with the polyurethane coat.
8. Sizing. I recommend not putting them on your head right away these glasses are best when they are sized. To size the sides to fit on your head in the way you want you can either sand down the ends of the sides so that they rest against the frames at a angle or you can sand the frames where the sides meet to be flat and then angle it to fit the sides to your head. (you could do this step before 7 if wanted)
Finish...You should now how complete glasses that you can wear however you want. I haven't done any testing or research into their build quality or such. I am going on to my 5th pair now and will update any problems or fixes that I find. Thank you for reading through this guide, feel free to leave suggestions on any step or ask any questions


Comments
Please log in or sign up to comment.