


Hardware components | ||||||
 |
| × | 1 | |||
| × | 1 | ||||
 |
| × | 1 | |||
 |
| × | 1 | |||
| × | 1 | ||||
 |
| × | 1 | |||
| × | 1 | ||||
Software apps and online services | ||||||
| ||||||
Hand tools and fabrication machines | ||||||
 |
| |||||
| ||||||
| ||||||
My determination for doing this project stemmed from my hobby of guitar playing first and foremost. Second, I love to be creative and make things unique. This has been a project that I had been planning to do for about 6 months, however not this in depth or challenging. However, with the opportunity my MEGR 3171 Instrumentations class presented me to earn extra credit with a project, I thought this would be a great way to link the classroom to my outside hobbies.
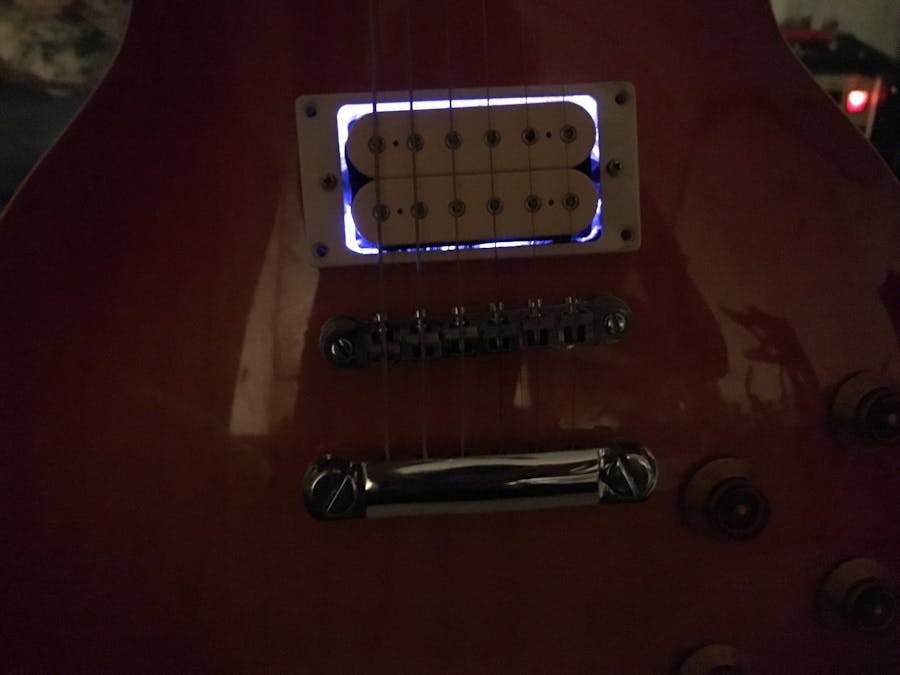
Ideally, the project would allow for neopixel LEDs to be inserted behind the pickups of my guitar, linked to my phone, coded via the photon to display whatever color was desired, and ultimately react to the a strumming pattern to turn on and off.
To begin to explain how this can be done, I'll begin by saying that this was the first Internet of Things (IOT) project I have ever attempted so gaining knowledge on the particle photon was the first challenge presented. The particle website has a great beginner's guide to learn all the basics of the particle photon which I used to get started on my way. Here I learned how to set up my photon with the cloud service particle offers and some basic coding techniques. Here is a link to the particle website's beginners guide for photons.
https://docs.particle.io/guide/getting-started/start/photon/
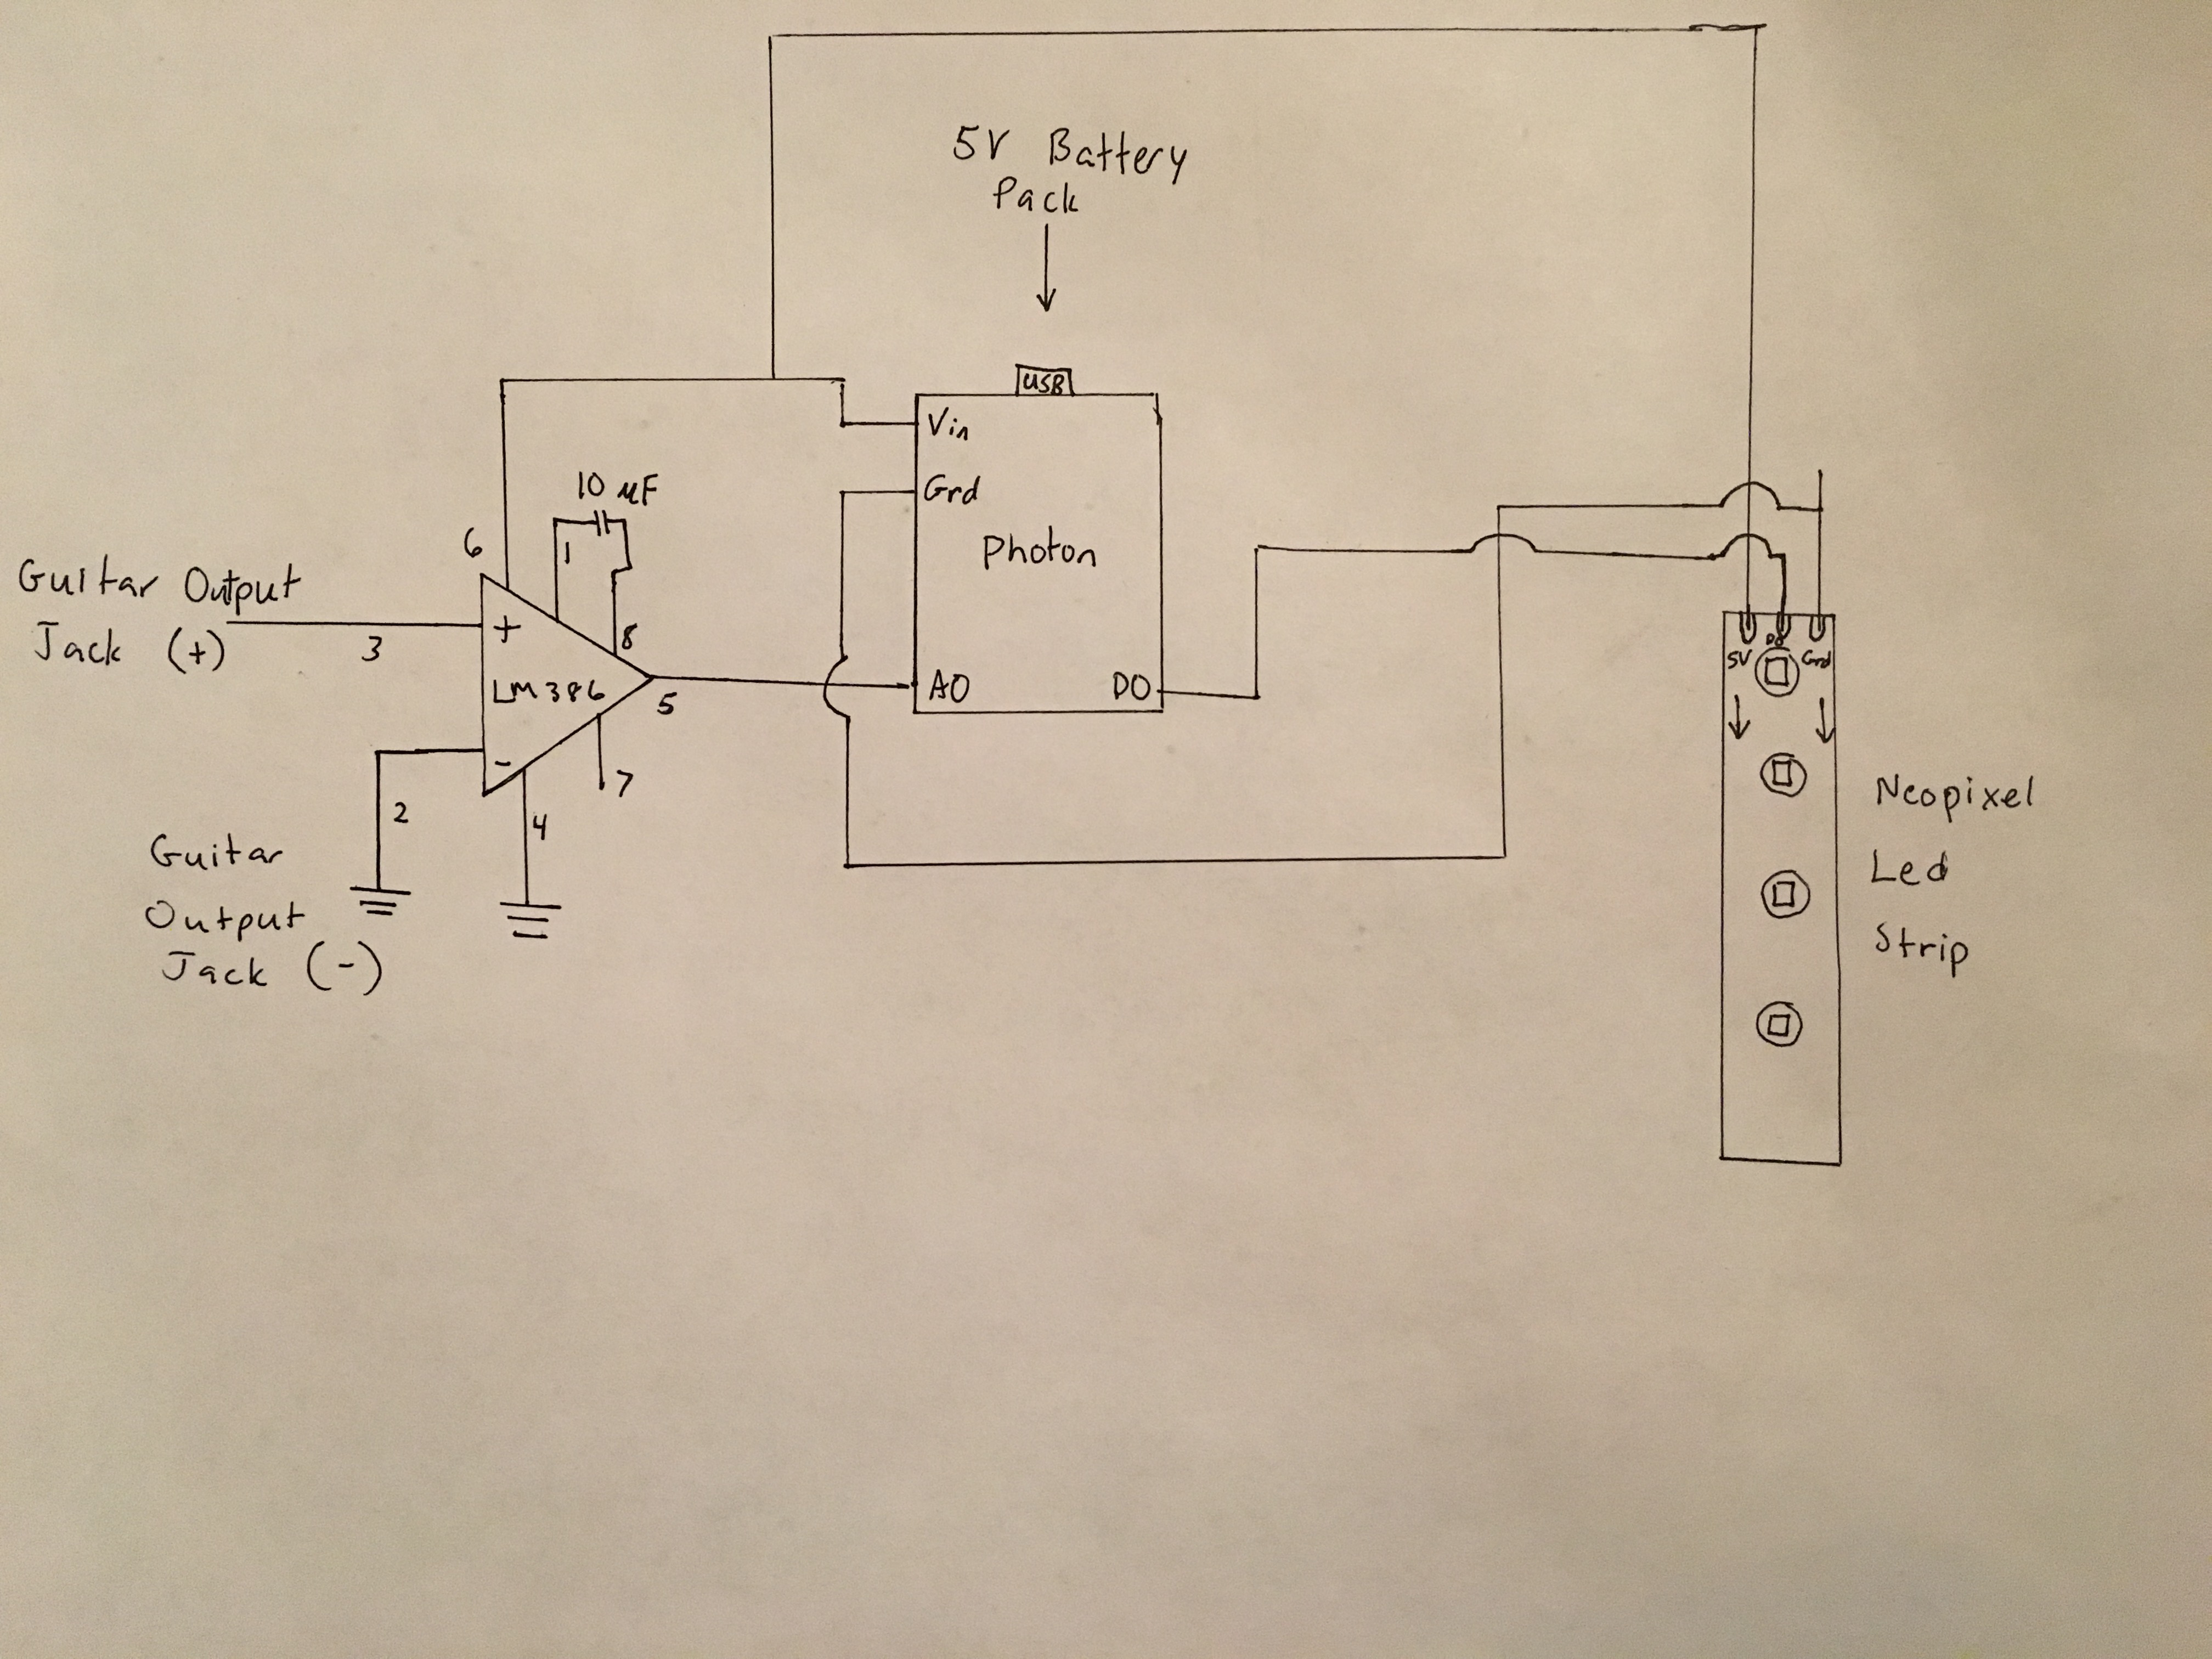
CircuitAfter getting my photon up and running, the next step was to develop the circuit to allow the LEDs to work as needed. This turned out to be a very difficult task as I wanted to be able to create a circuit free of any microphones or sound sensing LEDs. In order to achieve this I began my research and after learning of the all capabilities the photon had, I had an idea in mind.
To begin to explain the circuit set up, I will first explain how passive pickup electric guitars are able to work with amplifiers. Essentially what happens is as the strings on the guitar are plucked and begin to vibrate, a signal is generated from the pickups and relayed throughout the guitar, ultimately out through the output jack of the guitar and into the amplifier. The signal that is being relayed is a voltage that remains steady when none of the strings have been plucked and then oscillates as a sine wave as the strings are plucked. This voltage can be read across the positive and negative terminals of the output jack on the guitar when it is connected to an amplifier.
With this knowledge in mind and the capabilities of the photon I had recently discovered, I figured that an op amp could be used to magnify the voltage readings across the output jack of the guitar and send these values to an analog pin of the photon. The reason the voltages needed to be magnified was due to the fact that guitar pickups only output approximately 100 - 400 mV which would be hard for the photon to distinguish. Using an LM386N-1 Audio Amplifier I was able to enhance the voltage reading by a factor of 20.
CodingUsing the Blynk App that was recommended by a friend I was able to record and visualize the values that the op amp was relaying to the A0 pin on the photon. Within the Blynk App a line chart can be made that will take a reading as little as every 25 ms to create a continuous reading of what the analog pin is reading.
Using this chart within the Blynk App, I was able to determine the resting voltage across the output jack of the guitar. With that value, I was able to develop an if else statement, as seen below in the Guitar LEDs code, that would allow the LEDs to know when they should cut on and off. Essentially how that worked is the photon would take multiple readings every millisecond and if a peak voltage was met, the LEDs would know to turn on. I set this peak value at 2200 because the resting voltage reading was that of 2000 on the A0 analog pin and when strummed, the voltage would oscillate between values of 1300 and 2600. This spike could be seen in the Blynk App and that allowed me to determine an appropriate peak voltage that wouldn't set the LEDs off prematurely.
The coding was by far the most difficult part of this project as I had no experience in C++ coding before beginning this project. With the help of the blynk website tutorial, http://docs.blynk.cc/, and the neopixel libraries within the photon build website, I was able to learn enough information to get this project up and running. Thankfully, I had a few friends willing to help out along the way as well.
The coding was by far the most difficult part of this project as I had no experience in C++ coding before beginning this project. With the help of the blynk website tutorial, http://docs.blynk.cc/, and the neopixel libraries within the photon build website, I was able to learn enough information to get this project up and running. Thankfully, I had a few friends willing to help out along the way as well.
The end result of this project was very cool and I definitely intend to use photons and neopixel LEDs again soon. I now have a guitar that is unique and different than any I've seen. I hope to continue this project by creating multiple patterns and designs as well as wiring them to both pickups to enhance the visual aspect of the project.
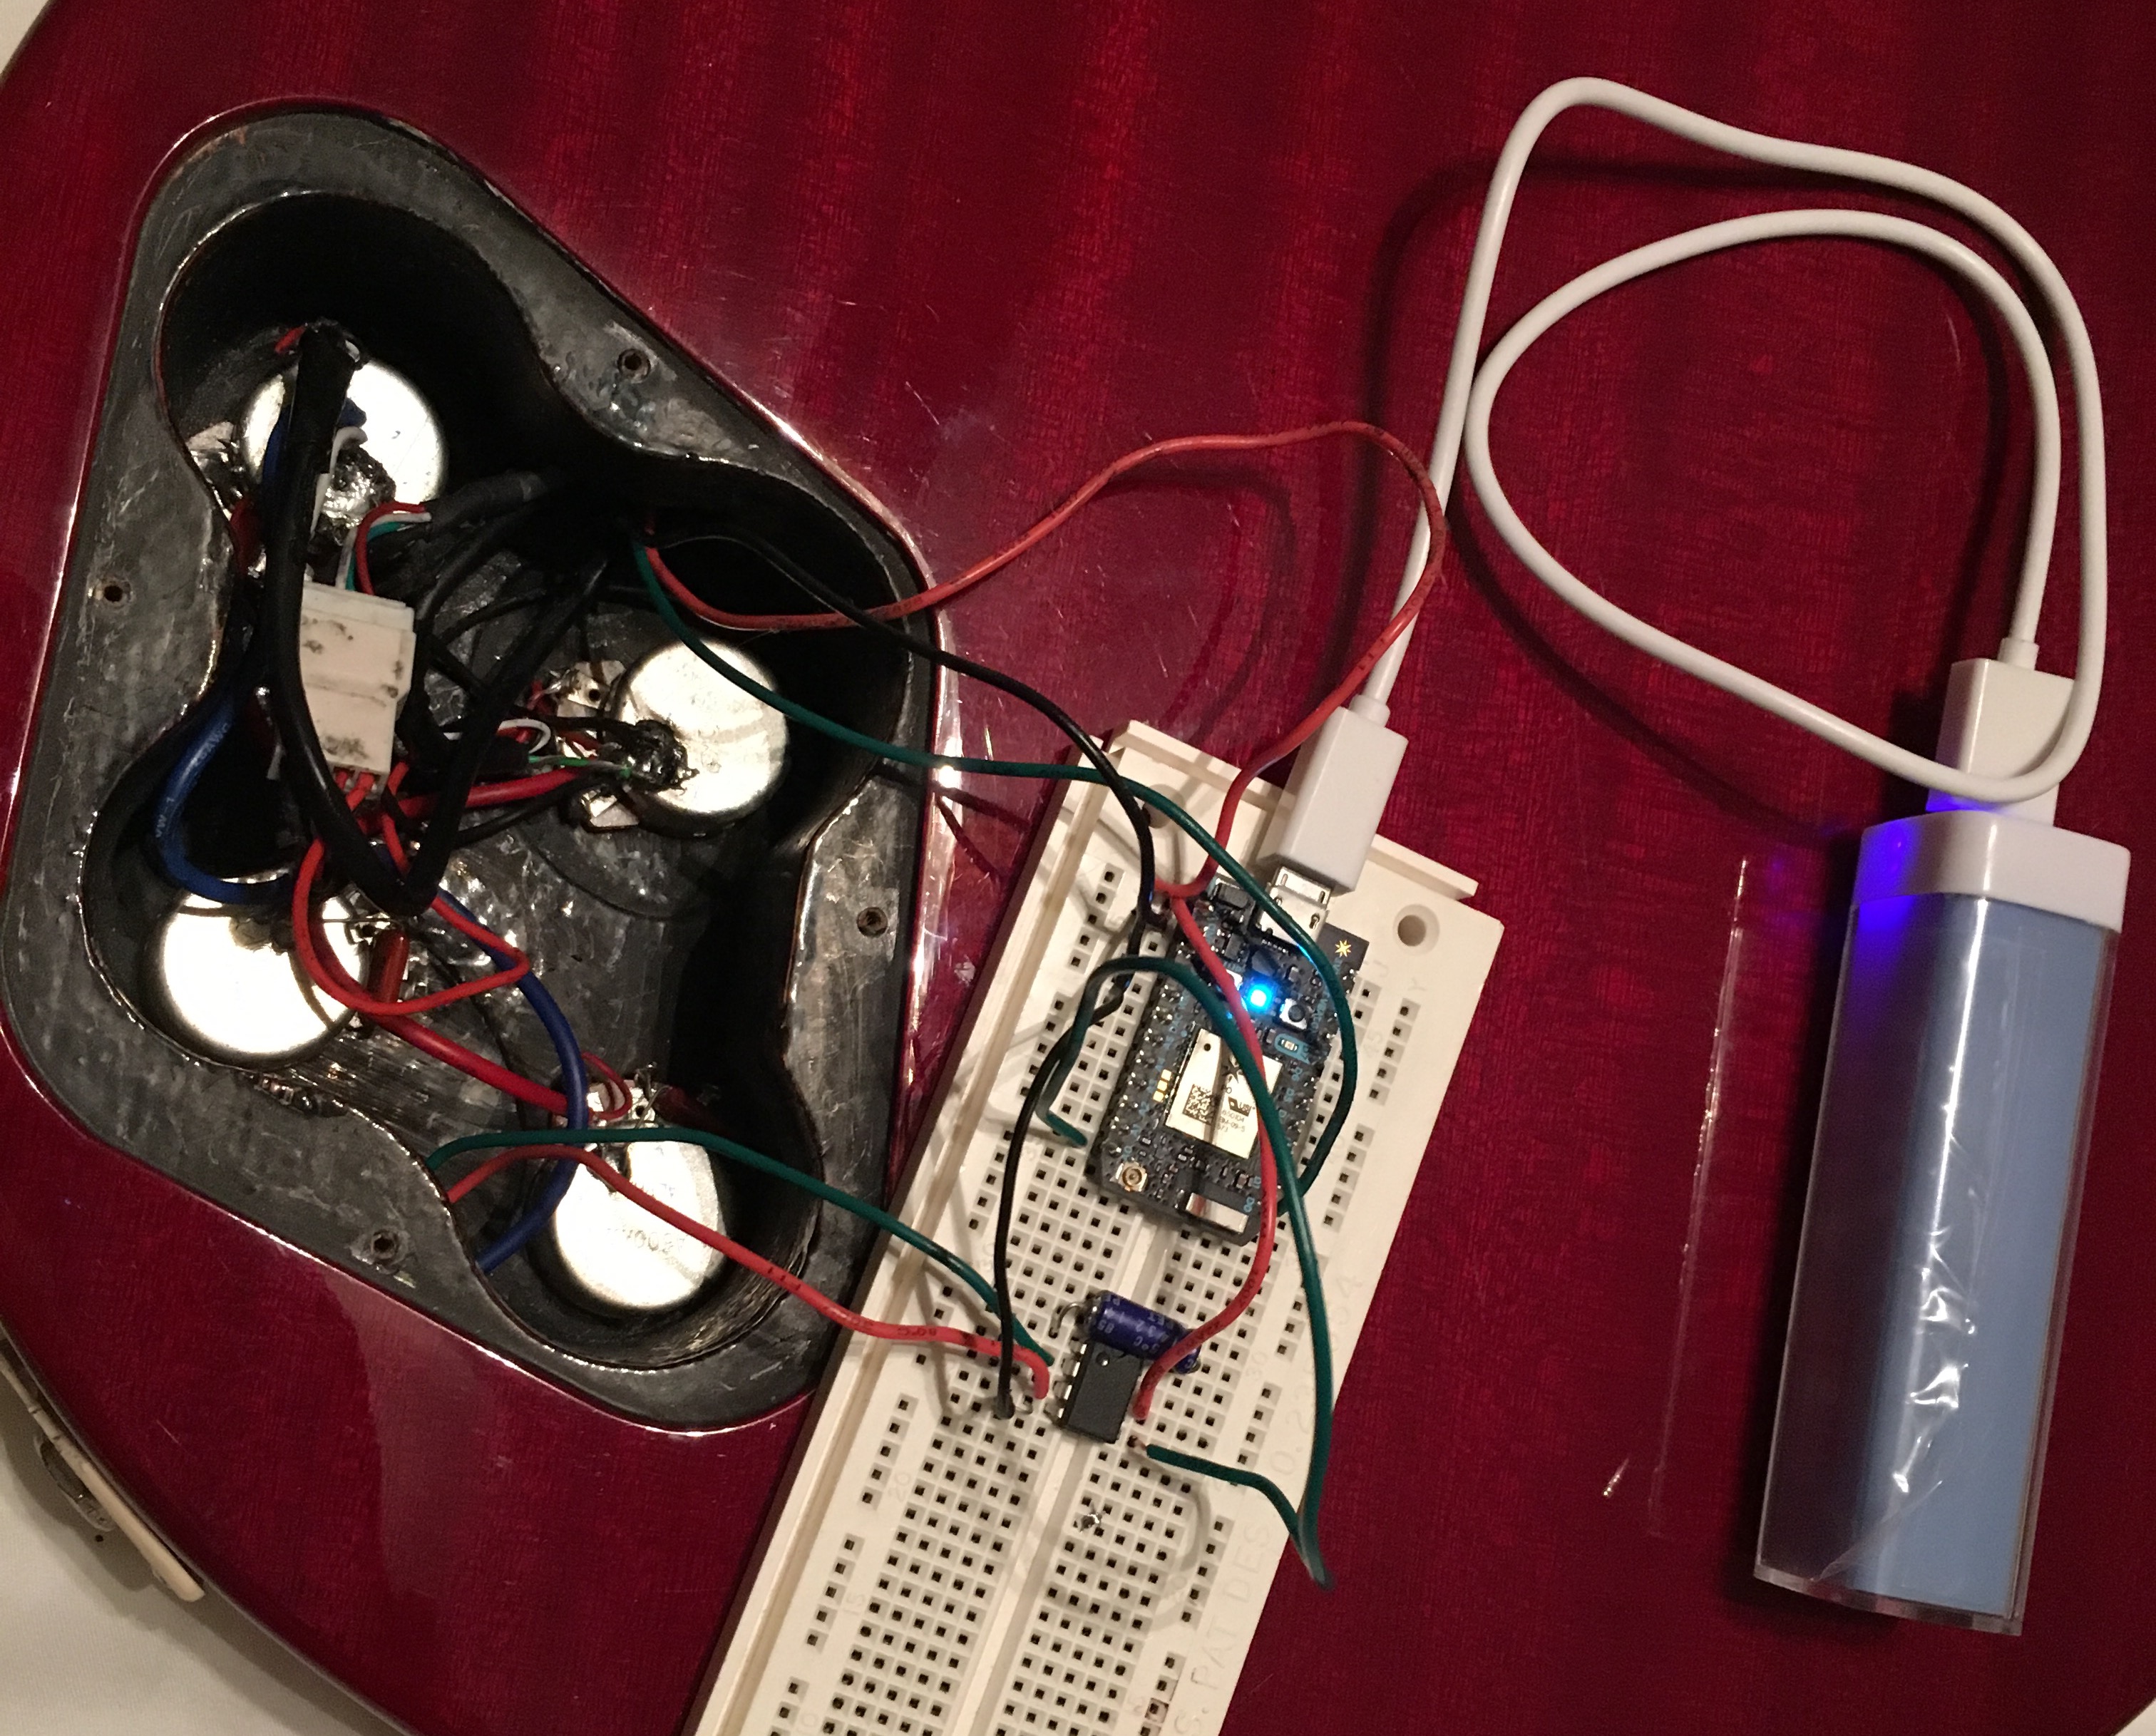
The next step for my project will be fitting the circuit to a breadboard capable of being stored within the small cavity available in the back of the guitar. Luckily, I bought a battery pack capable of powering all the parts needed in this project and one that is able to be housed within the electrical cavity of the guitar. This allows the guitar to be mobile while still enjoying the awesome effect of the neopixels.


Comments
Please log in or sign up to comment.