


Hardware components | ||||||
 |
| × | 1 | |||
_ztBMuBhMHo.jpg?auto=compress%2Cformat&w=48&h=48&fit=fill&bg=ffffff) |
| × | 1 | |||
| × | 1 | ||||
 |
| × | 1 | |||
In this project, I would control an LED using Smart phone APP with the remote Arduino connected using bluetooth, It is possible to control LED by sending simple signal from Android Phone. I used bluetooth connection to pair with Arduino and BlueTerm APP to connect with bluetooth device.
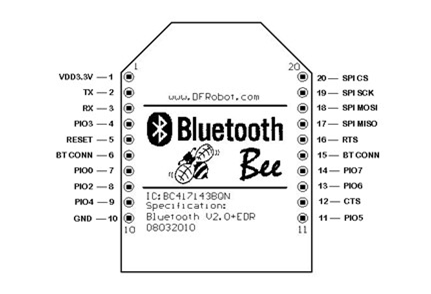
Before we connect bluetooth to Arduino, we are going to learn about bluetooth bee. As shown on the picture we can see where each pin is used for. If you want more information go to www.DFRobot.com I was using 4 pins (1,2,3,10) each consists of VCC(+), TX, RX, GND (-). connect these pins to Arduino pins.
BlueTerm
We need to download APP in our smartphone.
1. If downloaded, open BlueTerm and pair it with Bluetooth bee connected to Arduino.
2. After pairing is done, open Arduino IDE and click on serial monitor as shown on the figure .
3. Type in any words on serial monitor like figure and send it.
4. You can find the words on BlueTerm like figure .
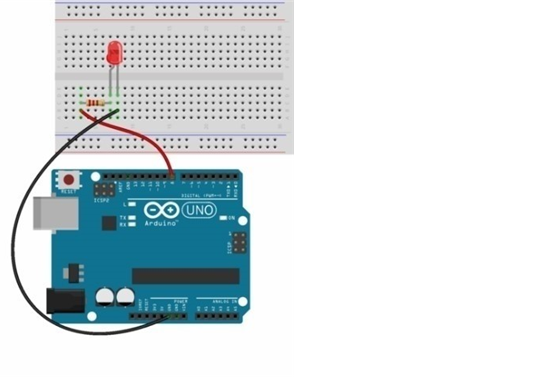
LED control circuit
Push button control

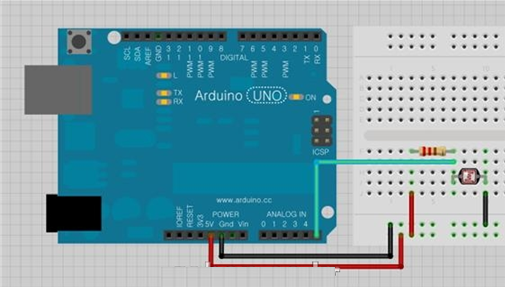
Light Sensor control
Bluetooth Bee
As shown on the picture we can see where each pin is used for. If you want more information go to www.DFRobot.com
I used 4 pins (1,2,3,10) each consists of VCC(+), TX, RX, GND (-). connect these pins to Arduino pins.

Comments
Please log in or sign up to comment.