

Hardware components | ||||||
| × | 1 | ||||
 |
| × | 1 | |||
| × | 1 | ||||
| × | 1 | ||||
Software apps and online services | ||||||
 |
| |||||
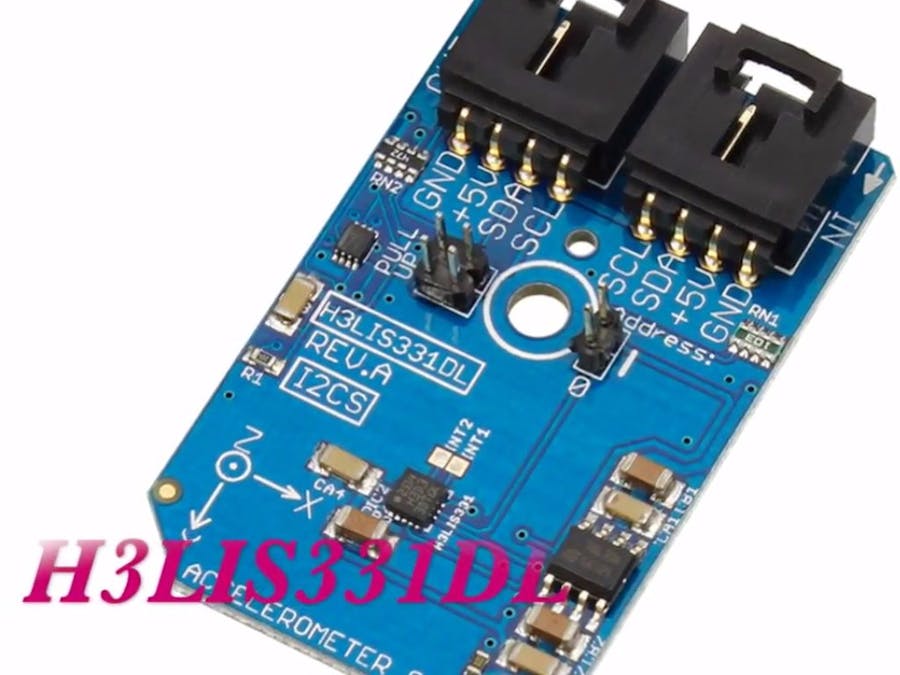
H3LIS331DL is a low-power high performance 3-axis linear accelerometer belonging to the “nano” family with digital I²C serial interface. H3LIS331DL has user-selectable full scales of ±100g/±200g/±400g, and it is capable of measuring accelerations with output data rates from 0.5 Hz to 1 kHz. The H3LIS331DL is guaranteed to operate over an extended temperature range from -40 °C to +85 °C.
In this tutorial we are going to demonstrate the interfacing of H3LIS331DL with Arduino Nano.
Step 1: Hardware RequiredThe materials that we need for accomplishing our goal include the following hardware components:
1. H3LIS331DL
2. Arduino Nano
3. I2C Cable
4. I2C Shield for Arduino Nano
Step 2: Hardware HookupThe hardware hookup section basically explains the wiring connections required between the sensor and the Arduino Nano. Ensuring correct connections is the basic necessity while working on any system for the desired output. So, the requisite connections are as follows:
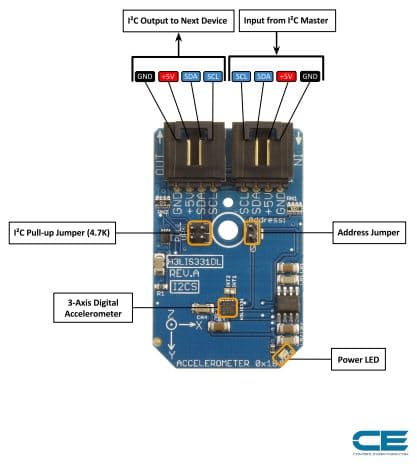
- The H3LIS331DL will work over I2C. Here is the example wiring diagram demonstrating how to wire up each interface of the sensor.
- Out-of-the-box, the board is configured for an I2C interface; as such, we recommend using this hookup if you’re otherwise agnostic. All you need is four wires!
Only four connections are required Vcc, Gnd, SCL and SDA pins and these are connected with the help of I2C cable. These connections are demonstrated in the pictures above.
Step 3: Arduino Code for Acceleration MeasurementLets start with the Arduino code now.
While using the sensor module with the Arduino, we include Wire.h
library. "Wire" library contains the functions which facilitate the I2C communication between the sensor and the Arduino board.
The entire Arduino code is given below for the convenience of the user:
#include
// H3LIS331DL I2C address is 0x18(24)
#define Addr 0x18
void setup()
{
// Initialise I2C communication as MASTER
Wire.begin();
// Initialise Serial Communication, set baud rate = 9600
Serial.begin(9600);
// Start I2C Transmission
Wire.beginTransmission(Addr);
// Select control register 1
Wire.write(0x20);
// Enable X, Y, Z axis, power on mode, data output rate 50Hz
Wire.write(0x27);
// Stop I2C Transmission
Wire.endTransmission();
  // Start I2C Transmission
Wire.beginTransmission(Addr);
// Select control register 4
Wire.write(0x23);
// Set full scale, +/- 100g, continuous update
Wire.write(0x00);
// Stop I2C Transmission
Wire.endTransmission();
delay(300);
}
void loop()
{
unsigned int data[6];
for(int i = 0; i < 6; i++)
{
// Start I2C Transmission
Wire.beginTransmission(Addr);
// Select data register
Wire.write((40+i));
// Stop I2C Transmission
Wire.endTransmission();
// Request 1 byte of data
Wire.requestFrom(Addr, 1);
// Read 6 bytes of data
// xAccl lsb, xAccl msb, yAccl lsb, yAccl msb, zAccl lsb, zAccl msb
if(Wire.available() == 1)
{
data[i] = Wire.read();
}
}
delay(300);
// Convert the data
int xAccl = ((data[1] * 256) + data[0]);
int yAccl = ((data[3] * 256) + data[2]);
int zAccl = ((data[5] * 256) + data[4]);
// Output data to serial monitor
Serial.print("Acceleration in X-Axis : ");
Serial.println(xAccl);
Serial.print("Acceleration in Y-Axis : ");
Serial.println(yAccl);
Serial.print("Acceleration in Z-Axis : ");
Serial.println(zAccl);
delay(300);
}
All you need to do is burn the code in Arduino and check your readings on serial port. The output is shown in the picture above.
Step 4: Applications:Accelerometers like H3LIS331DL mostly find its application in the games and display profile switching. This sensor module is also employed in the advanced power management system for mobile applications. H3LIS331DL is a triaxial digital acceleration sensor which is incorporated with an intelligent on-chip motion triggered interrupt controller.


Comments
Please log in or sign up to comment.