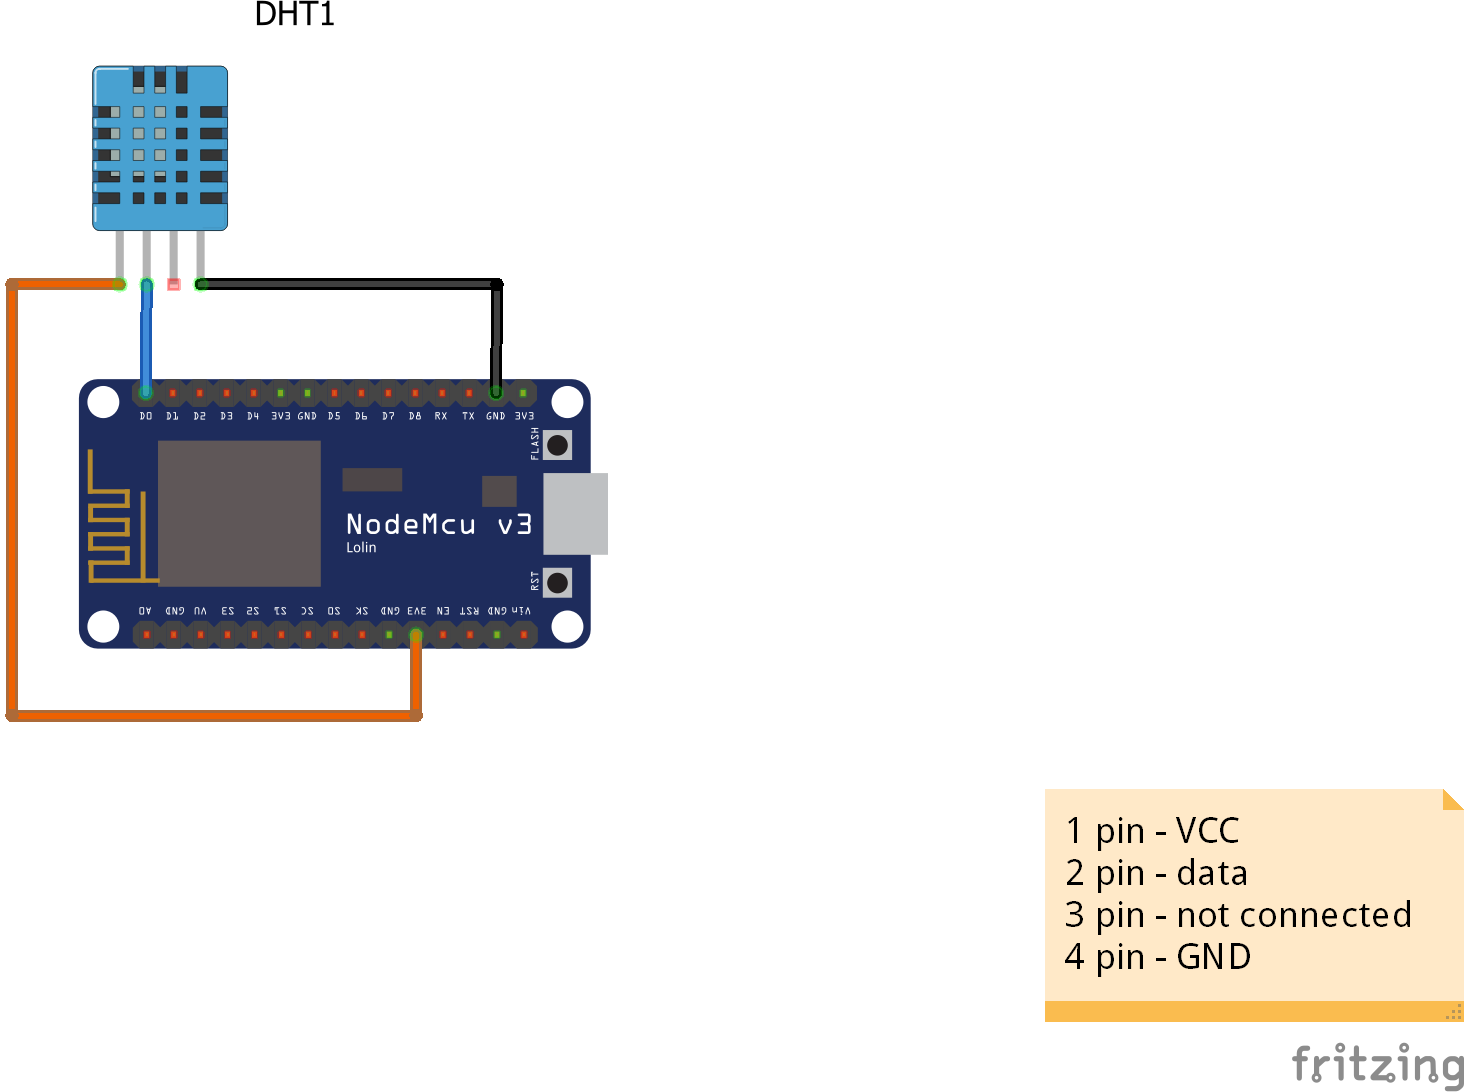
Harshit Jindal
Published © GPL3+

How to Interface Ubidots Cloud with NodeMCU

How to interface DHT11 with NodeMCU ESP8266 and send its data to the Ubidots cloud.

BeginnerFull instructions provided1 hour2,797
How to Interface Ubidots Cloud with NodeMCU

Things used in this project

Hardware components

DHT11 Temperature & Humidity Sensor (4 pins)
×1
NodeMCU ESP8266 Breakout Board
×1

Software apps and online services

Ubidots
Ubidots
Arduino IDE
Arduino IDE

Hand tools and fabrication machines

10 Pc. Jumper Wire Kit, 5 cm Long
Breadboard, 170 Pin
Breadboard, 170 Pin

Story

Read more

Schematics

circuit diagram

Code

code

C/C++
use it with arduino ide
#include "DHT.h" 
#define DHTPIN D1
#define DHTTYPE DHT11
DHT dht(DHTPIN, DHTTYPE);


#include "UbidotsMicroESP8266.h"
#define TOKEN  "A1E-kjeI6pKCeYOn6SFBDEBBiRezl68lxU"  // Put here your Ubidots TOKEN
#define WIFISSID "Nokia 3.1"
#define PASSWORD ""

Ubidots client(TOKEN);
unsigned long lastMillis = 0;

void setup(){
    Serial.begin(115200);
    dht.begin();
    delay(10);
    client.wifiConnection(WIFISSID, PASSWORD);
}
void loop(){

    if (millis() - lastMillis > 10000) {  ///every 10S

      float MyHumidity = dht.readHumidity();
      float MyTemperature = dht.readTemperature();
      
      
            lastMillis = millis();
            client.add("MyHumidity",MyHumidity );
            client.add("MyTemperature",MyTemperature );

           
            client.sendAll(true);
            
            }
   
}

Credits

Harshit Jindal
1 project • 2 followers
B.tech electronics and communication student a guy who loves embedded systems drone maker and pilot
Contact

Comments

Please log in or sign up to comment.