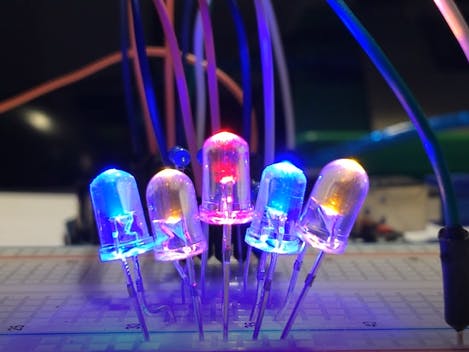
A fun and easy Logic Puzzle! Choose 6 Buttons on your IR remote. 5 of the buttons toggle different pairs/trios of LED's on and off, and one resets all the LED's. If the buttons are hit in the correct order...all the LED's will be on! Once you've solved it, simply change the values in your code to make a new test, or pass it onto to a friend and laugh piteously at their feeble attempts to solve your puzzle.
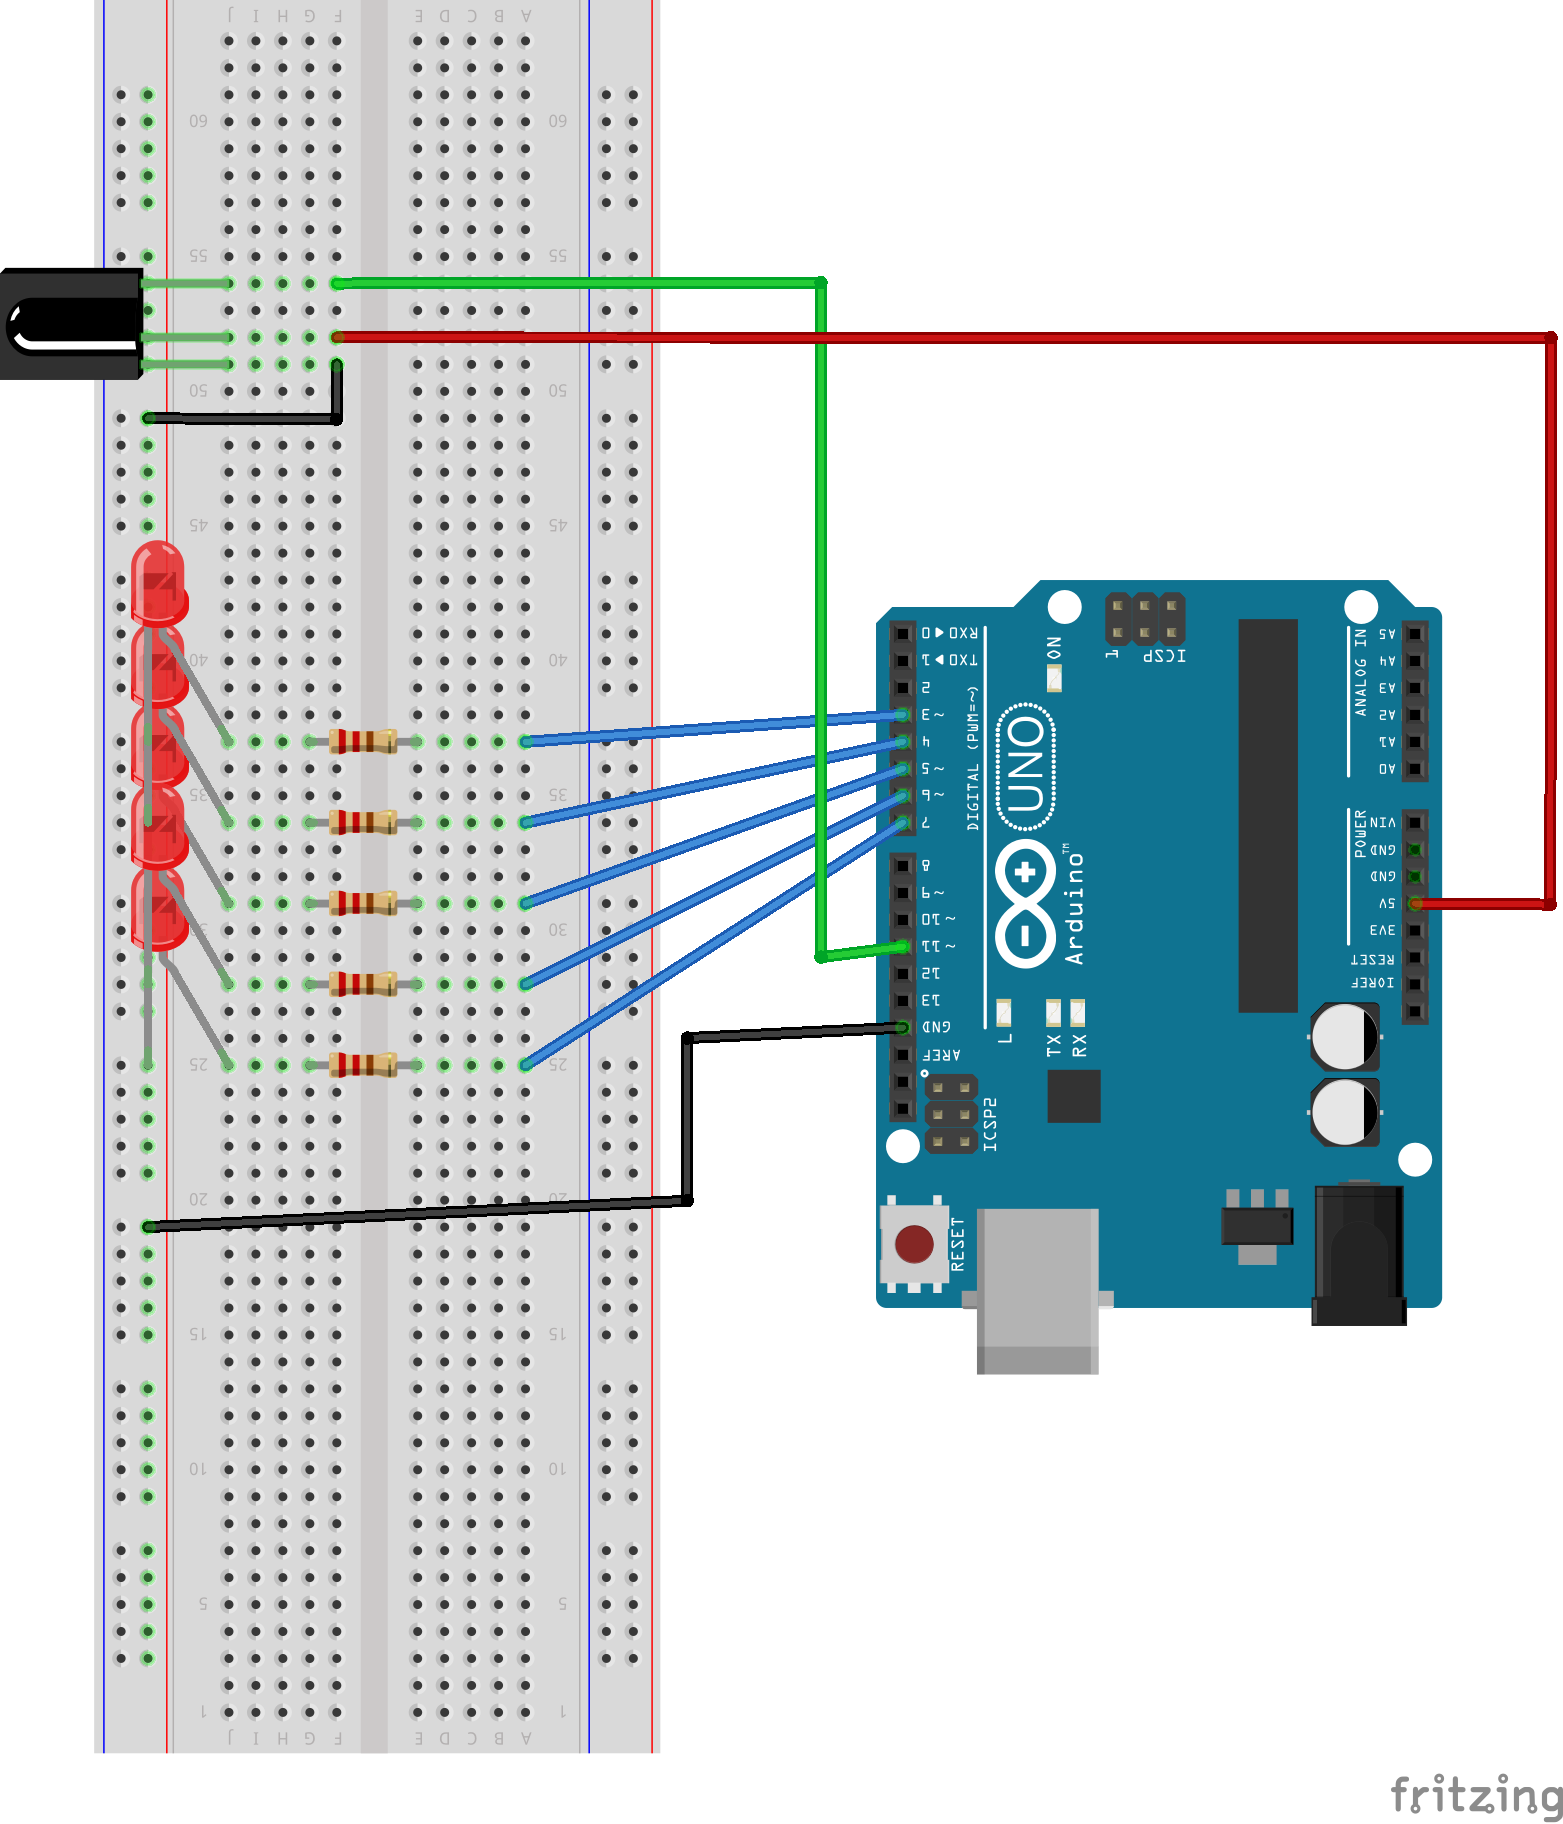
Putting it togetherAssembly of the circuit is very straight forward. Connect 5 LED's to the breadboard, with their negative leads directly into the Negative/ground power rail.
Connect a 220 ohm resistor (making sure their leads do not touch) to the positive lead of each LED, and then connect each Resistor to the Arduino's digital pins 3 to 7 inclusive. The order is not super important, but for debugging purposes it is handy to have them in the same order on the breadboard as they are connected to the Arduino, at least when you are testing the circuit.
The Infrared Remote/RecieverI bought my IR remote/receiver as part of a kit online, so yours may be slightly different. This circuit should work with any IR remote you have in your house (like the TV/DVD remote).
First, connect the IR receiver to a part of the breadboard where it will have an unobstructed line of sight to aim at it with the remote. A jumper wire hanging in front of the receiver will block the signal, so make sure its clear. The Receiver should have 3 pins, which are positive, negative and data. Generally the negative pin is in the middle, but depending on which receiver you have the side of the data/positive may change. If your circuit does not pick up any IR signals, try moving the wires around. Connect the data lead to digital pin 11 on the Arduino:
To use the remote to control the LED's we are going to have to pick some buttons on the remote to be our controllers. For my project I chose the buttons 1,2,3,4,5 and power (top left). In your Arduino IDE, add the the 'IRremote Library' by Shirriff:
We now need to use the library to test our IR remote, as as far as Im aware, they can all be a little bit different. Open a new Sketch with the following code.
#include <IRremote.h>
int RECV_PIN = 11;
IRrecv irrecv(RECV_PIN);  //Setup the IR remote for initilisation
decode_results results;   // set a decode variable, called results
unsigned int val = 0; // A variable to store the IR reading
void setup() {
 Serial.begin(9600) //Turn on the serial port
 irrecv.enableIRIn(); // Start the IR receiver
}
void loop() {
 if (irrecv.decode(&results)) {  //If the IR receiver gets a signal
   val = results.value;          //Save that signal as a value to 'val'
   Serial.println(val);          //To check the values from your remote
   irrecv.resume();              // Recieve the Next value
 }
}
Now open the serial monitor, grab a pen and paper, and start hitting buttons. Have a close look at the numbers that are coming up on the monitor. If you hold a button down it should show a value, and then repeat a different number over and over. That repeated number will be the same for any button you press, its the receiver registering that a button is being held down. What we are interested in is the number that pops up first, or if you just tap the button without holding it. See below, the number I got for repeated values was 65535. IGNORE THAT NUMBER!
Pick the 6 buttons you'd like to use to toggle the LED's on and off and as a reset button. Its probably a good idea to pick 5 that are close together, and one separate from the rest. Jot down what number comes up on the serial monitor when you hit your chosen buttons, as we will hard code those numbers into our sketch.
Almost there!Now, open a new Sketch and copy or type in the full code from below. We should be ready to try it out!
The Sketch uses a switch function to assess the value recorded from the IR remote as 'val', and then if it matches a value that you set as one of your global variables it will run one of two functions. toggle2() toggles on/off 2 LED's. toggle3() does the same for 3 LED's. We then pass the toggle functions the arguments of which LED's we want toggled if that particular button is hit. For example, in the case of code1 being received, LED's 1 and 4 will turn on if they are off, or off if they are on. If code3 is received, LED's 3, 4 and 5 will toggle on/off. You can change these values to mix up the puzzle if you know the solution, or to make it harder or easier. Case6 just resets all the LED's to off.
Each LED is assigned an LED_State which is either 1 or 0 and we change it whenever we turn it on or off. This is the easiest way for an 'if' statement to test whether the LED is currently on or off.
All you have to do now, is replace the values for code1-code6 in the global variables in the top of the sketch, with the values you recorded from your own remote and start playing.
If anyone comes up with a particularly difficult rendition, please share the values you used in the toggle functions as I would love to give them a go!
Thanks and enjoy!


_ztBMuBhMHo.jpg?auto=compress%2Cformat&w=48&h=48&fit=fill&bg=ffffff)


Comments
Please log in or sign up to comment.