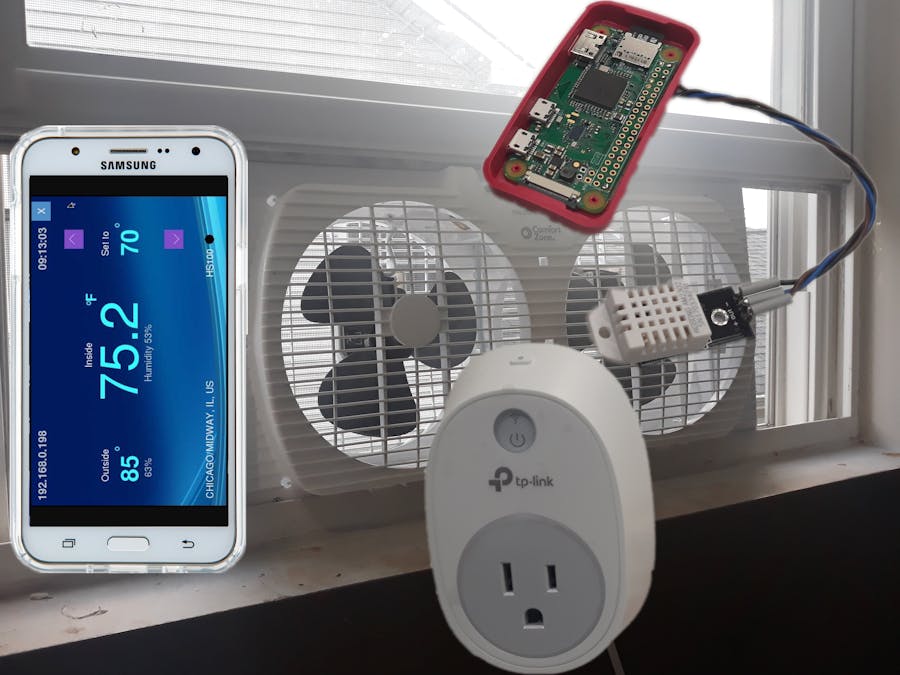
The smart fan is a learning project with great benefits. This fan will keep your house cool when the weather is hot and sunny during the day. As the sun goes down, the outside temperature drops but your house remains hot. The smart fan will automatically turn ON when the outdoor temperature is lower than the indoor temperature. The smart fan will turn OFF when the temperature has reached the set point. If the outdoor temperature is higher than the indoor temperature, the fan will not turn ON.
This project now is capable of running 2 window fans at the same time, one to blow in and another to blow out for better performance. But if you only have one fan, then one is OK.
InstallationBasic operation knowledge of the Raspberry pi is needed. Download the full Raspbian stretch image and burn to a 8GB or bigger SD card. To start, you should be able to SSH to the Raspberry Pi and also use the remote connection VNC. After burning the image create an empty file called ssh in the boot folder of the SD card. Also create a file called wpa_supplicant.conf and include your WIFI credentials.
ctrl_interface=DIR=/var/run/wpa_supplicant GROUP=netdev
update_config=1
country=US

network={
ssid="WifiName"
psk="password"
key_mgmt=WPA-PSK
}
Power ON the Pi and try connecting to it with SSH. Use pi@raspberrypi.local for the IP address or find the IP in your network with FING, an android App.
After the Pi boots up, you need to turn ON the VNC server on the pi using SSH.
sudo raspi-configGo to interfacing Options and enable VNC, then Exit.
Now connect to the Pi with VNC viewer from your computer and finish setting up your time zone and keyboard type. Use raspberrypi.local as the IP and raspberry as the password. Finish with the location and new password setup. At this time you should change the hostname from Raspberry Pi to smartfan. Go to Preferences and Raspberry Pi configuration. If you do not see the bottom of the window to hit OK, just press the Tab key 9 times and press Enter. Now smartfan.local will be your IP address.
Enter the terminal screen and upgrade if needed.
sudo apt-get update
sudo apt-get upgrade
After the upgrade, you are ready for the installation.
You need to install the driver (included with download) for the HS100 Power plug, also the driver for the DHT22. Follow the Adafruit_Python_DHT for details.
cd
sudo pip install Adafruit_DHT
Now download the smart fan script.
cd
sudo git clone https://github.com/granpino/Smart-Window-Fan.git
cd Smart-Window-Fan
sudo chmod +x *.sh
The shortcut.sh file will create a shortcut on the Raspberry Desktop for easy operation. Run the script by typing;
sudo ./shortcut.shTo change the desktop for a single click go to file manager, click on Edit and at the very bottom select preferences. Select 'openfiles with single click'.
WiringThe DHT22 sensor is connected as follows. the (+) pin to 3.3V, the (-) pin to GND, and the signal pin to GPIO4 on the Raspberry pi. A 10K resistor might be needed between the data and (+ )depending on your model. Keep the sensor slightly away from the Raspberry pi to avoid reading the heat of the Pi. Also keep away from other electronics or sources of heat.
Follow the instructions included with the Power Plug to set up the WIFI connection for each plug. The Kasa App is capable of running more than one Plug. During the installation of the Kasa App on your Phone, you will be asked to create an account. Skip this part. You do not need an account to run the device. If you wish to learn about the driver go to https://github.com/branning/hs100, and download all the files, but is is not required.
cd Smart-Window-Fan
sudo git clone https://github.com/branning/hs100.gitYou will have to edit the smartfan13.py file to work with your Power Plug. First find the IP address of the Power Plug. The easiest way to get the IP is to install an App on your Phone to scan your network. I use FING. Go to https://openweathermap.org/api and register to obtain a free Current weather data API code. Find the postal code or zipcode for your town. https://worldpostalcode.com/lookup And also find the 2 letter country code. https://www.iban.com/country-codes These 2 items are needed to be entered on the smartfan13.py script.
Inhibit modeAt the early hours of the day the temperature will begin to rise, however the temperature inside is still low but a little higher than outside. You do not want the temperature to increase by blowing air that is warming up. Inhibit mode starts at sunrise when the temperature begins to climb. The fans should be OFF to maintain the room temperature as low as possible. Inhibit mode ends at 9:00 AM.
Viewing the App on Your PhoneTo access the Raspberry Pi on your phone, you will need to install the VNC viewer app, and also activate VNCserver on the Raspberry Pi as indicated above. Open VNC and enter the IP of the Raspberry pi the same way as using it on your computer. The smart fan screen has 3 buttons, one to increase the setpoint and another to decese. Also the button with an X is to close the window and return to the desktop. Also at the bottom right screen is a fan status indicator. Green indicates a signal is sent to the power plug to turn ON. Black indicates an OFF signal is sent, and yellow indicates the output is in inhibit mode and an OFF signal is sent.
Fullscreen DesktopThe smart fan script is initially set at a resolution of 650x410 and it will fit in a 720x480 screen. If you get the error ‘No video mode large enough for 650x410’. It is because the Raspberry Pi screen is not big enough and must be changed. The default resolution is 720x480. Fullscreen can be changed on the script for troubleshooting.


Comments
Please log in or sign up to comment.