In this article, I will take you through the primary and advanced features of the Wokwi Arduino Simulator. Last year, I wrote about the simulator. I am excited to see so much love you have shared 😍.
Wokwi Arduino simulator has added several features helping you to build projects even faster and easier.
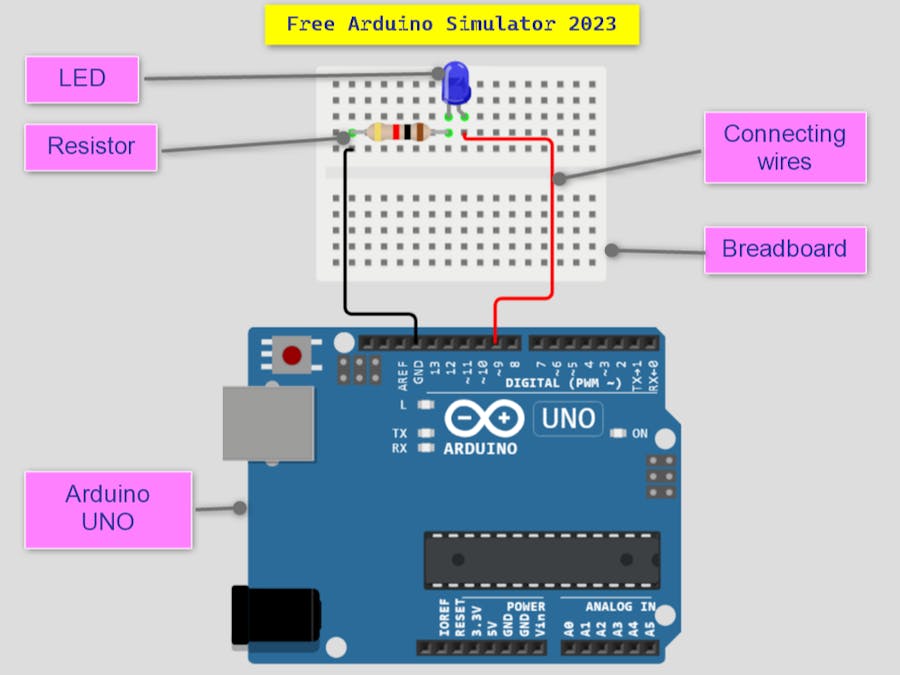
I’ll take you through the basic blocks with new updates. We will build an LED blinking project. I’ll also present shortcuts and some cool hacks😎 to enable you to work efficiently with projects.
Let’s get started!
What is Wokwi?
Wokwi is an Arduino simulator. It is free, easy to use, and requires no downloads or installation. You can straightaway visit the link.
And voila! the Arduino simulator is ready to use! You can build, compile and play with the Arduino projects on Mobile, tab, and any platforms in general that support a browser!
Currently, boards supported by the Wokwi Arduino Simulator are
Arduino Boards- Arduino UNO
- Arduino Mega
- Arduino Nano
- Bare IC (why not??)
- Franzininho Board
- ESP32 and Other WiFi Boards
The list of sensors and modules supported is ever-growing on the Wokwi Arduino simulator: SSD1306 OLED display, Shift registers, seven segment displays, A4988 stepper motor driver, analog joystick, stepper motor, DHT22 temperature and humidity sensors, ultrasonic sensors, IMU, relay module, a logic analyzer, motion sensors and much more.
Step 1: Visit the Wokwi home page by clicking on the link https://wokwi.com 👍🏼
Step 2: Select your preferred board. I will select Arduino UNO. 👍🏼
A new project window will open. The Arduino UNO template is shown in the image below.
Tip: You can append ?dark=1 in the project link of wokwi in the address bar. This will enable dark mode in the simulator. Similarly, ?dark=0 disables dark mode.
Example:
Step 3: In the image below, you can see all the essential units of the simulator.
In the order of labeling, here is the description of each of the units
1. Editor Window - You write 👩🏽💻 your Arduino code here in this section. You can also copy and paste the code. The Editor supports auto-code formatting too.
2. Simulation window - Here is where the magic happens 🪄 You will build your Arduino project connections here
3. Play button - 🛝Clicking on this button will start the simulation
4. Add button - Click on the button to add parts to the simulator window. In the image, you can see a list of parts has popped up. There are more parts that the Wokwi supports than the list can show!
5. More options - Here, you can find controls related to zoom and grid options
6. More options (save) - Clicking more options will provide you with additional options to manage your projects, such as unlisting a project, locking a project, and much more.
7. File edit options - Allows you to add, remove files and take additional action
8. Like button - Liked any Wokwi projects? Hit the 💖button. You can access the projects later in your dashboard.
9. Edit - You can edit the project name directly here
10. Share button - Click on the share button to get the project link which you can copy and share it with your friends
Step 4: Add an LED to the circuit. To add the LED, click on the add button and search for the LED. select the LED in the search results.
Step 5: Add a resistor to limit the current through the LED. If you connect the LED directly acorss the Arduino pin, the LED can draw maximum current and can also spoil the Arduino board.
In the simualtor, you don't spoil anything when you do wrong connections. But, it is good to always follow safety practices.
any value between 100 ohms and 470 ohms is okay. I have pale 220 ohms.
How to change the resistor value?
To change the resistance value, please go to the diagram.json tab in the editor window.
Change the attribute value to the desired value. In the below example, I have set the value to 220 ohms.
{
"type": "wokwi-resistor",
"id": "r1",
"top": -48.4,
"left": 0,
"attrs": { "value": "220" }
}
Step 6: Connect the resistor and the LED to the Arduino UNO.
To draw a wire, click on the LED terminal. The wire will appear automatically.
Complete the connections as shown in the image below.
Did you know, you can change the color of the LED and the wires in a click!
Here is how it is done on Wokwi.
Step 7: Time to program the Arduino!
You can use the blinking LED code example to test the circuit.
void setup()
{
pinMode(13, OUTPUT);
}
void loop()
{
digitalWrite(13, HIGH);
delay(1000);
digitalWrite(13, LOW);
delay(1000);
}
You can see the complete code and the circuit simulation.
Step8: Click on the green button to start the simulation 😍
“The great aim of education is not knowledge but action.”—Herbert Spencer.Grid feature
You can enable the grid in the circuit window by pressing the 'G' key. You can also toggle using the options in the circuit window menu. Grid helps you to align the parts. For more information on the grid feature, visit the link.
The following table summarizes the keyboard shortcuts on Wokwi functioanl as of today.
You can 🔐lock a project from further (accidental updates) by selecting the lock option.
Bring your components to Wokwi now!
You can create your ICs, Modules, and sensors for free on Wokwi! The creativity is now endless. I think WOkwi is the only Arduino simulator that allows you to do that easily.
This is the best addition to the Arduino simulator, where you can create the missing chips for your projects. No need to request others; wait in the queue or compromise!
To learn more about custom chips, visit this link.
🎁
Please hit a like button if you found this helpful 👍👍
Can you please leave a comment on when and how did you hear about Wokwi? It's awesome to read user stories.
For any support or feedback, please leave a comment. You can also hop on to Wokwi Discord Channel. to meet other wokwi seurs and learn what otehrs building.
Share your interesting projects and browse through several curious projects from fellow developers and makers on Facebook Wokwi Group!
Stay Safe! and Don't stop learning!
Until next time 👋


_ztBMuBhMHo.jpg?auto=compress%2Cformat&w=48&h=48&fit=fill&bg=ffffff)


Comments
Please log in or sign up to comment.