

Hardware components | ||||||
 |
| × | 1 | |||
 |
| × | 1 | |||
| × | 1 | ||||
| × | 1 | ||||
 |
| × | 1 | |||
 |
| × | 1 | |||
 |
| × | 1 | |||
Software apps and online services | ||||||
 |
| |||||
Hand tools and fabrication machines | ||||||
 |
| |||||
Jay Turla from Rootcon conference in the Philippines approached me to discuss the idea of hardware soldering village in their 13th conference year. This was the first time ever Rootcon was going to hold hardware soldering village.
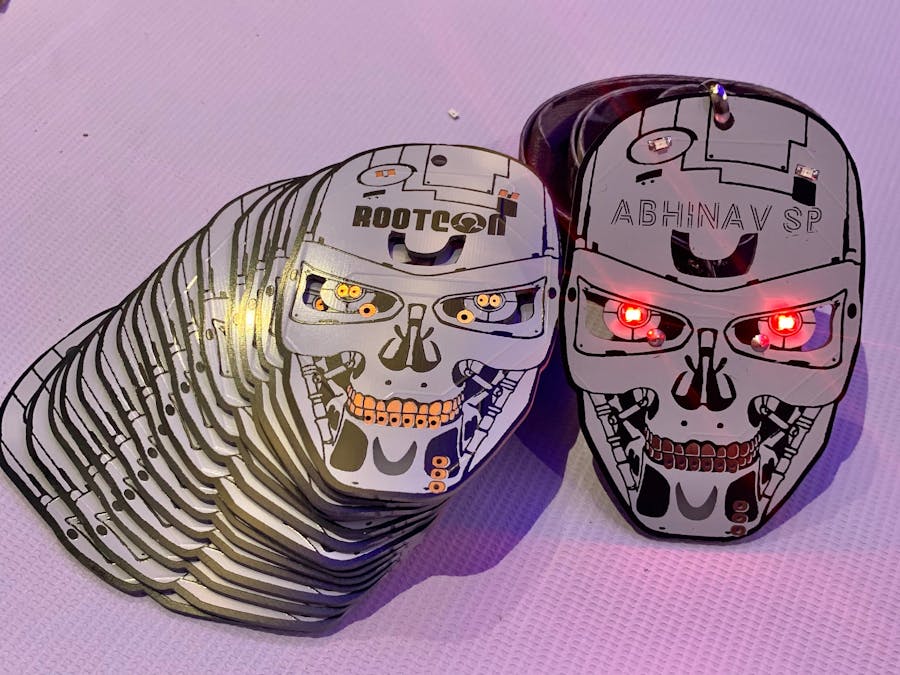
I had little to no idea what to expect. Thus, I focused on making a badge that everyone can find something to play with and learn something from. Badge design started from the conference's theme "Two Faces Of Tomorrow," a 1979 novel by James Hogan. And eventually landed up with the similar concept movie series Terminator.
This became the second experiment with Digispark chip after the Pirates badge. And it fits all 3 key goals:
1. Accessibility: Easy, instant connection to the system. Digispark came with an onboard USB port so nobody needed jumper wires or cables, thus, allowing everyone to dive into it right away.
2. Versatility: Badge came with two additional soldering points. If needed, Digispark can be de-soldered and re-used in a new circuit. Or turn it into Rubber Ducky with automated keystroke scripts.
3. Feasibility: Entire badge and logistics needed to fit the limited budget without compromising on design or other key goals.
The DesignI started by watching the first instalment in the series and Skynet, of course, turned out to be the character that suited the badge. After what seemed like an eternity of drawing reiterations and detailing, we reached here...
We utilised the onboard LED on Digispark to glow through the PCB for Skynet's Chin.
And with that, the Skynet was ready to terminate everything.
Some of the Digispark units were not detected by the system due to its PCB thickness not being adequate enough. So it may not get detected if plugged directly to the system. One way to solve this is to use a USB hub or USB extension cable.
Rubber DuckyInstructions for setting up the Digispark connection can be found here. Programming the badge is easy if one is good with Arduino IDE.
One thing to remember is not to connect Digispark before clicking upload. We have to click "upload" and wait for the IDE to give notification about plugging in. After which, we can plug it in and it should be programmed instantly.
To use Rubber Ducky applications, we'll need to include "DigiKeyboard.h" and the rest of the code is pretty easy to guess if one has worked with Arduino before.
In the attachment here are keystrokes and their respective program implementation.
Terminator badge was created keeping in mind the audience had very little interaction with hardware before and trying to make learning part of it for everyone regardless of their particular interest. And since we didn't release a particular code officially, every attendee found their own way to program the badge, whether it was interfacing the extra LEDs or programming Rubber Ducky scripts and made it a personalised unique version.


Comments