This video explains the aims of the project before showing the working prototype.
IntroductionSmall to medium shops are starting to reopen, with economies in need of the return of cash flow. However, customer safety will always be what shops want first, not only to prevent the spread of the virus and preventing fatalities, but also because the return of a second wave could be extremely damaging to their businesses if a second lock-down were required. Finally, increased protection of customers means the customers will have greater confidence in going shopping for non-essential items.
How the Device OperatesI hope the video explains the device, its capabilities and ease of use, but if not I will explain it here:
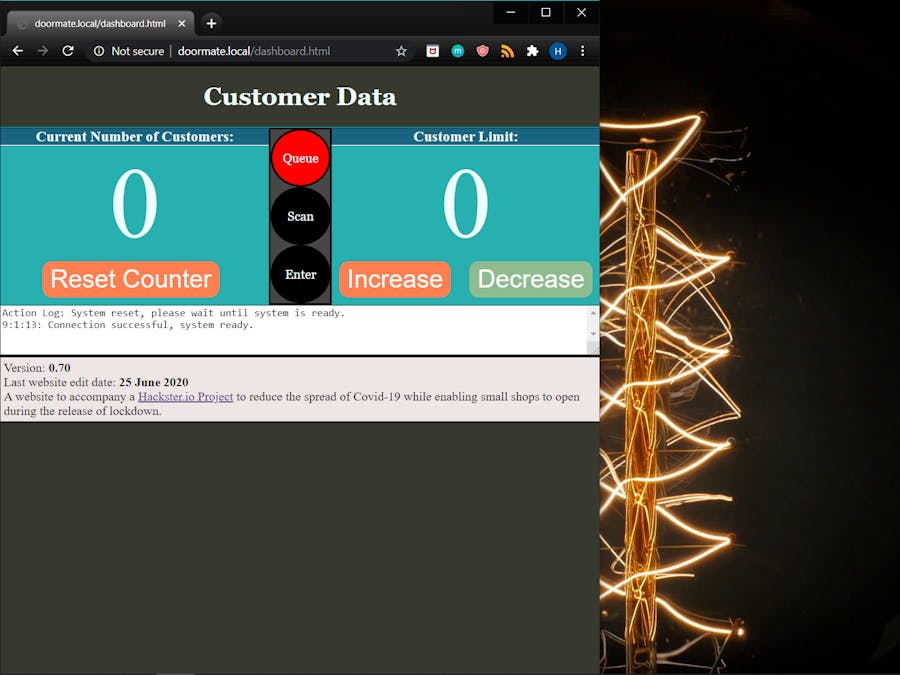
The shop assistant will connect to the device using WiFi, and can load the page below. They can then set a limit to the number of customers that may be able to enter the shop. They may change this number live any time.
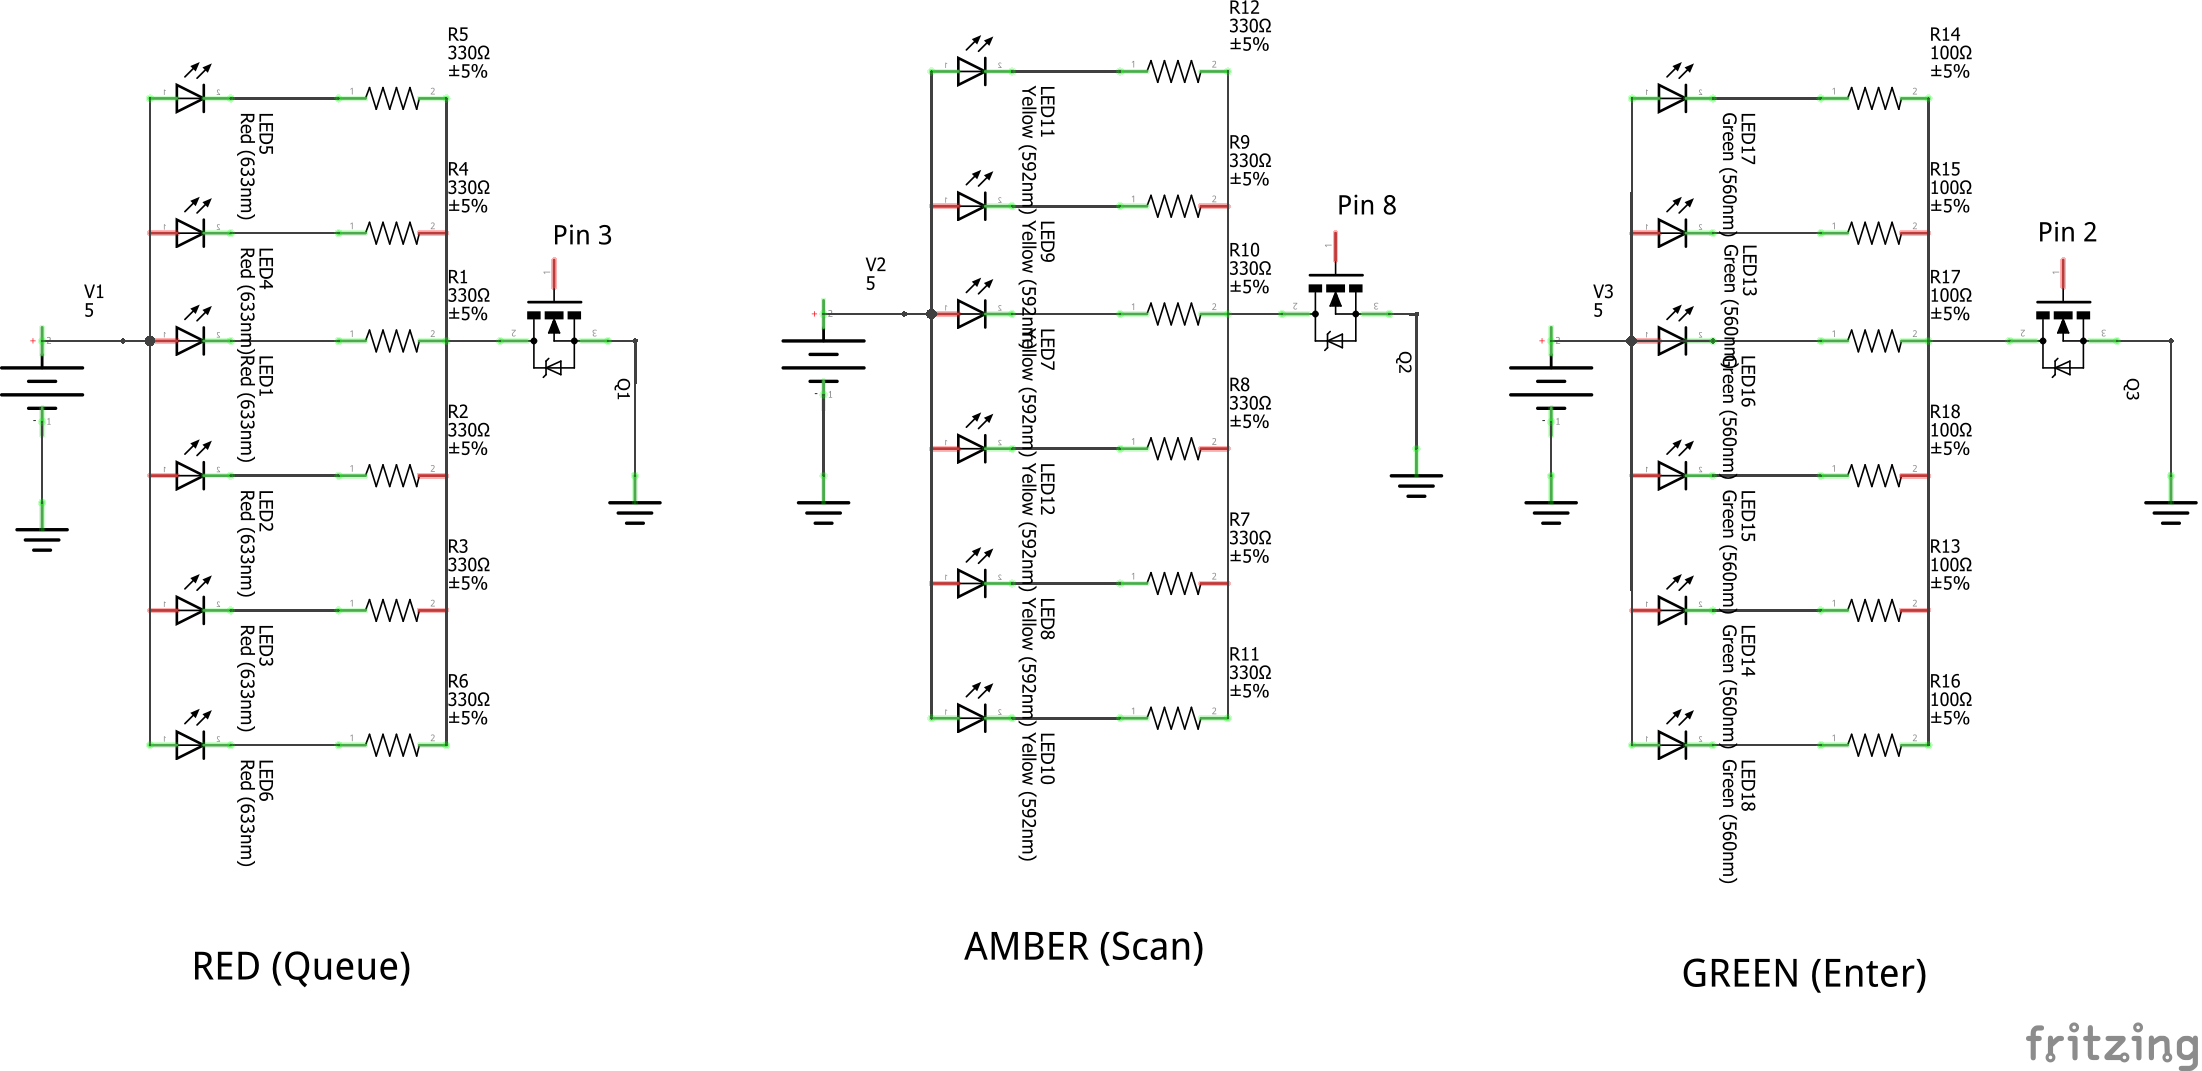
When a customer approaches a shop, they will see a device with lights which resemble a traffic light. If the number of customers within the shop match the customer limit, the red light will show and they will queue until someone leaves. If there is space within the shop, the amber light will be displaying as they approach telling them they must scan to enter. Once scanned, the green light will show, meaning they will enter. The shop-assistant can use the web page to observe the number of people in the shop. Also the lights in the middle will match the hardware.
Image of Web Page Used by Shop AssistantThe number on the left is the count of the number of customers in the shop. The customer limit on the right can be updated by the shop assistant in real time. The lights in the middle match the hardware. You can use the action log below to scroll through all changes since connecting to the device.
ScalabilityIf WiFi connection is unavailable, the ESP can operate as an access point and server so this is not a problem. Even though this device was designed for use in small to medium sized shops, its applications can be easily expanded. For example:
- Toilets in social areas such as pubs, restaurants and cafes may be choke points for people so a traffic light system can be introduced to indicate whether a space is free or not.
- Limiting people walking down tight streets.
- Where queuing, a customer could scan themselves present at a location - say a restaurant or cinema. When they scan themselves, they are given a number to the exact seat or table they must sit at. The software then knows where people are sitting and adapts the next numbers given to customers so they are distant from the first customers.
- Large sports or music events, to prevent people all arriving at once or stepping over each other to get to seats, these could be placed at all entrances and controlled by stewards.
- In schools, you could make the adaption so instead of anonymous scans, it used RFID tags. This means you can keep classes separate and control the flow of students in the hallways. When one class is passing through hallway A, make sure any other classes wanting to use hallway A must wait.
- 5V power supply: £5.00
- Power N-Type MOSFETS: £1.50 for the three.
- LEDs: £0.50 - £0.90 for the 18 LEDs.
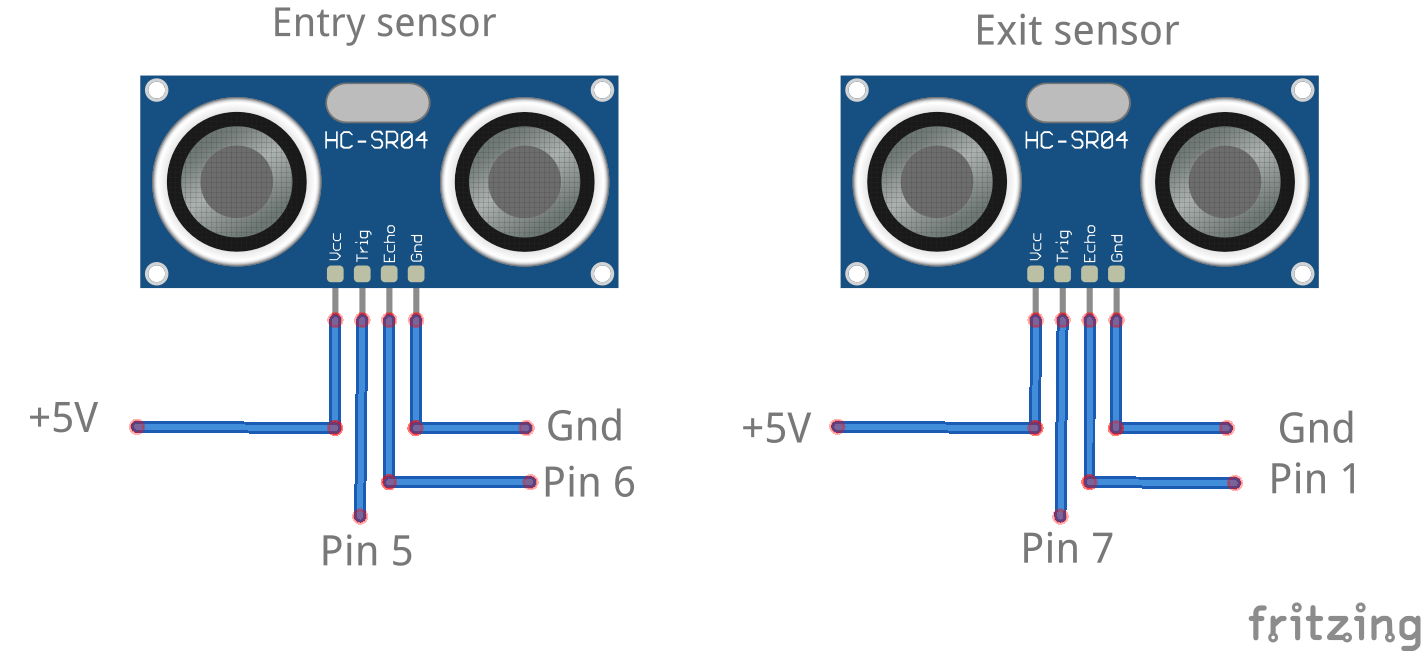
- Ultasonic sensor: £3.00 each
- NodeMCU board: £5.00
- For power I used a breadboard power supply (£3.00), but this would need to be replaces with a 5V to 3V converter for manufacturing. (The US sensor needs 5V, the NodeMCU needs 3V)
The cost of making a container and the solder required is unknown. The prices will change with larger scale manufacturing.
Notes on using the ESP8266 as a ServerThis was my first project you WiFi so please excuse any errors in my explanations but I will try to share a bit of what I have learnt. I would like to point to this ESP8266 guide written by Pieter P. It is a super explanation of using the ESP8266.
When you enter the website name into a browser, the first part (doormate.local in my case) is actually a proxy for the IP address of the ESP. The router which sets up the WiFi will send a request to all the devices on this network for the one using this proxy to reveal itself. This proxy is called mDNS - it is a small scale, local version of you typing google into the browser instead of google's ip address which makes things much easier to use. The server then receives a http GET request for a file. http://doormate.local/dashboard.html would request the.html file. The (TCP) connection between computer and server is only made when sending and receiving files - after which the connection is cut off. This means we need to use another protocol to continuously send data between server and computer (host and client) which I will get to shortly.
If you imagine a haunted painting - a creepy portrait with moving eyes. The css and html produce all the objects of the painting - the background, the portrait, but it is nothing more than a painting. Javascript then controls the eyes - it brings the page alive. To send data between server and computer continuously you need to use WebSocket. This is similar to sending http requests, but the connection is never closed between data packets so it is quite speedy at sending and receiving data relative to what we notice. Javascipt is required on the website side to implement this while the hardware uses the WebSocket.h code.
Notes on using FS.h (SPIFFS.h)This handy code allows you to implement a file system, a bit like what you'd use on your computer. It took me a while to find out how to use it properly so I thought I'd make some notes on how to use it. It is incredibly useful when designing webpages as you can use an IDE like Brackets to design the webpage and when you save it, it will automatically update the file which will be sent to the ESP.
To use FS.h:
1) Use this instuctables website to install SPIFFS such that you have the ESP Sketch Data Upload tool in the Arduino IDE.
2) Create a folder called 'data' in the directory which has your arduino sketch in. This will be the root (indicated by the / after the website name) when the http requests are sent.
3) Within this folder place your html/javascript/css files. My html file is called dashboard so the request sent to the server will be for website.local/dashboard, where before the forward slash is the website name and after is the directory in the file system.
4) Upload the arduino sketch as you would usually using the right-facing arrow at the top of the arduino IDE.
5) Once the sketch is uploaded, use the ESP Sketch Data Upload tool that was installed in step 1. Every time you upload the Arduino sketch, you need to upload the data again.
Final NotesSorry, my limited funds as a student means I hope to reuse the parts in future projects so I can't solder everything together.


Comments
Please log in or sign up to comment.