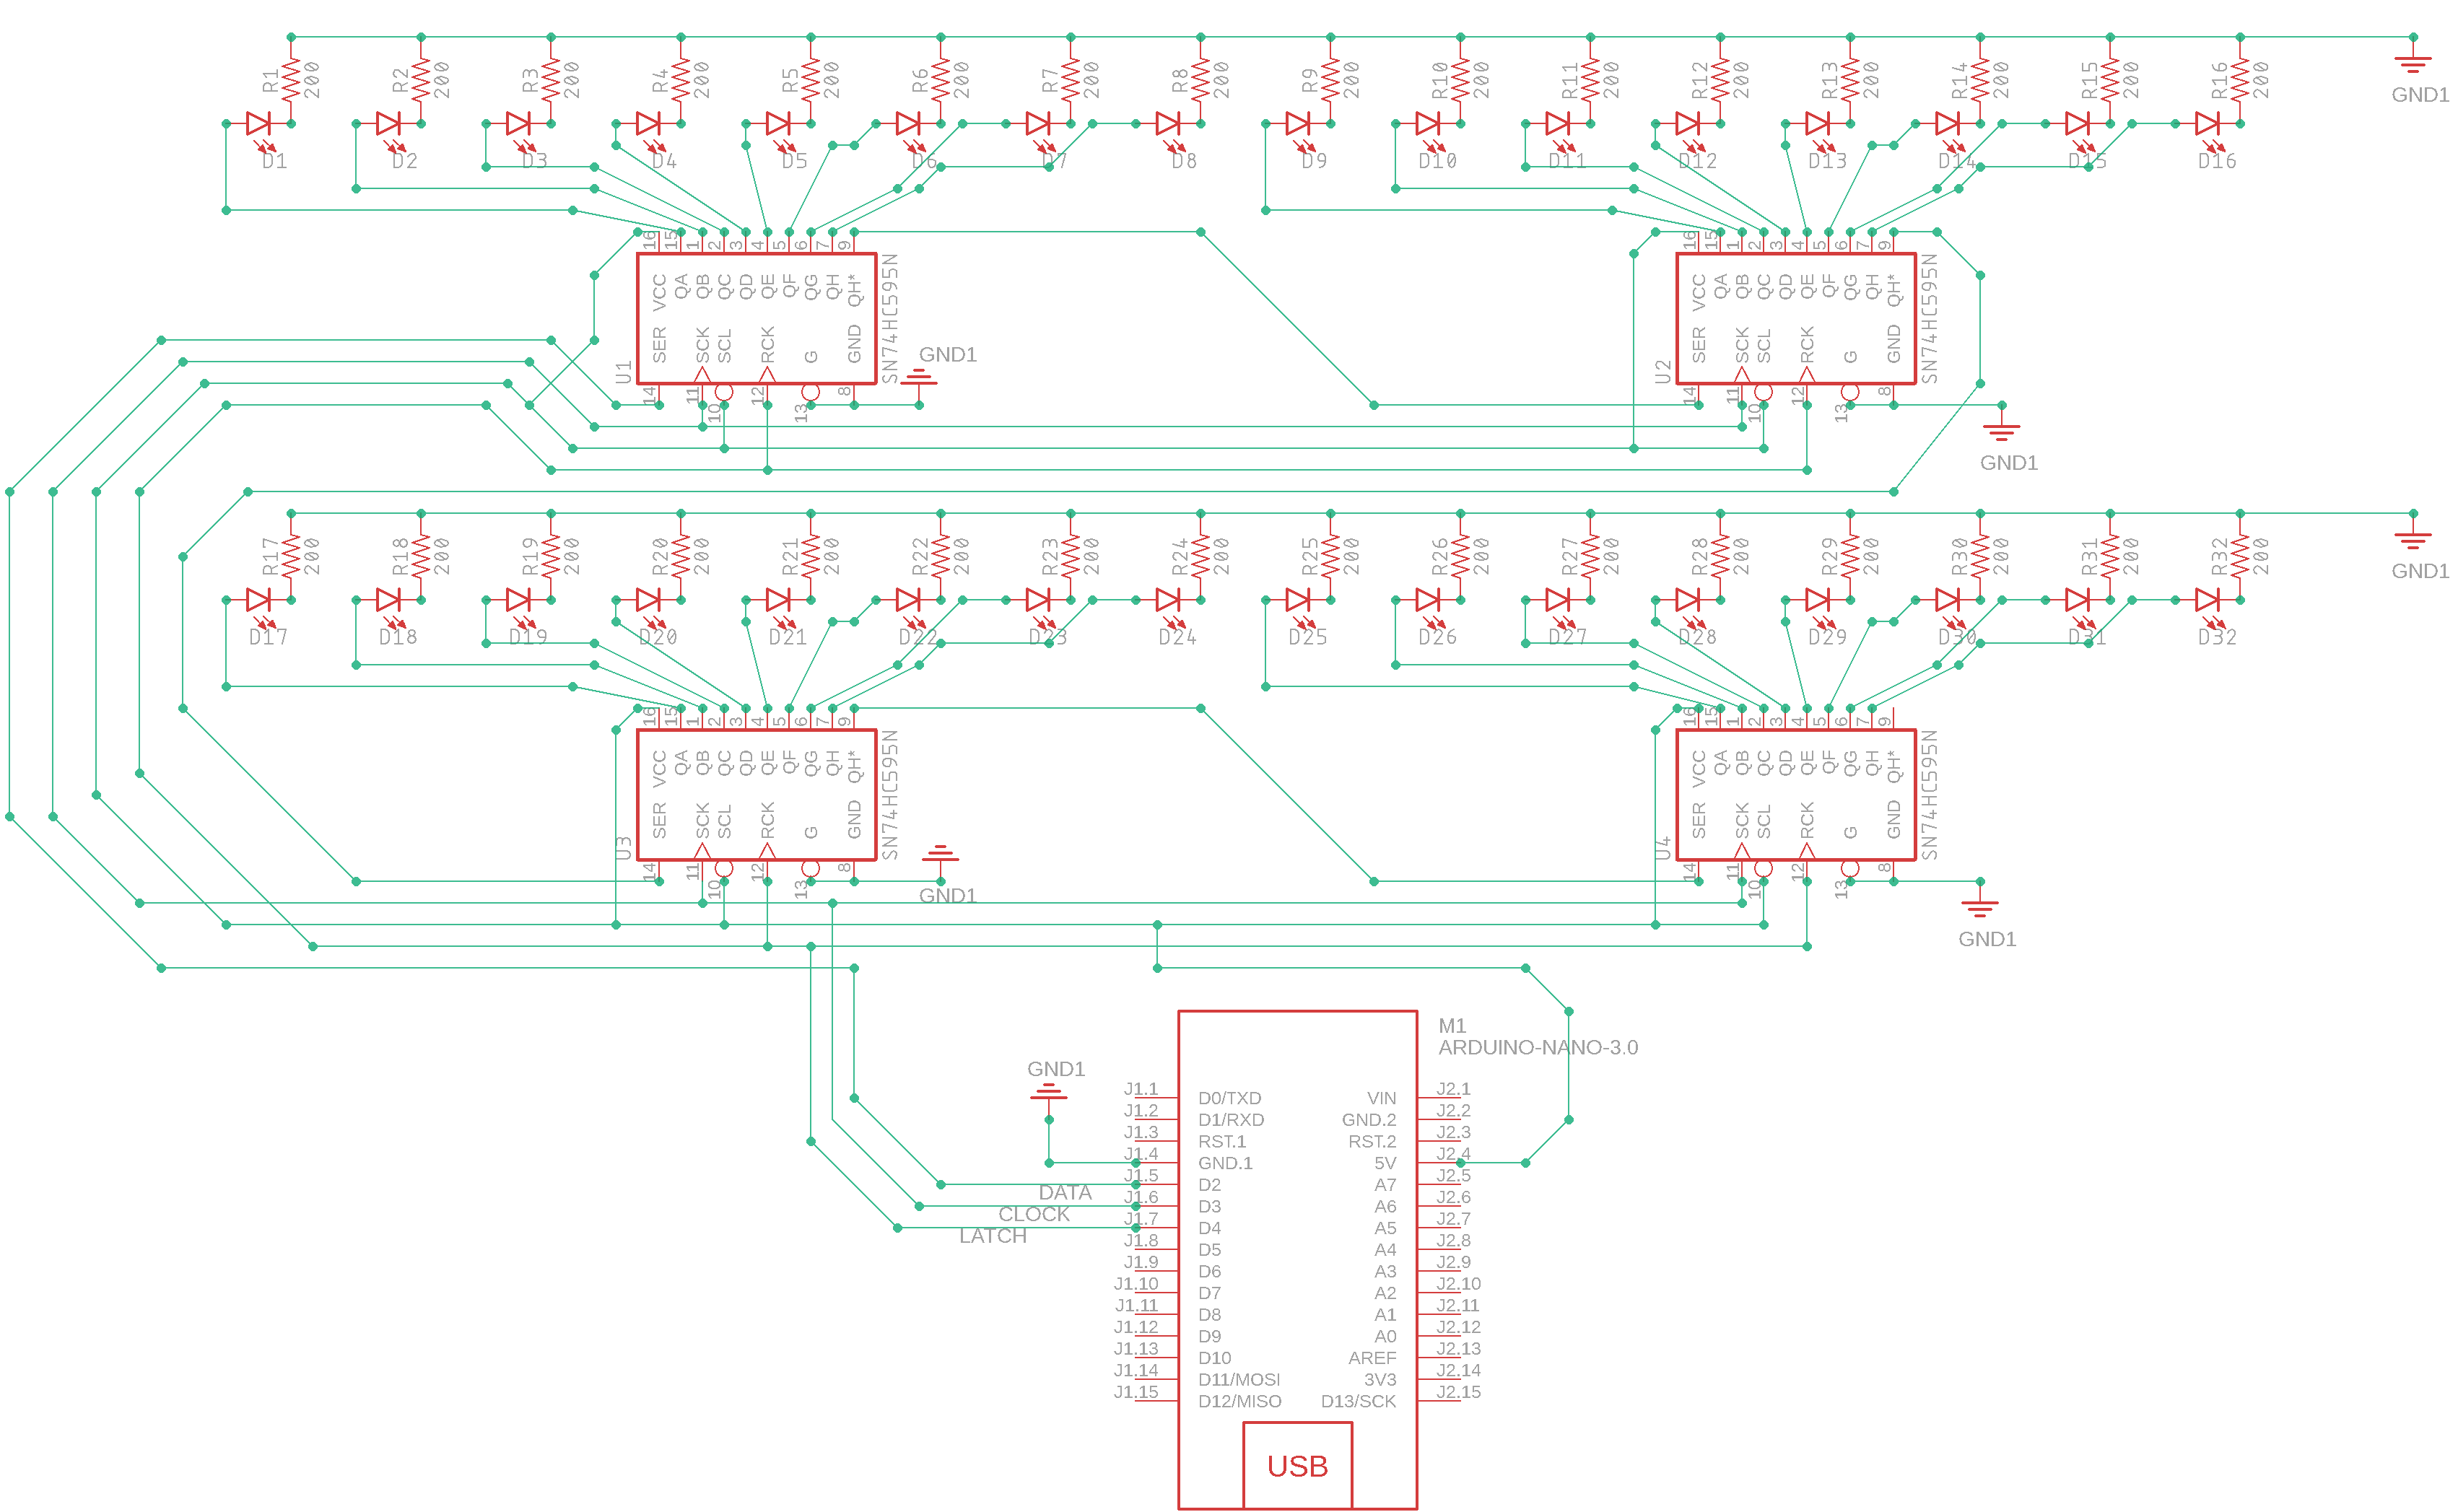
This is a step-by-step guide that I have created for beginners and arduiNOOBS like me.
In this tutorial, we would be discussing some pretty basic knowledge about the 8-bit shift register called 74HC595.
Learn how to daisy-chain them together and use some codes from an HC595 Library.
Also, I encountered a problem with some of the shift registers. I don't know why. Was it because of lack of power?
******************************************************************************
NECESSARY LINKS:
HC595 Library - https://github.com/j-bellavance/HC595
Datasheet - http://www.ti.com/document-viewer/SN74HC595/datasheet/specifications#SCLS0419845
More Information: https://rastating.github.io/using-a-74hc595-shift-register-with-an-arduino-uno/
For Loop Iteration: https://www.arduino.cc/en/Tutorial/ForLoopIteration
******************************************************************************
Social Media Links To Follow (I mean, if you want to):
Facebook - https://fb.me/HeathenHacks
Twitter - https://twitter.com/HeathenHacks
Instagram - https://instagr.am/HeathenHacks
******************************************************************************
![3 Pins, 32 LEDs, 4 Shift Registers [74HC595]](https://prod.hackster-cdn.online/assets/transparent-a0c1e3063bcabc548a5f3fa7328f3c1c97f747e6e764da4c14439567baa79ae1.gif)


![3 Pins, 32 LEDs, 4 Shift Registers [74HC595]](https://hackster.imgix.net/uploads/attachments/865575/blob_9ZByLQXWfH.blob?auto=compress%2Cformat&w=900&h=675&fit=min)


Comments
Please log in or sign up to comment.