


Hardware components | ||||||
| × | 1 | ||||
Software apps and online services | ||||||
| ||||||
| ||||||
Hand tools and fabrication machines | ||||||
| ||||||
| ||||||
| ||||||
| ||||||
(MORE IMAGES COMING SOON!!!)
Early on - actually the first day of school - I was setting things up in my room. I was building a lamp that had multiple shelves. To build this lamp, I had to build it upside down as per the directions. As I was attaching the base (which was very heavy) it slipped and fell and broke one of the shelves below it.
Unfortunately, it was a piece of plastic, so when I took it to class and left it there, the cleaning staff mistook it as garbage and threw it away. Luckily, I had all of the measurements for it, so all was not lost.
However, I do not have a picture of the broken shelf itself.
After sketching the shelf, I decided that I was going to 3D print it. So, I hopped on AutoDeskFusion 360 and created the shelf. It was relatively straightforward, despite my, at the time, limited knowledge of the program.
(Image of Autodesk sketch)
I was all set to 3D print until I realized that the piece was too big for the 3D printer (albeit not by much). So I turned to my next, not quite as cool, option: the ShopBot.
(Image of ShopBot)
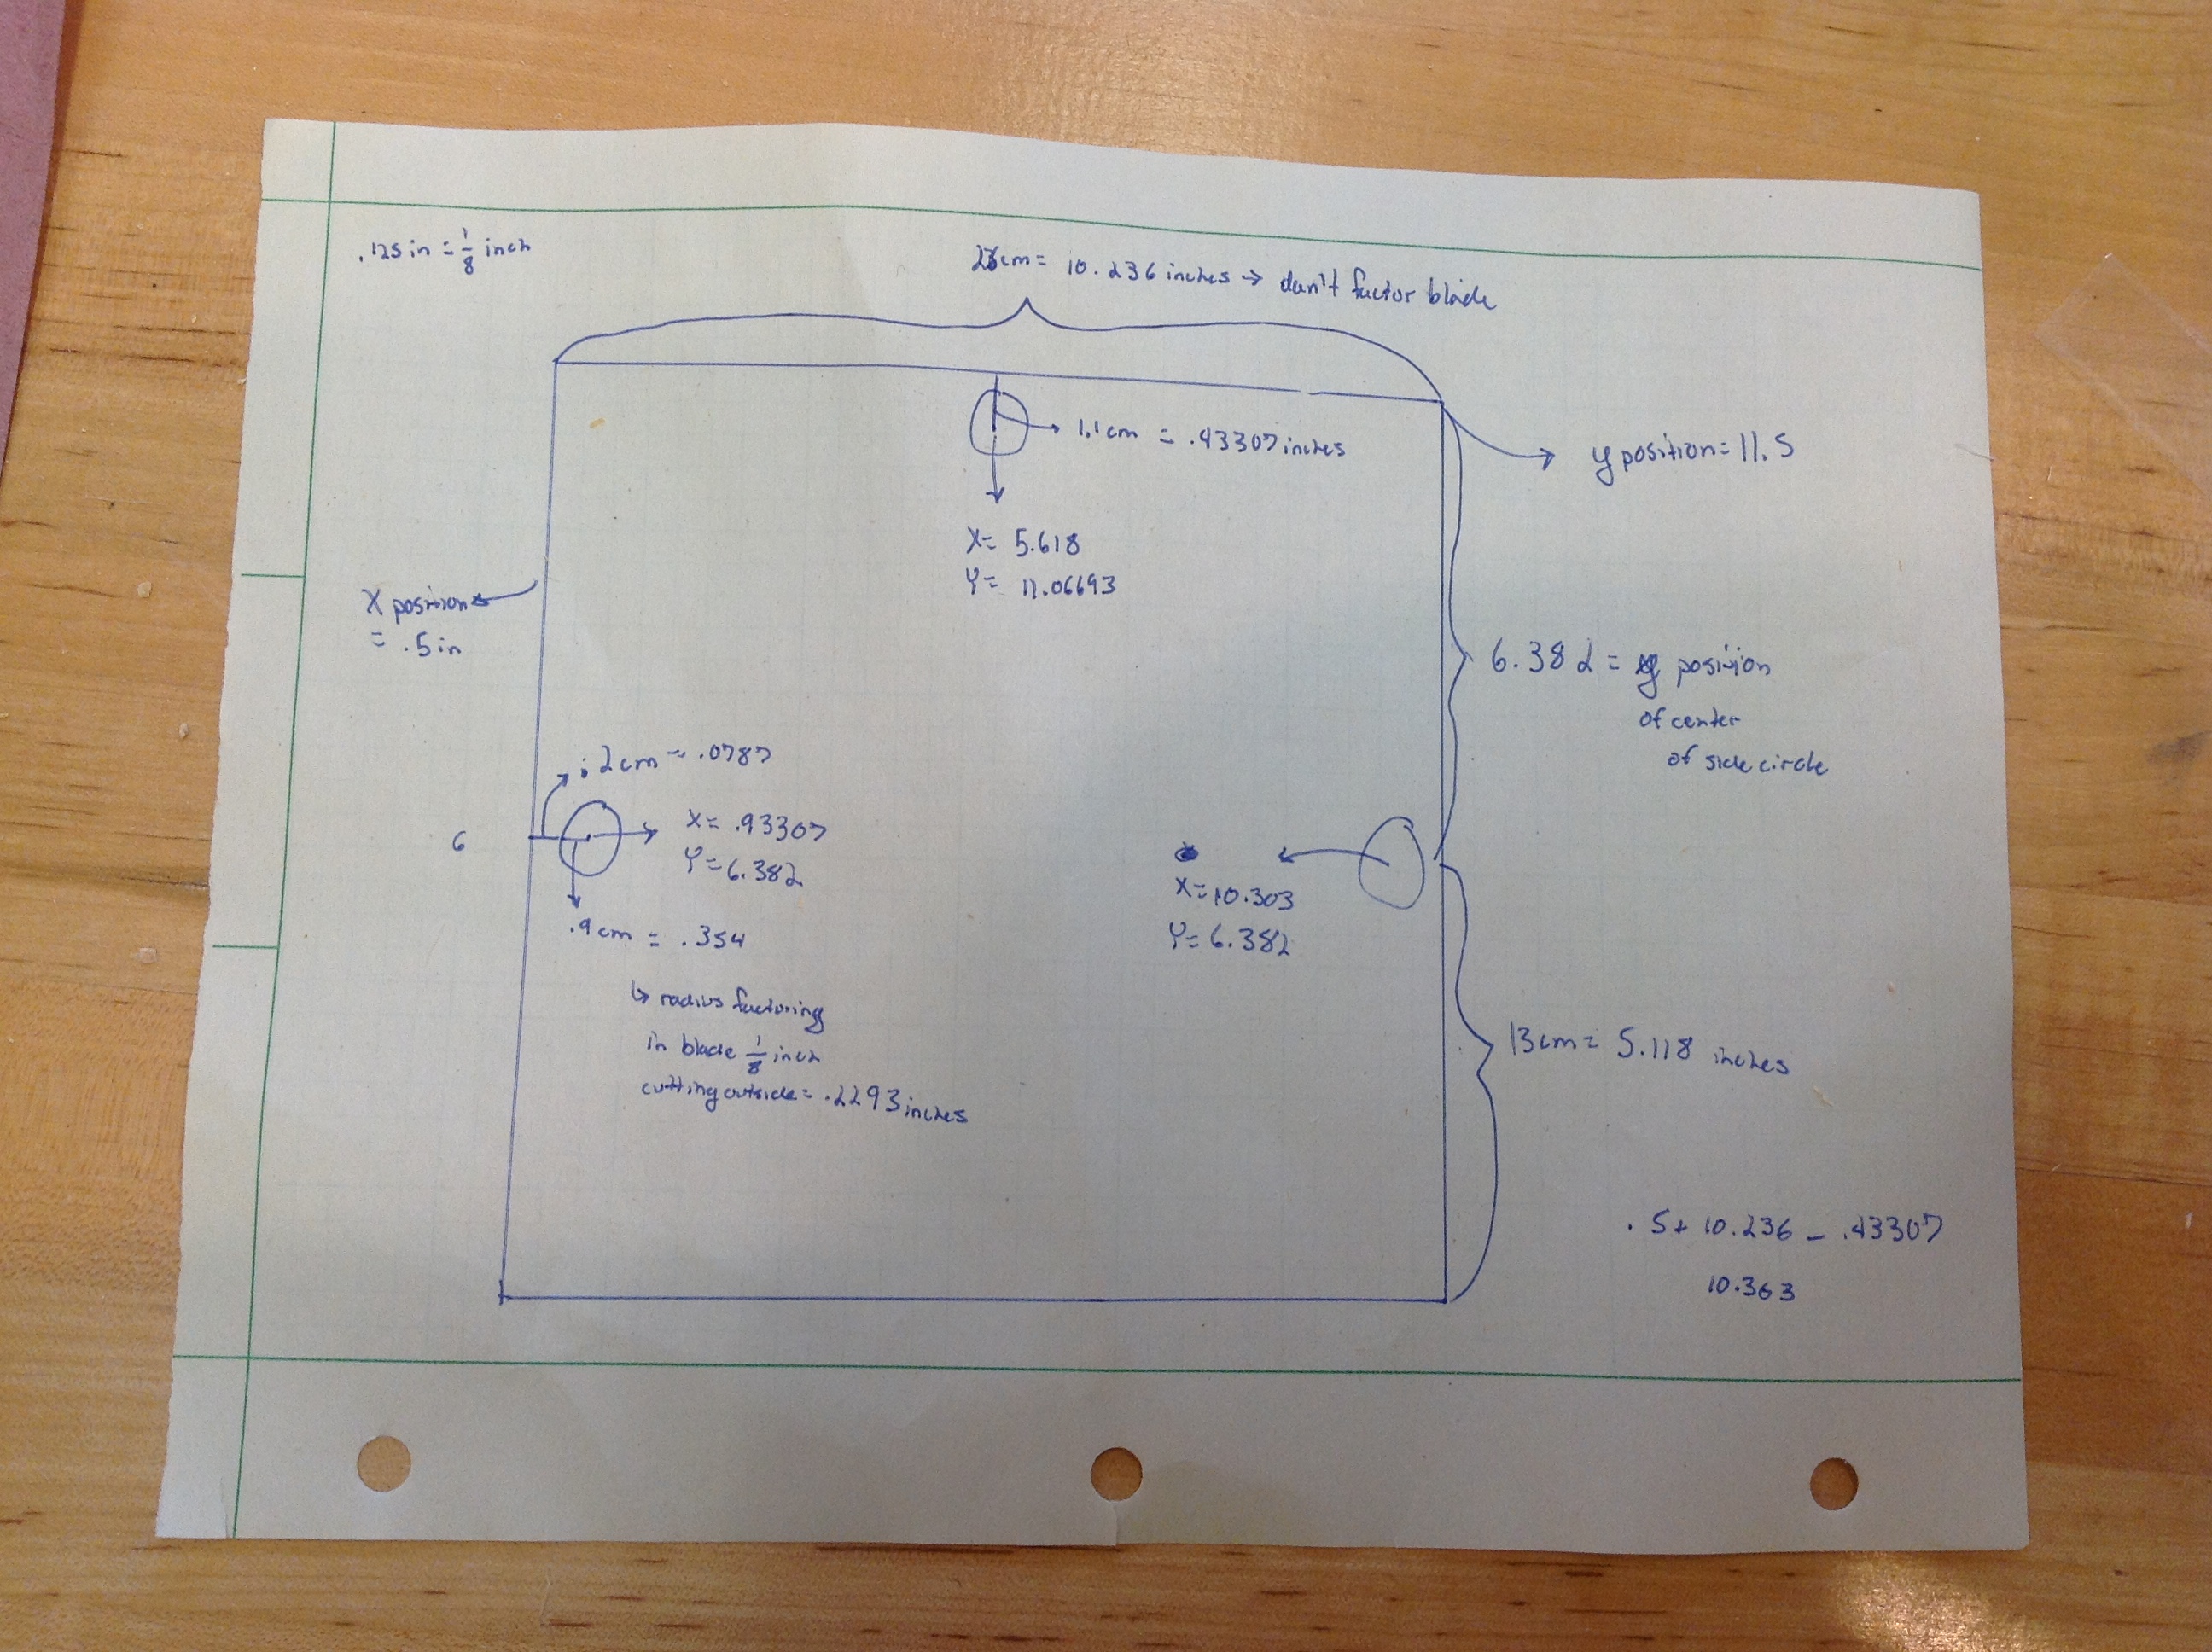
Creating the shelf in the ShopBot software was relatively straightforward. I had all the measurements, and all I had to do was convert them to inches, and put them in the X-Y plane in ShopBot. I used the vector cut toolpath. It was an easy task and took very little time. I added tabs using the software so that the piece didn't fly out as it was being cut and seriously injure someone.
The ShopBot is very easy to use. To switch the cutting tool, you use two wrenches to unlatch the collar that goes around the blade. To calibrate you attach an alligator clip to an area on the collar and put a metal plate on the piece of wood you wish to cut, then hit calibrate on the computer software.
Becuase of the tabs, which are a good idea to add and can be done so very easily in the ShopBot software (there is a box that says "add tabs"), the shelf was still attached to the wood when it was finished cutting. I used an electric osculating saw to cut the tabs and remove the shelf. The outside of the shelf had lots of scratches, and its edges were rough, so I used the Festool to sand all of the rough parts.
Using the Festool is very easy. You plug the machine in, attach the green and black tube to the tool being used and then when the tool is turned on, the Festool sucks up the dust.
Next, to open up the holes I used a Dremel Tool with a sanding attachment, and smoothed the holes.
(Dremel Tool)
The shelf turned out well. I haven't tried to install it just yet, but images of the finished project, or the next part of this ongoing saga of problems, will be coming soon.
Comments
Please log in or sign up to comment.