


Hardware components | ||||||
_ztBMuBhMHo.jpg?auto=compress%2Cformat&w=48&h=48&fit=fill&bg=ffffff) |
| × | 1 | |||
 |
| × | 1 | |||
 |
| × | 2 | |||
| × | 2 | ||||
 |
| × | 1 | |||
| × | 2 | ||||
| × | 1 | ||||
| × | 2 | ||||
| × | 1 | ||||
| × | 1 | ||||
Software apps and online services | ||||||
 |
| |||||
| ||||||
I needed to get reliable acceleration and orientation data from one point to another for a school project. The data is collected outdoors which makes portability a necessity. I really didn't have someone to assist with timing and logging, so I had to cobble things together.
The contraption consists of the following:
- Start Node
- Stop Node
- Smartphone sensors
The way it works is the Start Node activates the smartphone to start the data collection. The data from the phone's sensors are then logged within the phone's memory. The Stop Node then sends a signal back to the Start Node to end the data collection. Finally, the logged data is saved as a CSV file.
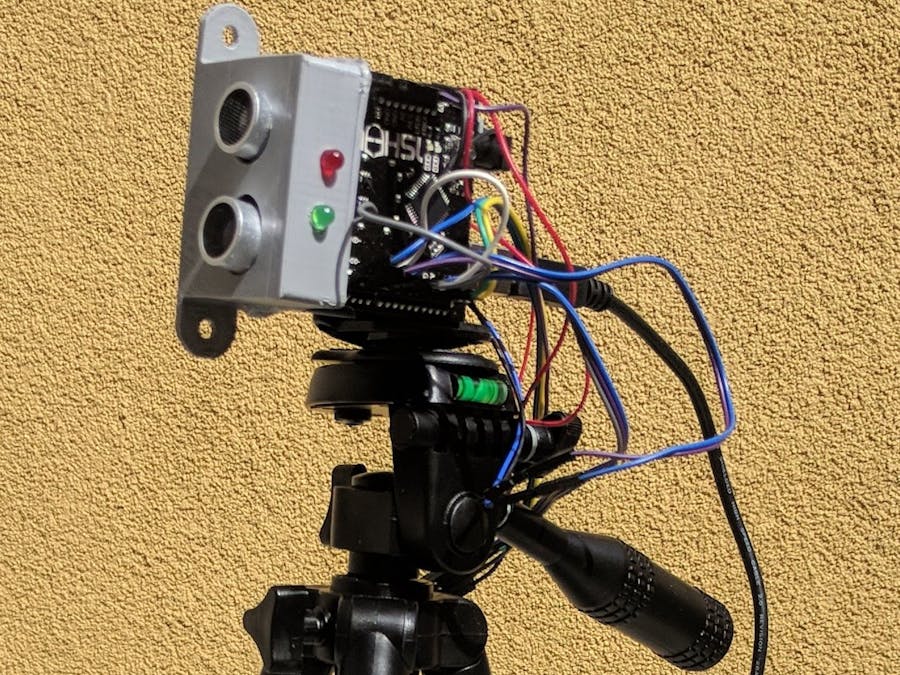
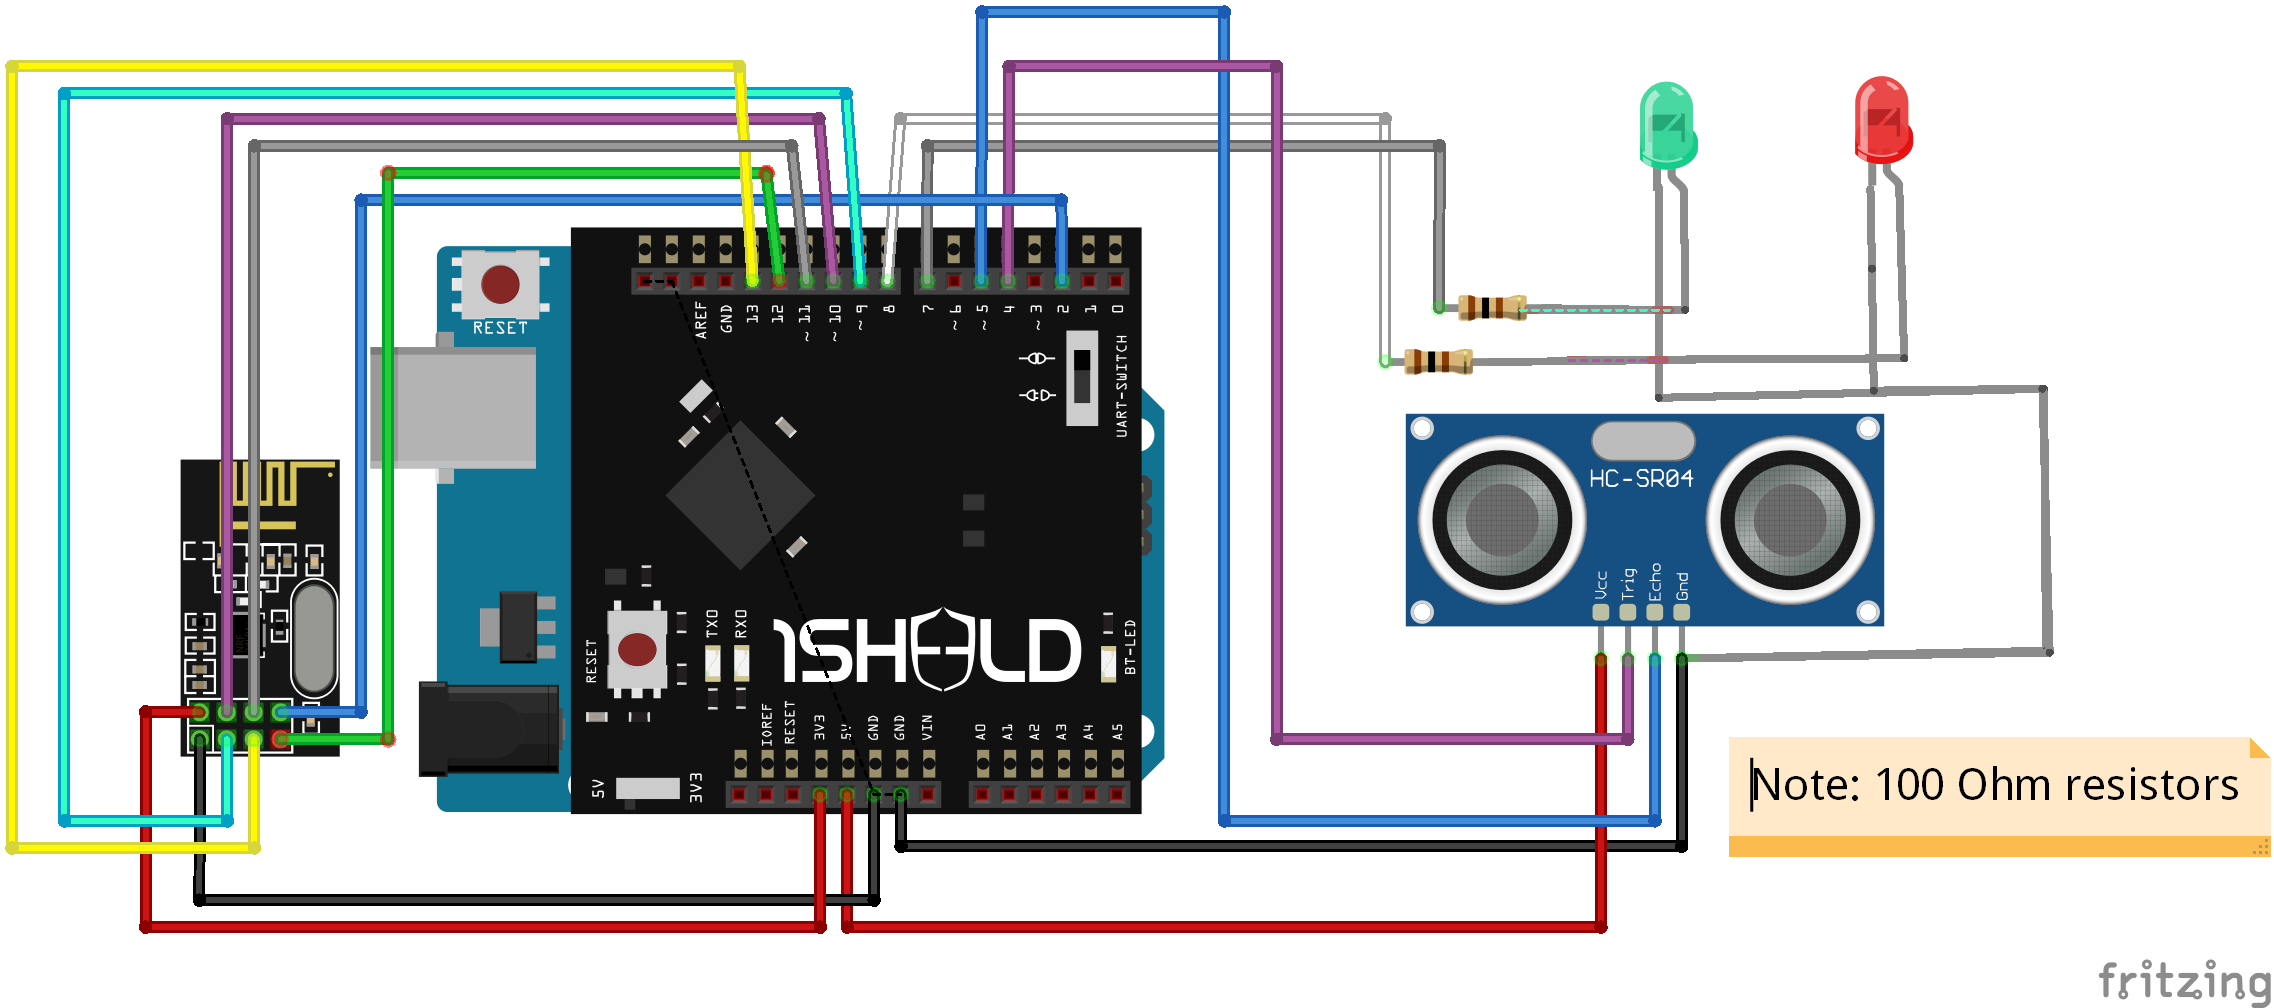
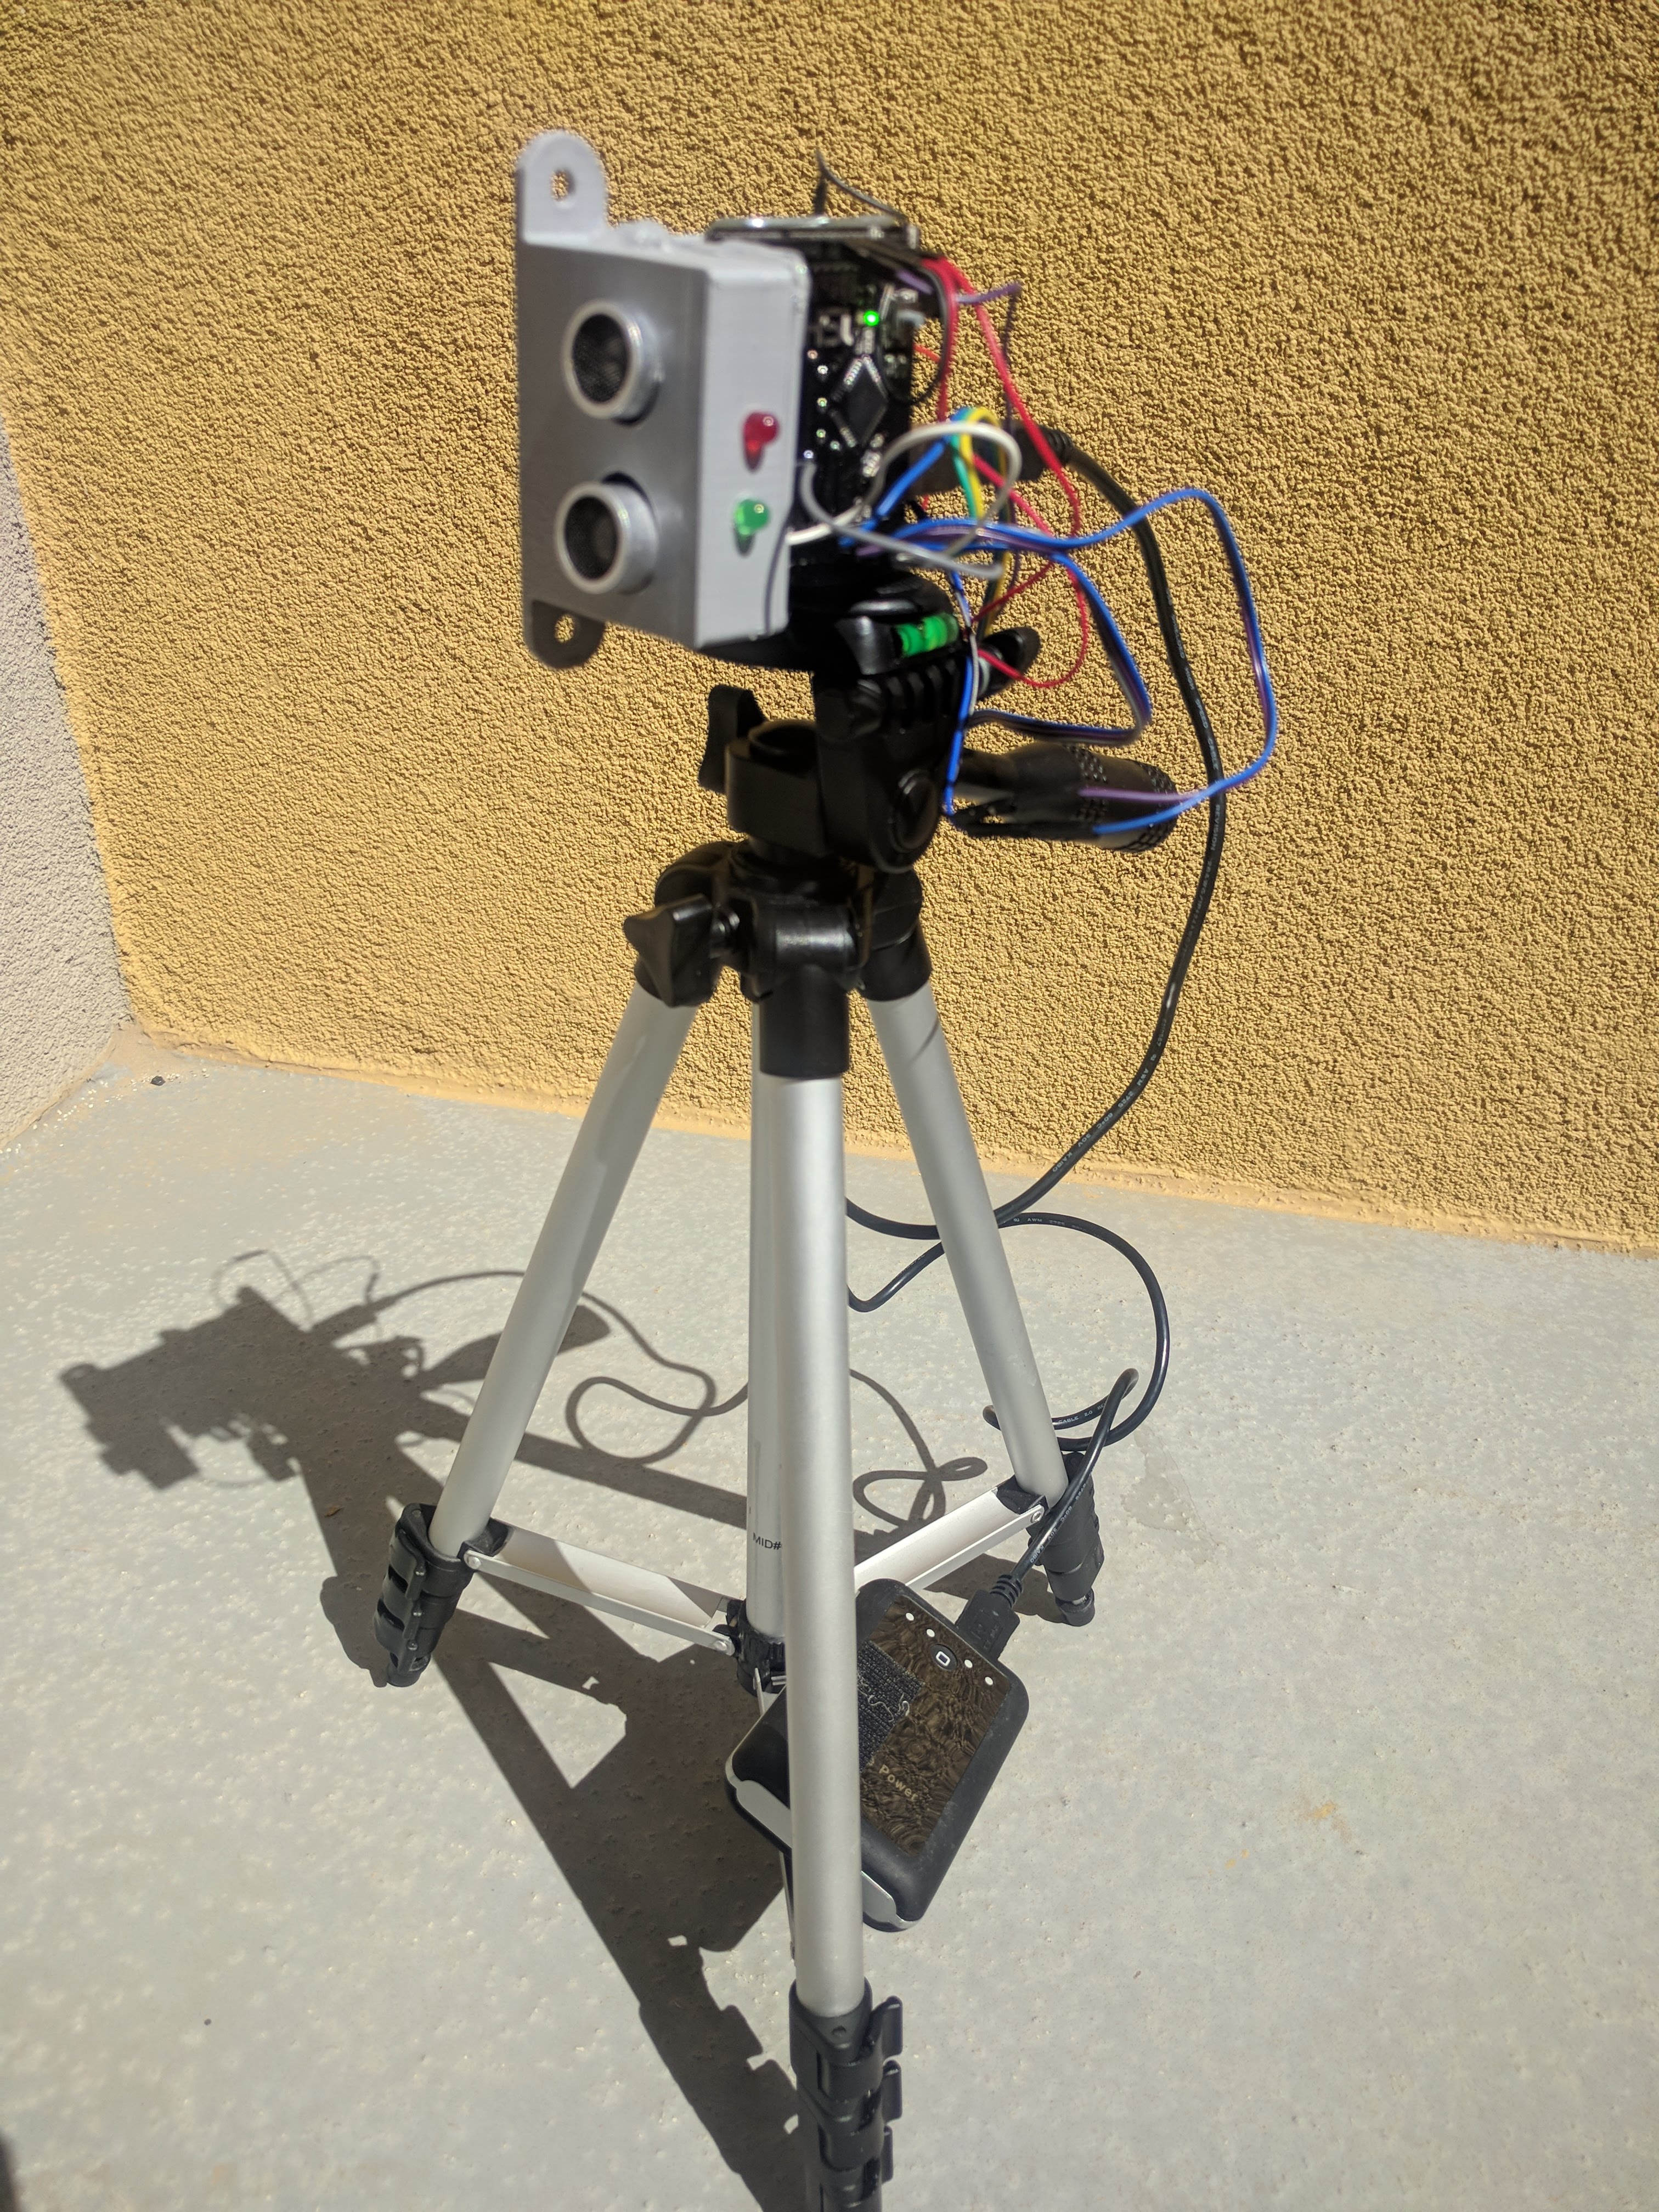
The Start Node is composed of the following:
- Arduino Uno
- Ultrasonic Sensor (HC-SR04)
- RF Transceiver (NRF24L01)
- 1Sheeld
- Resistors and LEDs
- Semi-enclosure
- Camera Tripod
- Battery Bank
So hook up the components together using the schematic above. Set the 1Sheeld physical switch to Programming Mode. Then open up your Arduino IDE and upload the Start Node code. Return the physical switch to Operating Mode after it completes.
When turned on, the Start Node has the red LED on and waits for the object/subject to trigger the ultrasonic sensor. Once it is activated, the node will turn on the green LED to indicate that it is active. 1Sheeld communicates with the smartphone using bluetooth to start data logging. The node then waits for a stop signal from the End Node. If it does, the red LED turns back on and the green LED turns off. The Start Node then tells the smartphone to stop logging.
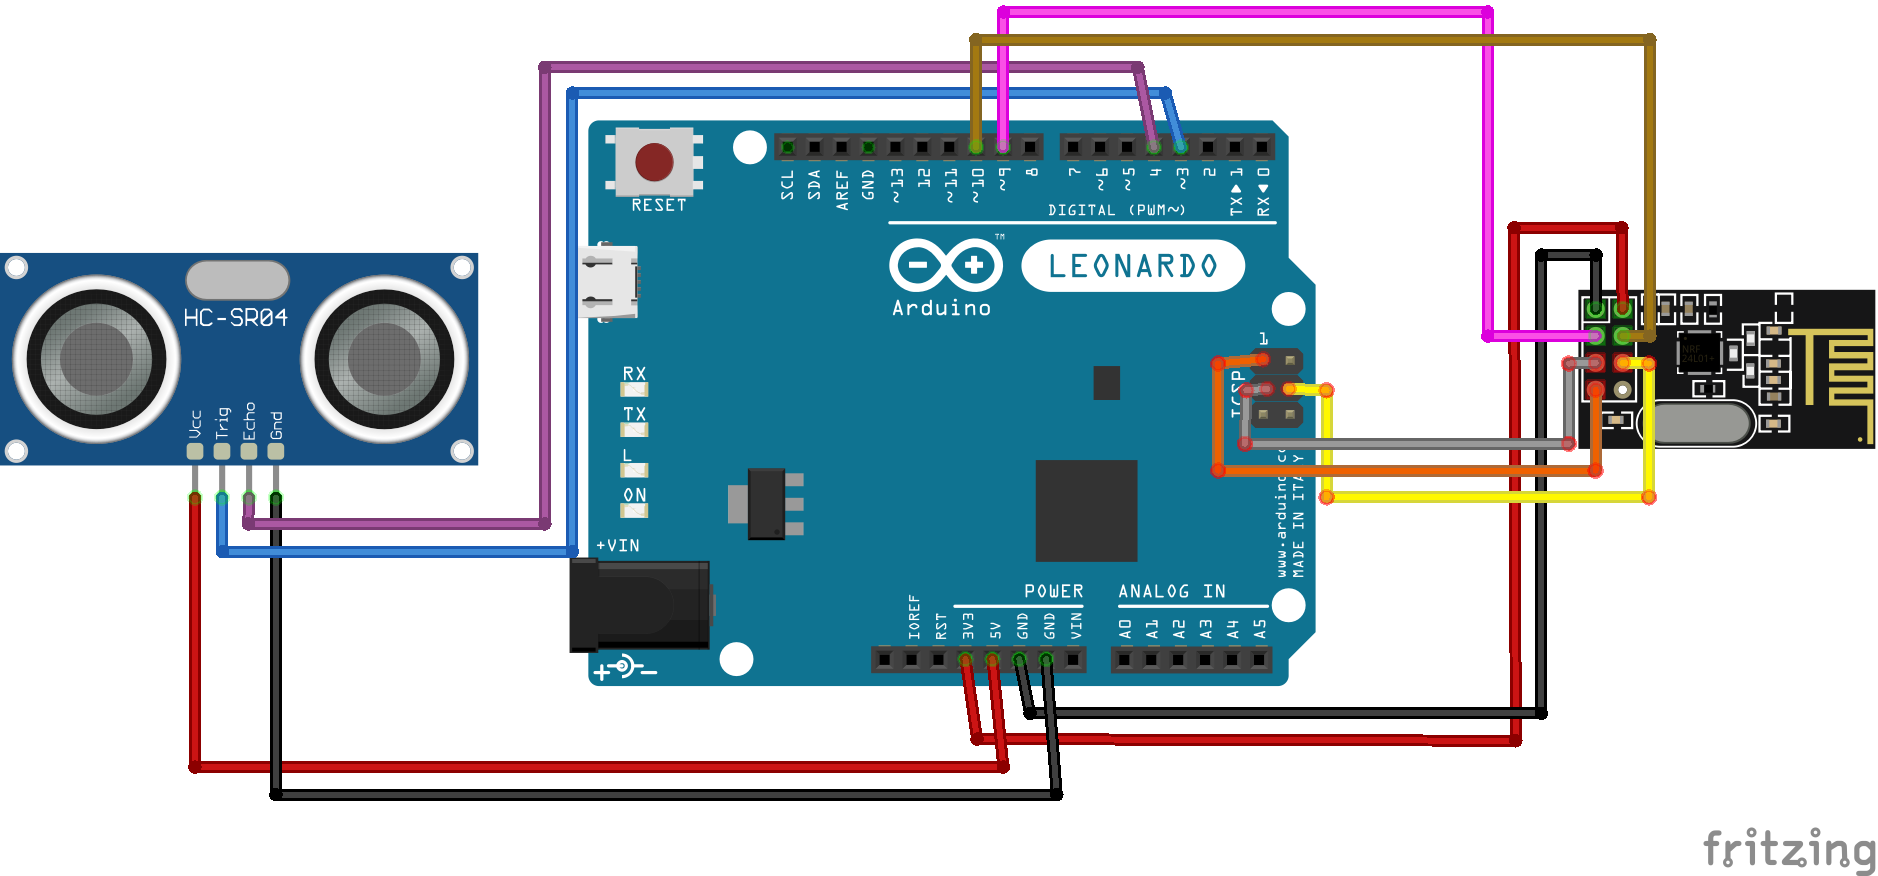
Setting Up the End NodeThe End Node has a similar build minus the 1Sheeld. All it does is send a signal back to the Start Node to indicate that the object/subject has passed through its ultrasonic sensor. I'm using an Arduino Leonardo because that's the only thing I have lying around. Using a different Arduino board requires a little wiring change due to the SPI pinout.
Setting Up the SmartphoneTo communicate and log data, the 1Sheeld app is needed. I have the old hardware version so I can only connect to an Android phone (the revision can connect to iPhones). Anyways, download that from the app store and establish a link to the 1Sheeld device. Remember to set the physical switch of the 1Sheeld device to OperatingMode!
Activate the sensors, in my case the Accelerometer and Orientation, and Data Logger as seen below.
Now the app should start logging the data once the Start Node is activated. The collection lasts until the stop signal is received from the End Node. A CSV file is saved in the phone's storage under "OneSheeld" folder. It's pretty cumbersome to find, but it's there. You'll probably need to access the Settings>Storage>Files to find it or just download a file explorer app. Here's a sample CSV output:
I'm logging orientation, x & y axis acceleration, and the timestamp for my data.
 /* Add orientation values as a column in the CSV file. */
 Logger.add("Degrees", OrientationSensor.getX());
 /* Add x-acceleration values as a column in the CSV file. */
 Logger.add("X-axis m/s^2", AccelerometerSensor.getX());
 /* Add y-acceleration values as a column in the CSV file. */
 Logger.add("Y-axis m/s^2", AccelerometerSensor.getY());
There are a lot more sensor options that can be added like magnetometer, GPS, gravity, temperature, pressure, light, sound level, etc. Here's an example from 1Sheeld's data logging tutorial:
/* Add noise level values as a column in the CSV file. */
Logger.add("Decibels",Mic.getValue());
The availability of the sensor options really depend on the actual sensors integrated on your smartphone.


Comments
Please log in or sign up to comment.