With growing demands on workplaces, we have seen flexdesk concepts popping up more and more. Desks are shared to increase flexibility and adapt to new work methods such as agile and cross-functional teams.
So how do you find the perfect desk for you?
Smart Desk PolicyWouldn't it be great to have the best work place, perfect for your needs? With a smart desk policy you can enter your favorite work environment settings and you're guided to the best suitable and available workplace.
Let's say you want a quiet, not too bright, spot to work in to be focused - or you want the energy and connection of a crowed area with other colleagues wanting to chat and connect as well. Both are options - and many more - that your smart office can keep track of as well being parameters (like temperature, humidity and CO2 levels) as well as free and occupied workplaces are monitored.
How to get your office smart?
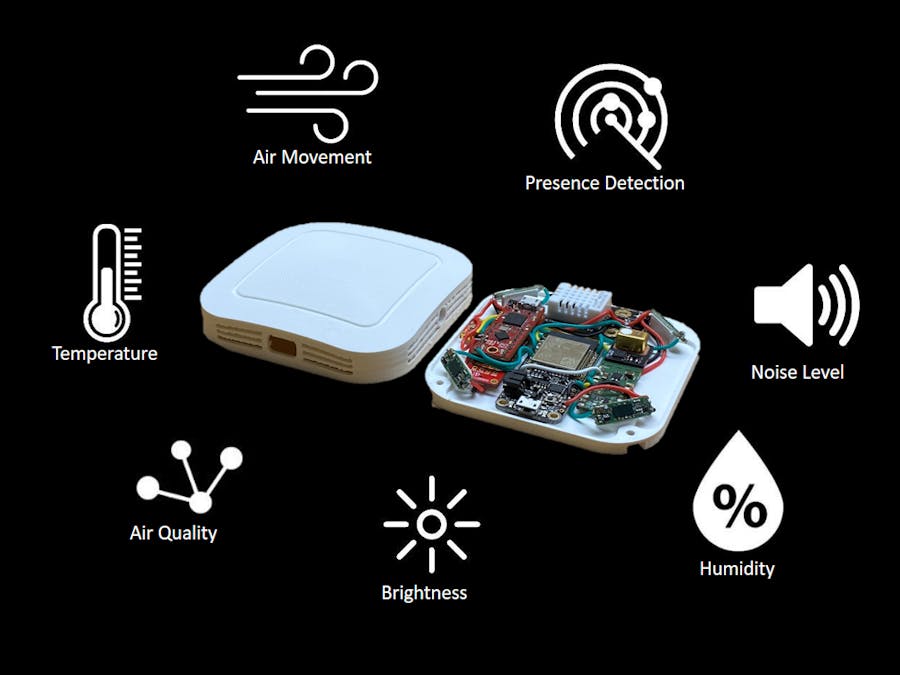
The IoT Sensor BoxTo keep track of the office parameters (temperature, air movement, desk availability, noise level, air quality (CO2, humidity) and brightness) our sensor box is equipped with:
- Temperature and Barometric Pressure sensor - DPS310/DPS368/DPS422
- CO2 sensor - PAS CO2
- noise sensor - IM69D130 MEMS microphone
- Humidity sensor - DHT22
- 60GHz Radar sensor - 4x BGT60LRT11AIP
- Photoresistor
Building instructions:
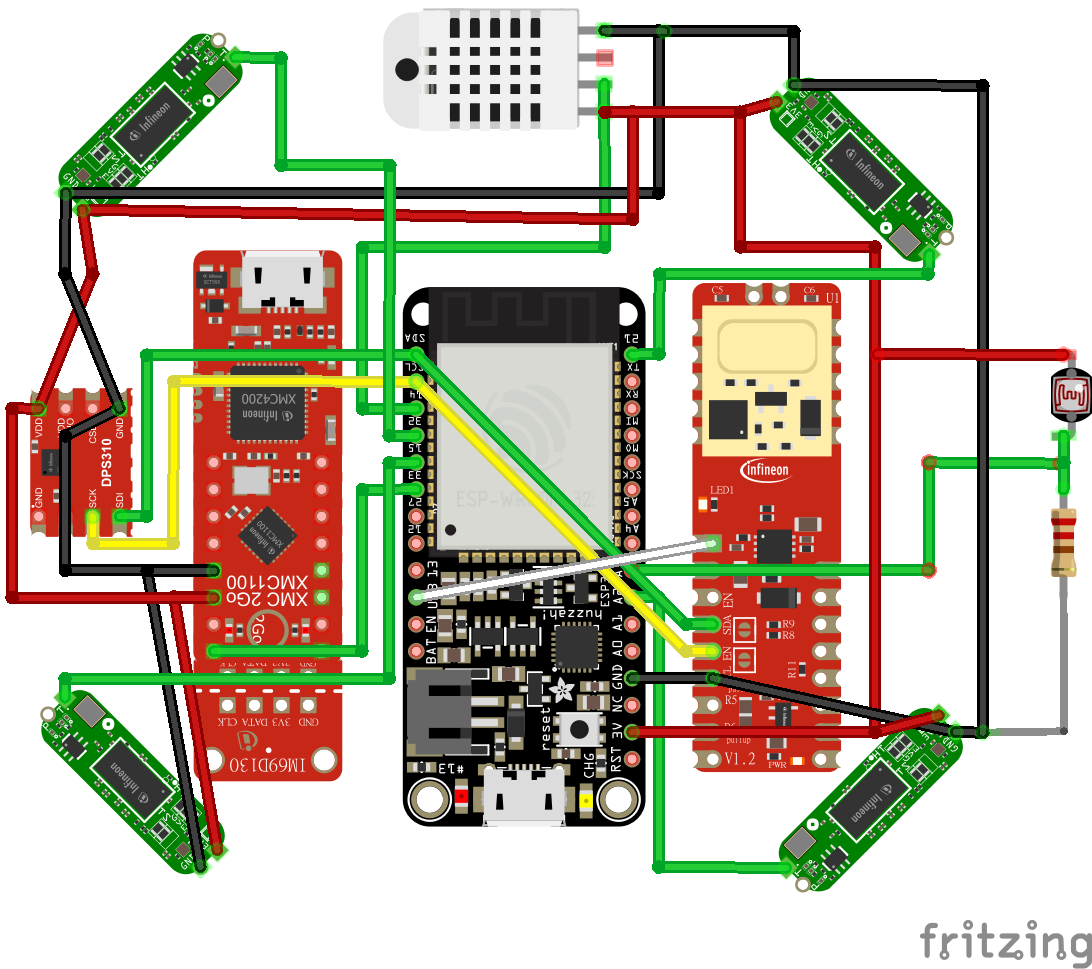
3D print the attached files and glue the electric components on the baseplate.Note that there is a XMC2Go Controller on top of the MEMS microphone Shield2Go. The XMC microcontroller is calculating a noise level and sending it to the IoT controller via a PWM duty cycle. This way even with over-the-air firmware updates you can't use the mic to spy ;)
Temperature and Barometric Pressure sensor and CO2 sensor are connected via I2C. The noise sensor (XMC P0.5) goes to IO33. The Humidity sensor is connected to IO14. Radar sensors to IO32, 15, 21 and 34.
Note: The radar sensor use all the same frequency by default. to prevent cross talk from one to another you can change the frequency by changing two components at "QS4".
A great visualisation tool for IoT protoypes is Adafruit.io.They offer a plug and play Arduino example called "adafruitio_00_publish" which is the base of our prototype.
Adafruit.io offers a 3 step approach to see data online:
- Create an account in Adafruit.io
- Copy your "key" and "name" into that Arduino example
- See feeds of data coming into your dashboard
From here on you can use widgets to create a dashboard. All set up in your webbrowser.This is how our Smart Office Dashboard looks like:
You can also see line charts to see how parameters change over time.We will add these after some time of data collection - promised!
What are datapoints you would be interested of in your office?
Let us know in the comments below!


_5Wpf9nkOTC.png?auto=compress%2Cformat&w=48&h=48&fit=fill&bg=ffffff)


Comments
Please log in or sign up to comment.