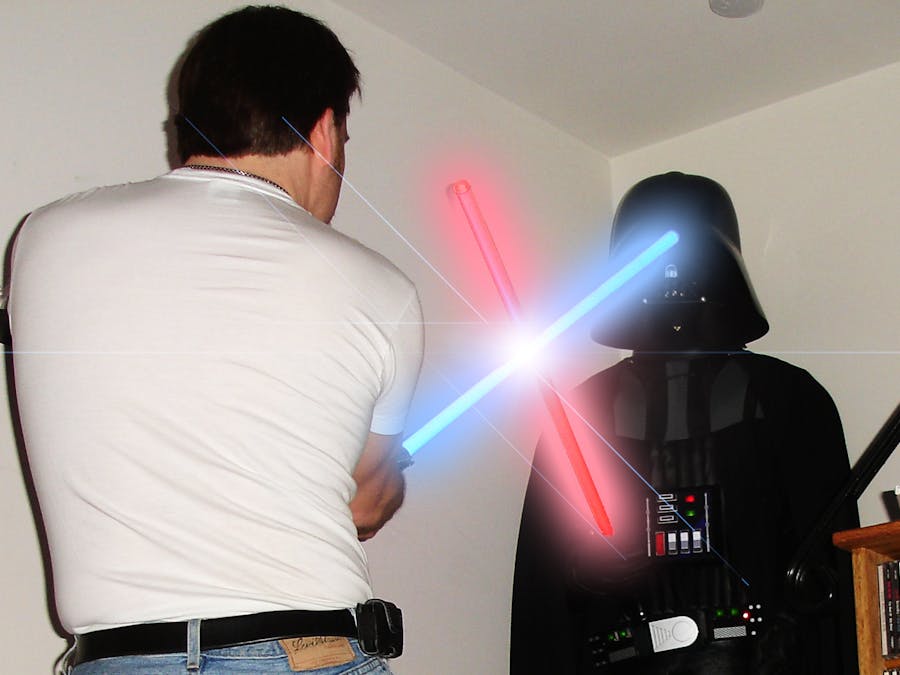
My favorite Star Wars prop is my full-size Darth Vader that stands in my living room. Having always been a huge Star Wars fan, when I had an opportunity to purchase a collectors edition Revenge of the Sith Darth Vader Helmet I jumped at it. Later I purchased a Deluxe version Darth Vader Revenge of the Sith Costume from Ruby's and modified it to my liking. I then purchased a Mannequin and made this my prize collectors piece.
Later I added two Master Collectors Light Sabers to my collection. Vader is seen holding one above.
I've wanted to add lights and sounds for a while now. I started simple about 8 years ago and added one of the Halloween Vader Breathing Effect boards which I hacked to slow the breathing a bit. I also modified the Chest Plate which only lit up and added a small Basic Stamp and sequenced the LEDs as they were seen in the Empire Strikes Back. It's a 7 combination sequence that lights the coin slot lights.
I had my full-size Vader plugged into a Z-Wave outlet where I could turn on the breathing and lights. While this was cool it was still pretty boring.
Now with boards like the Particle Photon I am able to take my Prop to the next level and have it remotely controlled via a phone app so when we have guests over I can have Vader on display.
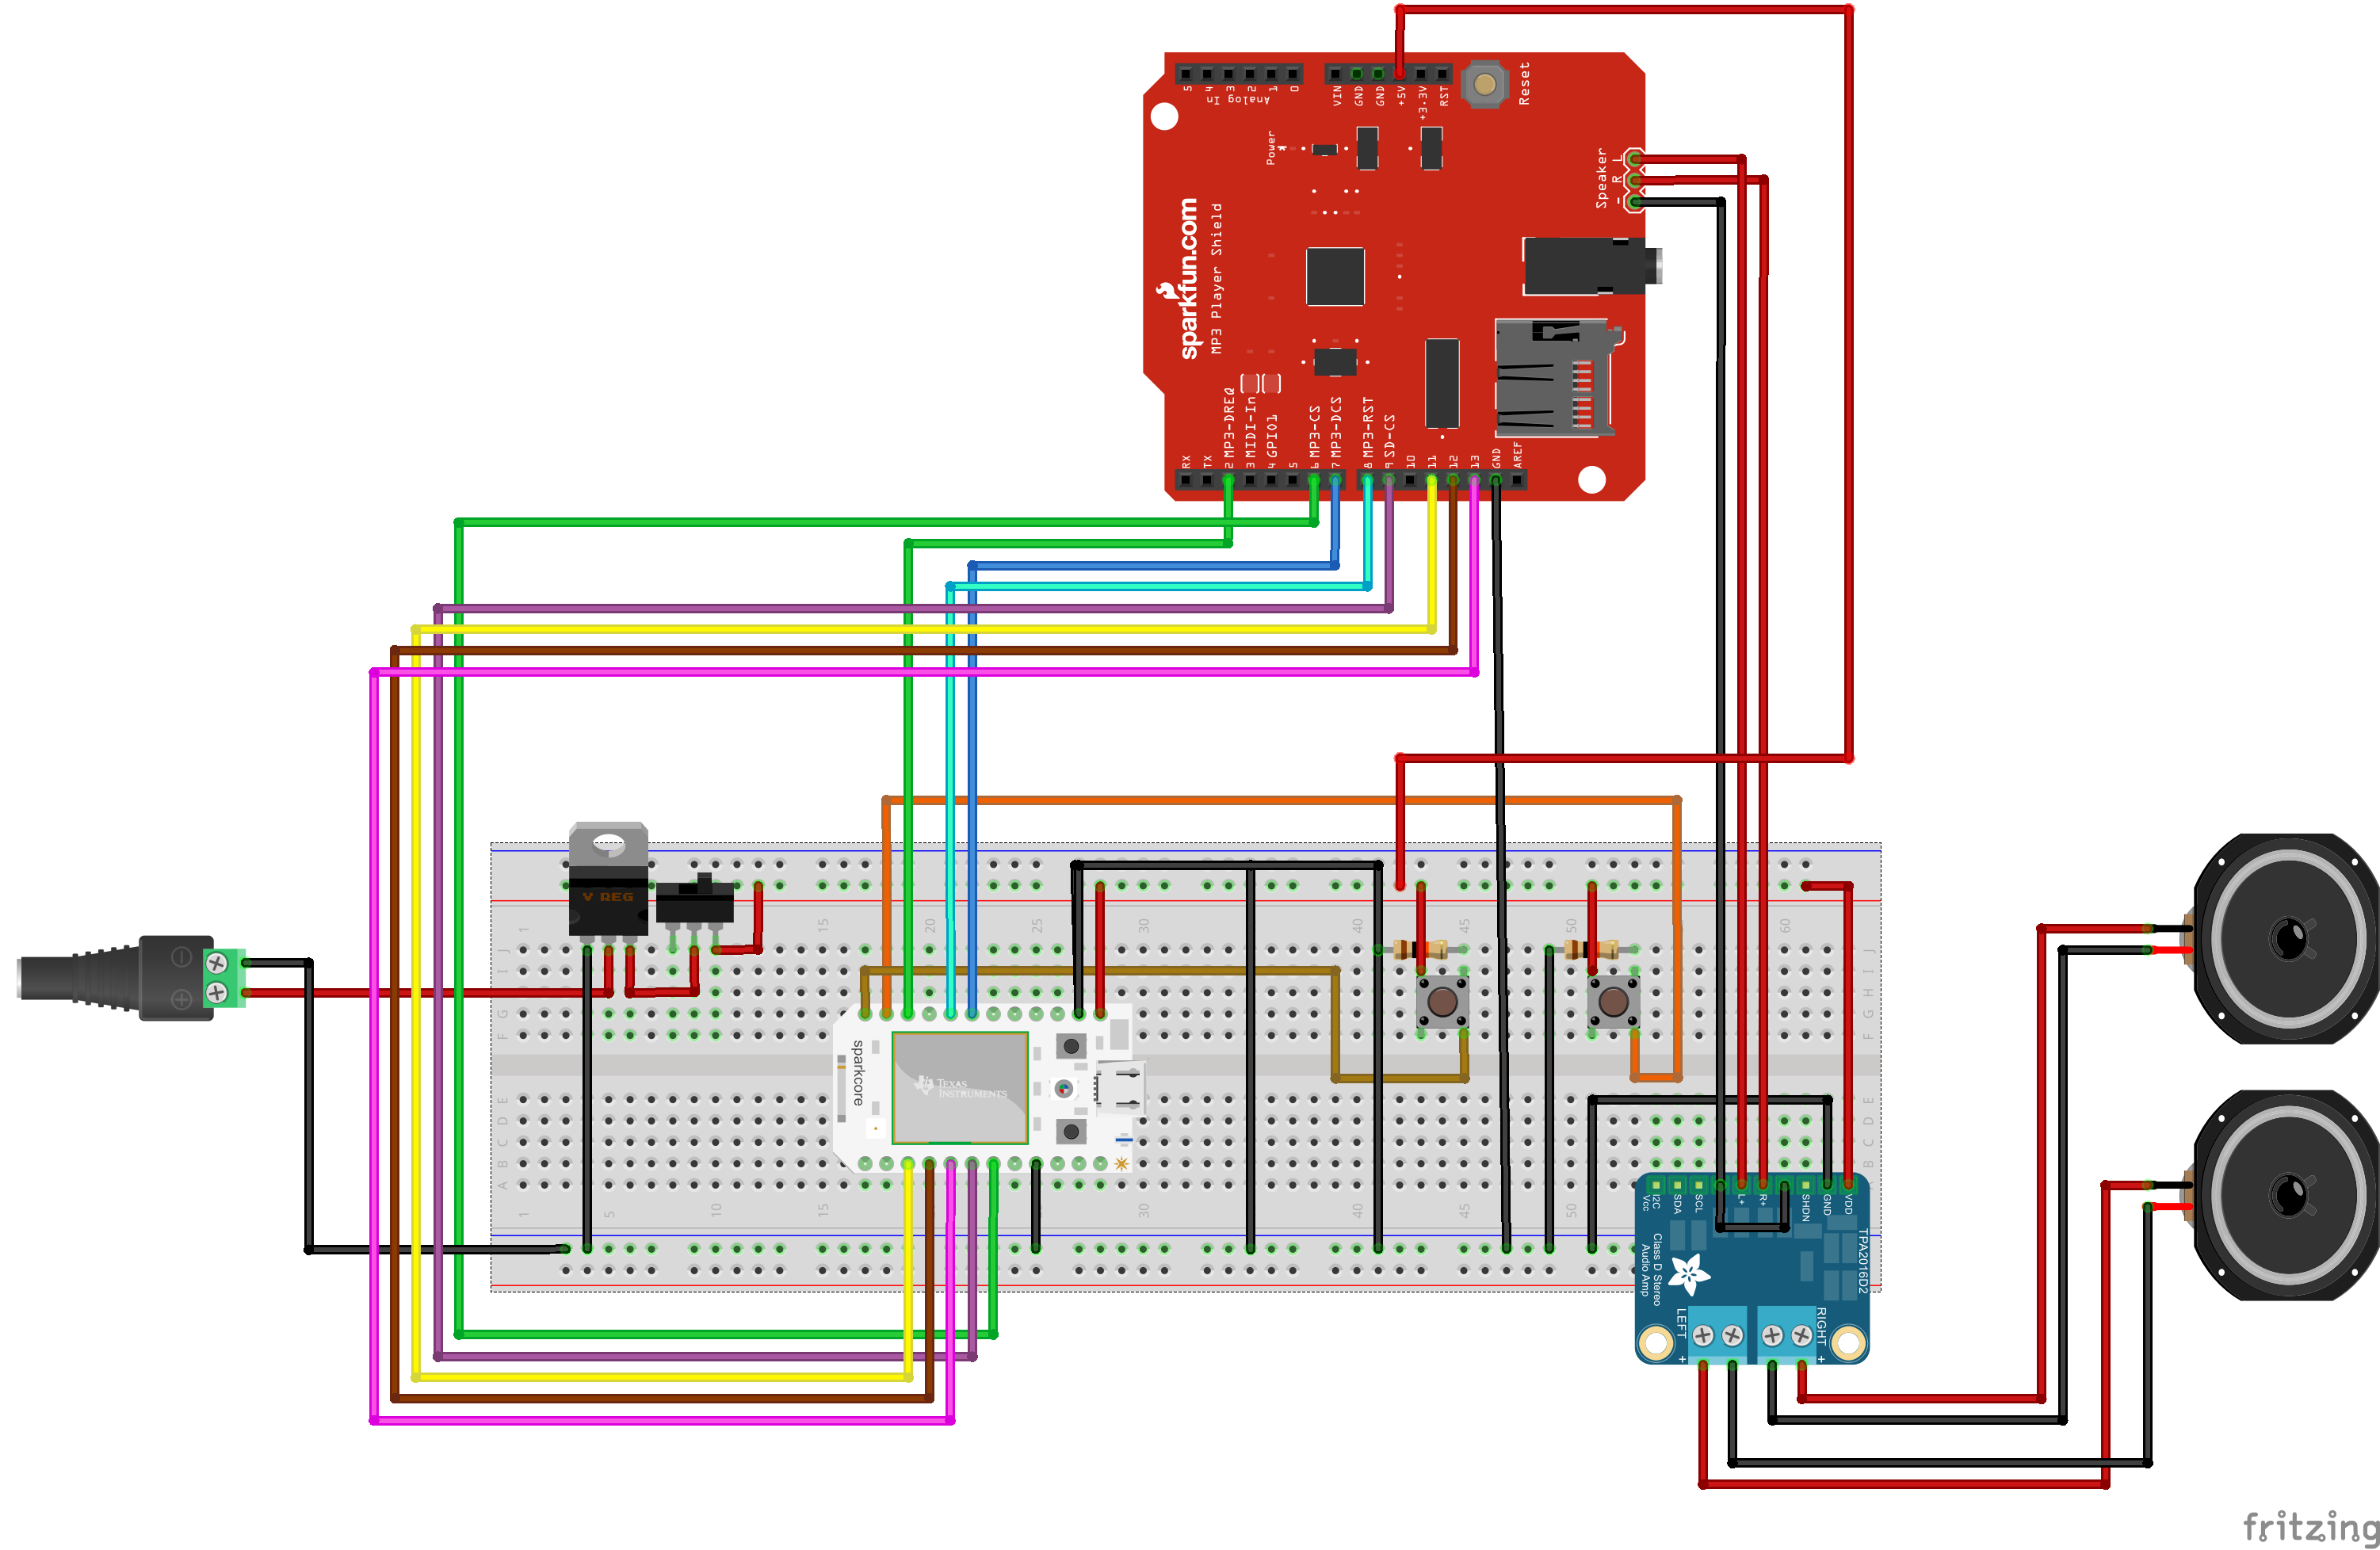
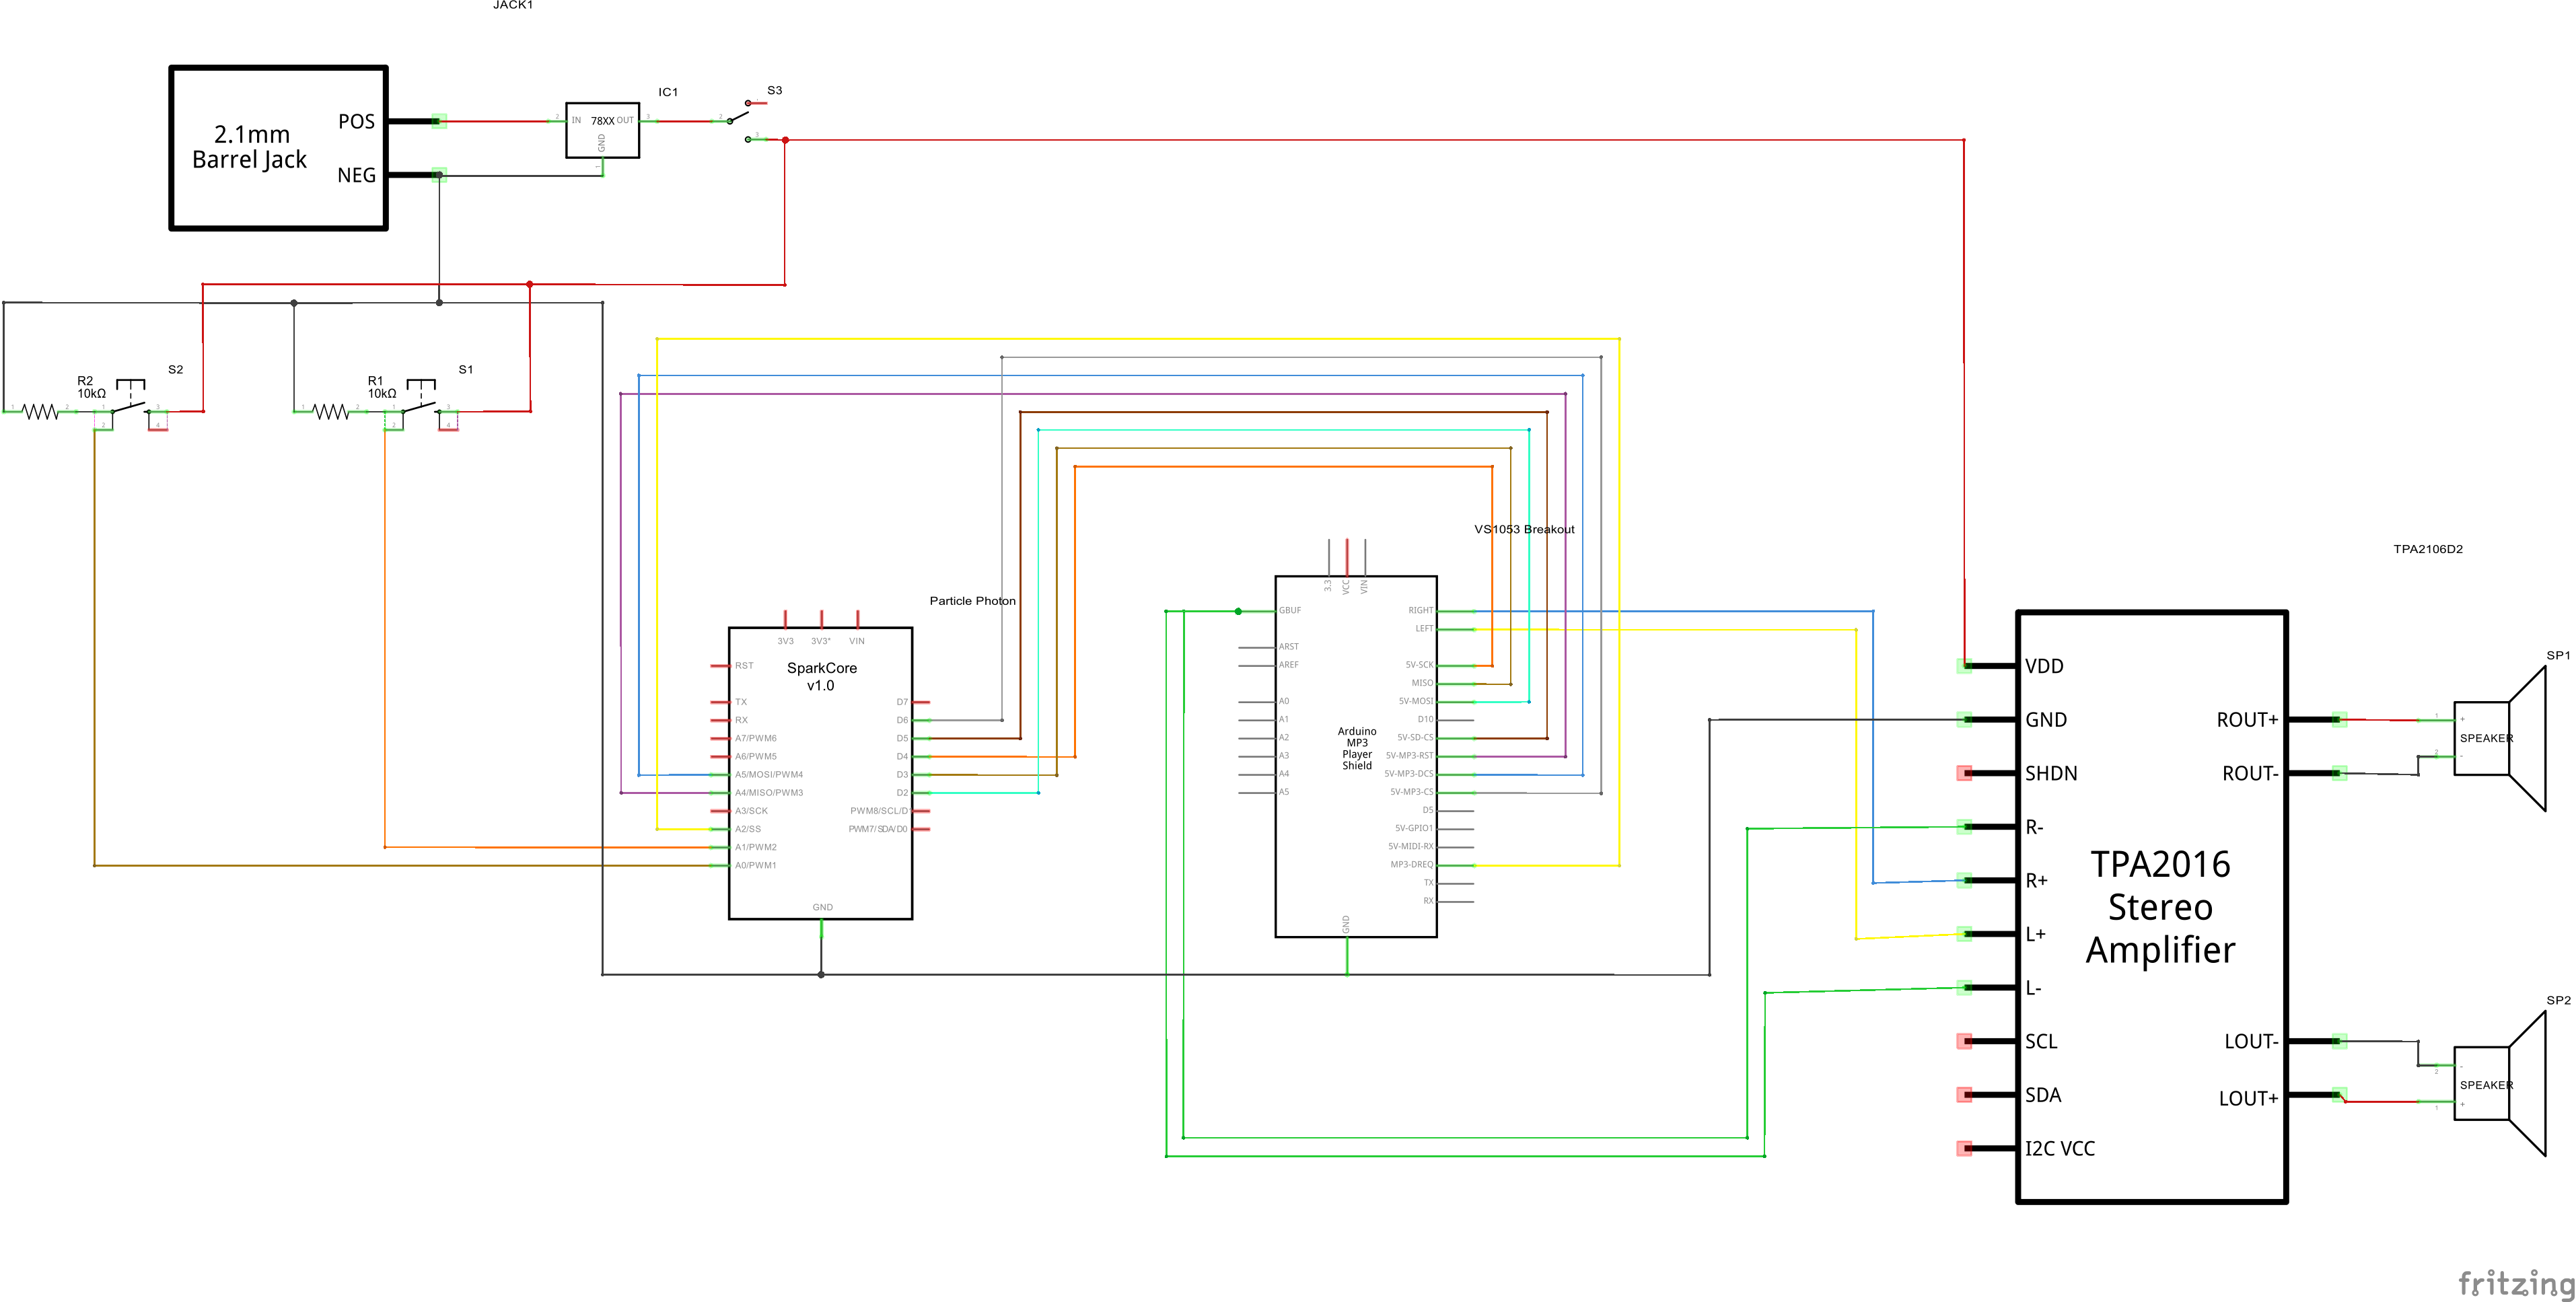
I started by wiring up a Particle Photon to an Adafruit VS1053 Codec + MicroSD Breakout board along with an Adafruit Stereo 2.8W Class D Audio Amplifier.
Using the Particle Photon Shield Shield helped prototype this quickly. It made it easier to match up with the Adafruit VS1053 Library Examples Pin-outs. You can also see I wired up 2 push buttons. These are so I can play random audio and the Imperial March from within the suit if I chose to wear it.
Next, I copied my sound clips to a Class 10 SD card. I chose a Class 10 to get the best performance and speed. I had to take this 128bit MP3s and change the bit rate to 32bit. While they lost some clarity they play properly. 128bit MP3s were not streaming from the SD card fast enough.
I then wanted to wire into my existing lights and breathing and did this with a 4 channel relay board. This gives me 2 future channels for possibly controlling my prop light saber or possibly a fan cooling system for the helmet if I choose to wear the suit.
After getting everything wired up and working from the switches, I exposed some functions to the web via the Particle Photon's Spark.function method and took to writing a Windows Universal Application in C# for my Lumia 950 Windows Phone. I also added a Spark.variable so I could populate and pass back a list of files on SD card so they enumerated in the phone app. As I mentioned I wanted to be able to remotely show off my Vader prop when people were over and with my phone usually on me it seemed like a great solution.
Here's what the Windows 10 Universal App looks like. It allows me to choose a clip to play, turn on the breathing sounds, turn on the lights, play the Imperial march or just play a random clip.
I also added some code to the Particle code to silence the breathing if it was on while paying sounds so they could be heard. When the sound finishes the Photon restores the breathing sound effect.
Here's a short video of everything working on the bench.
Next I set out to take my Spaghetti Factory of a prototype project and make it into a slightly neater and more compact Spaghetti Factory. I wanted to get everything on to the Shield Shield, using an Arduino Shield.
I created my own Proto-shield a while back and used one of them to create a new Spaghetti factory but this time on an Arduino shield that could mount to the Photon Shield Shield.
On the top side, I mounted and wired the audio amp and created to rails to hold the VS1053 MP3 Player/SD card. I also added an 1/8" earphone jack for easy assembly/disassembly.
Below you can see the nice small package it made allowing me to stack the shield onto the Photon Shield Shield. It also gives me the ability to use it with an Arduino if I so choose.
Next, I worked on adding a couple small speakers to the Chest Plate and rewired the lighting controller which is a basic stamp that runs the sequence. I'll be closing this all up and adding a connector to hook it to the rest of the system.
With the addition of my relay board and a small enclosure to hold the breathing sound chip and amplifier this is my completed controller for Darth Vader.
The only thing left was to mount the speaker inside the Helmet. I was able to easily do this with some stand offs and still have it wearable.
I created a simple sling using some Parachute cord to hang the controller down Vader's back under his suit. In the future I plan to make this a little more wearable however most of the time the costume is on display.
With everything installed I took to putting all of the accessories back in place and testing out the controls to make sure everything is still operational.
... and with this project completed here is a short video demo of my working project.
I hope you enjoyed my project. I have many more plans in the future such as adding a cable to control the light saber and that will involve creating a new right hand for Vader to hold the saber. I plan to make this an Anthropomorphic Robotic Hand that can hold the saber but will also look like Vader's with the glove off. I also was lucky enough to pick up both versions of Graflex flash handles which I plan to make a Darth Vader Saber with working insides. I hope to be able to post these additional projects here in the future.


_3u05Tpwasz.png?auto=compress%2Cformat&w=40&h=40&fit=fillmax&bg=fff&dpr=2)
Comments
Please log in or sign up to comment.