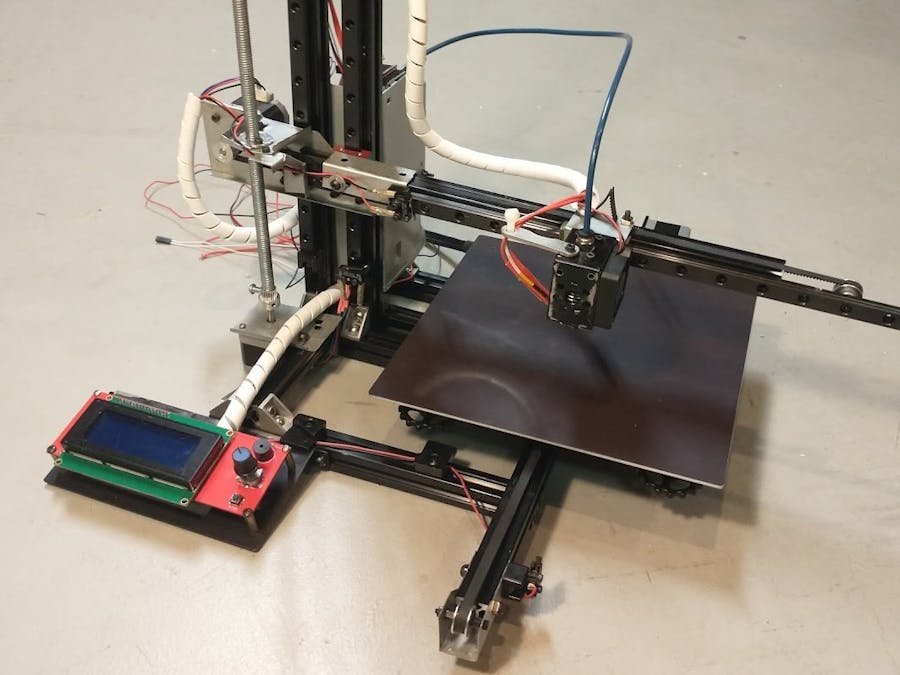
This project is currently in development, I will be updating this page as it nears completion.
Goals:- The printer must be of minimal costs
- The printer must be easily accessible and adjusted for maintenance
- The bed must be heated, if possible
- The printer must have a large, tall print volume.
The frame mainly consists of aluminum extrusions. I chose this material because I happened to already have what I needed to build the frame available to me, but also because it is generally very easy to work with. Before I began building, I attempted to create what I wanted to build in cad to get a better understanding of how things would fit together. This is my first attempt at what I wanted to make:
Afterward, I began to flesh out specific aspects of the design. I knew that I wanted to use a ball screw system for the Z-axis, and linear rails for the Y and X-axis. Those rails would be driven with belt and pulleys:
One big change from this initial prototype design to what was made was how I was planning to create the custom pieces you see in blue above. Originally, I was going to have them 3D printed, but it turned out that option was too expensive. Instead, I went a bit out of my box. I picked up some sheet metal from Home Depot and got to work with a Dremel. Using a folding technique, I was able to create all the pieces above and save about 100$ in printing costs for those custom parts. Here is a guide to this sort of manufacturing process: Tips for Bending Sheet Metal – Make It From Metal. Essentially, all my parts were "unfolded, " drawn onto paper and outlined onto the sheet metal. From there the part was cut out and folded into shape. For the Z-axis, I also was able to save a lot of money by buying a threaded shaft from home depot. It is not perfectly straight, like a normal ball screw system 3D printers use, but it is much cheaper. The effectiveness of this design decision can only be measured once I begin testing the printing capabilities of this printer,
CodingFor this printer, I used an Arduino Mega with a ramps board. This is a simple and easy system that gave me lots of IO to work with. This printer will use Marlin firmware which is open source and easy to configure.
Current Progress:At this time, I have successfully finished the frame, parts, and most of the wiring. I have uploaded an unedited version of marlin to the motors to test the functionality, and each axis currently works. Using a program called pronterface, I can send gcode commands directly to the printer to test different aspects of it.
For the future, I plan to continue updating this blog post to contain more specific instructions and project updates. I hope that I can make this project more accessible so that anyone with some spare time and an itch to create something can make their own 3D printer. My progress goals specifically are:
- Configure marlin properly to better control the printer (and get rid of the noise)
- Finish the wiring and test the functionality of the hot end.
- Test printer properly with a benchy!
- Update this guide with more specific instructions and videos of progress


Comments
Please log in or sign up to comment.