This article is part of a series.
I’m spoiled. I love the pretty colors of modern text IDEs. My favorite among them being Visual Studio Code.
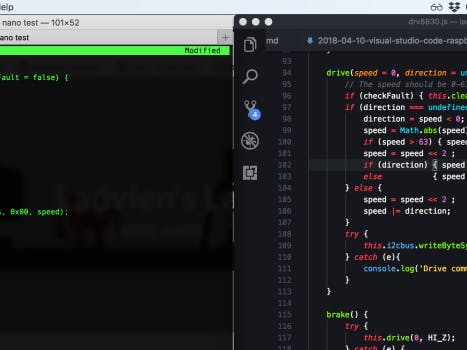
I know it’ll engender a lot of bad rep with the old-timers, but I prefer the one on the right.
However, when working on a headless (no monitor) Raspberry Pi it felt like I was pretty much stuck with the nano.
Until! I discovered Visual Studio Code’s remote extension.
This allowed me to edit my Raspberry Pi files from within Visual Studio Code. So, I get all the joys of writing code directly on my Raspberry Pi, but with all the bells-and-whistles of Visual Studio Code (VSC).
For the most part, setup is pretty straightforward. But the Pi side can get tricky, so I’m going to walk us through the process.
Get Visual Studio CodeDownload the version of VSC for your PC. Note, you aren’t running this from the Raspberry Pi–instead, you’ll be running it from the PC and connecting it to the Raspberry Pi.
After it’s downloaded and installed open it up.
Once open, click here
Ok, now search for the extension called
Remote VSCode
And hit the Install button. Once it finishes hit the reload button.
The extension works by creating a server which listens for incoming calls from the Raspberry Pi. Once we finished setting up the Raspberry Pi we will use a special command which sends the file on the Raspberry Pi to Visual Studio Code. However, when it’s all done, it’ll look pretty seamless.
SetupBack to setup.
In Visual Studio Code type F1 and type Preferences: Open Workspace Settings
Find the section labeled
remote.onStartup: false
We need to change it to true by clicking on the pencil next to its name. This sets the listening server to start every time you open Visual Studio Code.
Almost there. Now to setup the Raspberry Pi. We need to install a program on the Pi which will send a file of our choosing to Visual Studio Code to be edited. RMate was my choice.
Start by SSH’ing into your Raspberry Pi.
Then type
sudo pacman -S ruby
cd ~
gem install rmate
PATH="$PATH:$(ruby -e 'print Gem.user_dir')/bin"
echo 'PATH="$PATH:$(ruby -e 'print Gem.user_dir')/bin"' >> /etc/profile
echo 'export GEM_HOME=$HOME/.gem' >> /etc/profile
The above commands install Ruby, moves to to the user’s directory, uses the Ruby package manager to install rmate, then adds Ruby and it’s Gems (packages) executables to the environment variables. All of this is necessary to get Rmate working on Arch Linux.
Ok, let’s test it. Stop SSH’ing into your Pi by typing exit until it brings you back to your PC’s prompt. Now we are going to SSH into the Pi while listening for incoming files to be displayed in Visual Studio Code.
Open Visual Studio Code and open the integrated terminal (if it’s not showing hit CTRL + `).
At the terminal type
ssh -R 52698:localhost:52698 alarm@192.168.1.x
Replace the x with your Pi’s ip address.
This should SSH into the Pi while listening for files.
At the pi command prompt, type
rmate test.js
This should open a new file called test.js in your Visual Studio Code.
Now you get all the goodness of the VSC IDE, such as syntax highlighting, linting, etc!
A Few NotesFile permissions still apply, so if you want to be able to save a file the user you logged into on the Raspberry Pi and rmated the file must have write permission on the file.
However, if you do have write permissions, then the “File Save” function in the VSC editor will update the Raspberry Pi file with your modifications. Booyah!
One last annoyance to address. Whenever you want to use VSC to edit your file you have to log into the Pi using
ssh -R 52698:localhost:52698 alarm@192.168.1.x
This annoyed me a bit. I could never remember all that. Instead, I created a small bash script to help.
On my PC (for Mac and Linux, Windows, you’re on your own) I created in my home user directory called
vs
And added the following to the file.
echo $1
ssh -R 52698:localhost:52698 "$1"
Essentially, this script takes your Pi’s login information and logs in to your Pi using the VSC Remote Extension listening.
To get it to work you’ve got to make the file executable
sudo +x chmod vs
Then login in your Pi like this
./vs alarm@192.168.1.x
Hope you enjoy.
Oh, and for you web-devs, this also works for remote servers. Just replace the Pi with the server.


Comments
Please log in or sign up to comment.