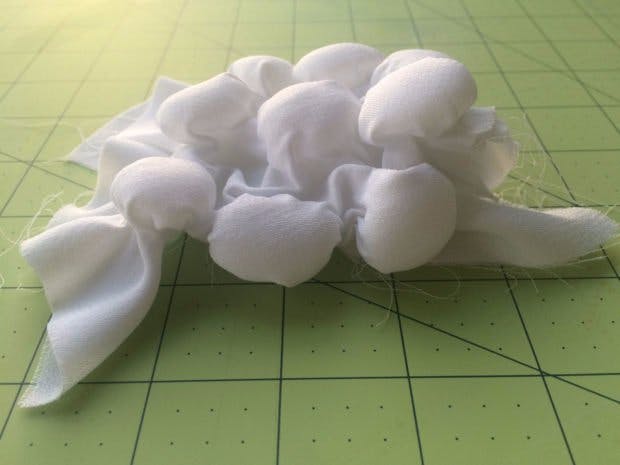
If you’ve ever answered the question “What’s cooking?” with “Oh, I’m just boiling some fabric… Sorry, were you expecting pasta or something?” then chances are you already know what 3D Shibori is.
3D Shibori is a technique for adding texture to textiles by exploiting the thermoplastic qualities of some synthetic fabrics. Polyester, for example, is perfect for this. Like shibori dyeing techniques, it often involves wrapping, twisting, pleating, folding, and binding fabric into shapes with thread. When you wrap and twist polyester into shapes and then boil it, once it has dried out the fabric will maintain the shape it was boiled in.
It’s not stiff. The fabric can still be spread flat, but once you release the fabric it will bounce back to its boiled shape. Besides being oddly satisfying (see gif), the fact it will return to its original shape can be used for different applications like stretching it over a frame for textile sculpture, adding an interesting visual layer to a lampshade, or for making one of those weird “bubble” shirts from the early 2000s. I think if you were careful about the placement of the fabric (namely, were careful to avoid placing the fabric where it might get stuck in moving parts) it could make for an interesting and flexible skin for robotics as well.
Materials:Thermoplastic fabric (a lightweight 100% polyester fabric has the best, most reliable results).
Some stores are better than others about displaying the material content of fabric. A store like Joann’s will reliably label bolts of fabric with what they’re made out of, other fabric stores (like those that primarily sell fabrics for apparel or some independent shops) can be hit or miss when it comes to labelling their bolts. Unfortunately, the only tested method I know for determining the kind of fabric you’re dealing with (if you don’t already know) involves setting it on fire, which is generally frowned upon when dealing with fabric you haven’t bought yet.
Thread Items to wrap into your fabric (optional). Glass craft stones, nails, nuts and bolts, cookie cutters, coins — these are just the items I’ve personally tried, but feel free to get creative and experiment.
Pot (one you don’t plan on using for food).
Step 1: Prepare your fabric.Washing won’t be necessary, but if your intended application for the finished piece is size-critical, then I suggest doing a swatch first. Cut out a square or rectangle (be sure to record the size) and then do the surface manipulation you plan on using on your larger project. That way you’ll know how much the size of the fabric will change once it no longer lies flat.
I cut the largest rectangle I could fit in the unevenly cut edge of my fabric to serve as my swatch.
Step 2: Manipulate the SurfaceThere are many different ways you can manipulate the edge of the fabric. You can twist it into spikes, wrap small objects in it, sew in gathers, or pleat it into geometric shapes. I decided to wrap some glass craft stones for this example. If you’re wondering if the glass breaks because of the heat changes involved, the answer is yes, but rarely and it doesn’t make a difference in the results when it does since everything is tied into place.
Start from the middle and work your way to the edges. Use the thread to wrap each section into place. You might be tempted to cut your thread for each piece, but honestly it’s easier and less of a pain to clean up if you just use one continuous thread to wrap all sections.
If you’re trying create a pleated or folded pattern you’ll find that using clamps or sewing the folds in place give you a crisper fold than wrapping everything in thread.
Step 3: BoilFill a pot with enough water to cover your fabric by an inch. Before adding the fabric to the pot, bring the water to a boil. Boil the fabric for thirty minutes.
Step 4: Blanche and DryAfter the thirty minutes are up, remove the fabric with a pair of tongs or some other tool (because you wouldn’t want to stick your hand in boiling water). Immediately put the fabric under cold water to cool it off and stop the thermoplastic molding effect. Let it dry completely before removing the thread.
Step 5: Remove thread and enjoy!Once it’s dry remove the thread and have fun with it. Pull it flat and let it bounce back. Sometimes doing this will make one of the shapes turn inside out but if you just poke it the shape will return.


Comments
Please log in or sign up to comment.