!!!! BE CAREFUL DANGEROUS 230 VOLT IN CIRCUIT !!!
Device iot-control based on cc3200 Launchpad module. Microcontroller cc3200 working in Access Point mode. HTTP server functionality is enabled. Using HTTP server user can control one of the microcontroller output. In presented example controlling output is connected to relay mounted in lamp. Using dediated www page user can control lamp ( turn on and turn off the light ).
hardware
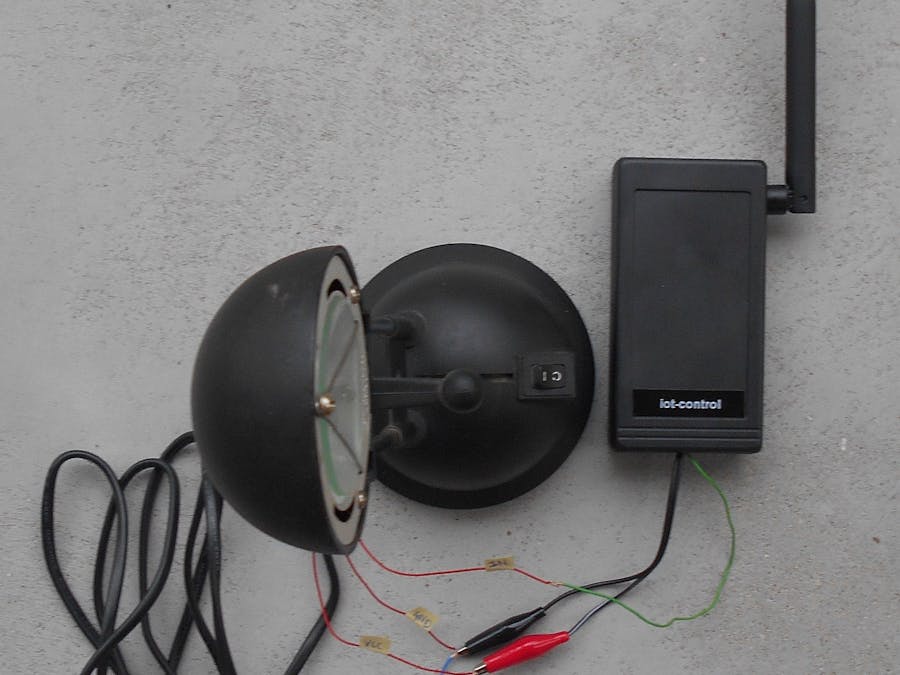
Launchpad is mounted in Z-34 box (dimension 129 mm x 67 mm x 28 mm ). Device use external Wi-Fi antenna ( TRF1002 – 2,4GHz, 5dBi ) and is supply from external power source. Relay mounted in lamp is connected to cc3200 P02 output. Device is presented on picture 1.>
Relay mounted in lamp was developed with analogue elements: optotriac, triac, tranzistor NPN and rezistors. Relay input is connected with P02 cc3200 output. When P02 output is in low state ( near 0 Volt ) relay is closed ( lamp is off ). When P02 output is in high state ( 3.3 Volt ) relay is opened ( lamp is on ). Schematic is shown on figure 1.
functionality
In device iot-control web server functionality is available. Using dedicated www page user can control state of cc3200 microcontroller output. In presented example controlling output is connected to relay.
software
Project was made in CCSv6. Software was written in C language. Server HTTP implemented in cc3200 based on SDK HTTP server example. In iot-control project was added www page ( page light.html in new tab Control ). Communication between WWW page and cc3200 microcontroller is realized by GET and POST tags. In light.html page source code are implemeted two GET tags (__SL_G_U.I , __SL_G_U.V ) and one POST tag ( __SL_P_U.N ).
When user call light.html page GET tags are send into cc3200 microcontroller. In procedure SimpleLinkHttpServerCallback tags are catch and depending on cc3200 output P02 state tags values are set.
Tag __SL_G_U.I controlling bulb image ( P02 in low state - image bulb off, P02 in high state – image bulb on ).
Tag __SL_G_U.V controlling button text ( P02 in low state – button text Turn on, P02 in high state – button text Turn off ).
When user push turn on / turn off button, then form is activated and POST tag __SL_P_U.N is send into cc3200 microcontroller. In procedure SimpleLinkHttpServerCallback tag is catch and P02 state is changing ( from on to off or from off to on ). In form action parameter was set on light.html page. After push button and sending form light.html is calling. Next GET tags are send into cc3200 microcontroller and page is refreshing ( new image value and button text ).
start
Iot-control project source code is avaliable on github. Firstly you should download project. After that you should run CCS UniFlash application and upload code ( iot_control.bin ) and WWW pages ( main.html, light.html, on.jpg, off.jpg) into cc3200 LaunchPad S-FLASH memory. In this case you should choose from CCS UniFlash options Open Target Configuration and you should open httpserver.ucf file ( this file is located in project localization in folder html). When programming will be done you should configure LaunchPad to work in Access Point mode (defoult mode is Station mode ). In this case you should connect P58 to VCC. Next you should connect together LaunchPad and lamp ( P02 output with relay input, VCC, GND ) and you should plug in external power source.
Iot-control device is working. Now you should start device with wireless network card Wi-Fi 2.4 GHz IEEE 802.11 b/g/n standard ( for example smartphone, notebook, PC ) and you should found network SSID mysimplelink-2B2246 . You should connect into this network ( no password is needed). When connection will be open you should turn on some www browser and run page mysimplelink.net . In tab Control page light.html is avaliable. There you can control lamp connected with LaunchPad. How device work was shown on picture 2.
Lukasz Krysiewicz, Poland


Comments
Please log in or sign up to comment.