This project requires only a basic ability to set up a Raspberry pi and solder electronic components, but you will learn all you need to build the chess system.
This section gives detailed instructions for building a Raspberry PI Noughts and Crosses game, know in the USA as Tic Tac Toe, hereafter referred to as NOX. This is an ideal project to build before trying to build the chess board. It uses exactly the same components, but instead of being played on a 8×8 grid like chess, its played on a 3×3 grid. So their are many fewer connections and the game logic is simpler.
In this build I use exactly the same components as for the chess board, just fewer of them. Even the most basic builder and coder should be able to build this. When you build this you will learn useful skills and techniques so that when you come to build the chess board it will go more smoothly. This makes it a bit overkill for NOX, but a great training project.
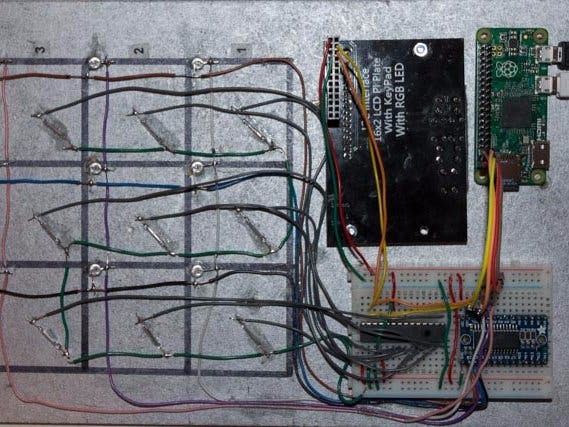
In play there will be wooden X and O pieces with magnets on the back that are placed on a board with Reed switches that register the placement. To move the NOX game will flash LEDs to show where it wants to go. The screen and buttons will indicate who’s move it is, allow setting of levels etc.
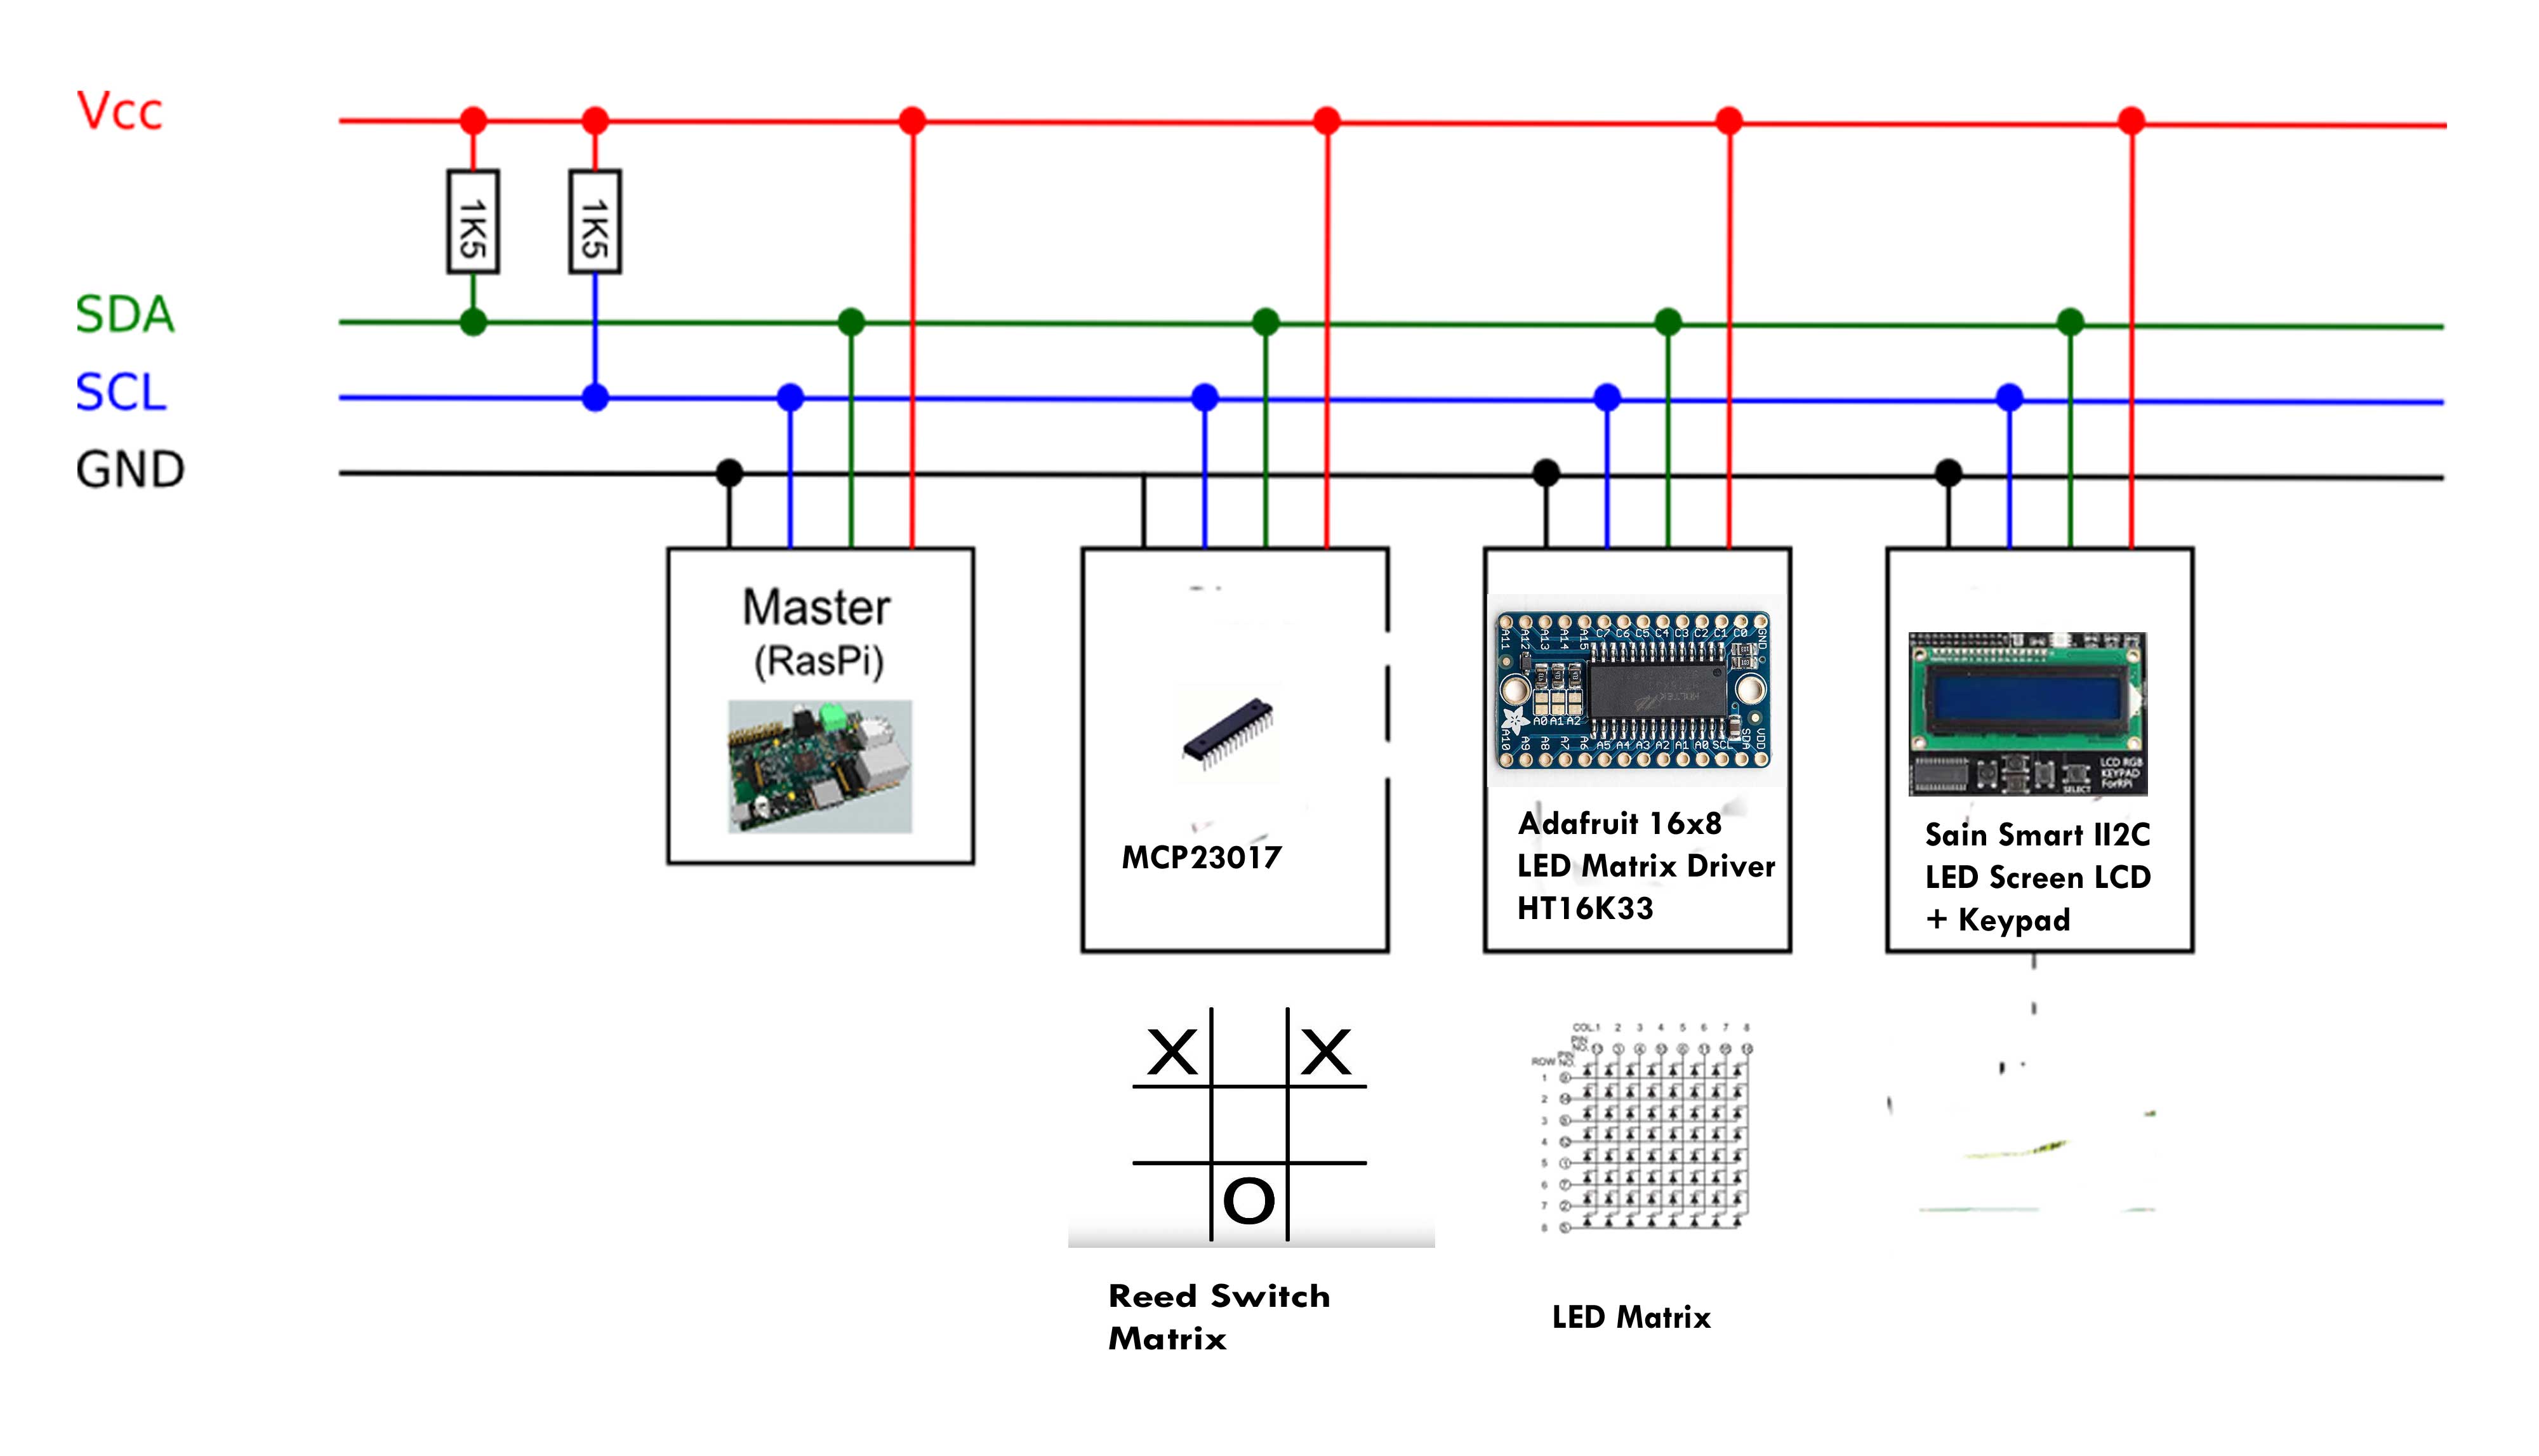
As with the Chess game the NOX game uses these components:
The Raspberry PI drives the other bits using an I2C bus, so there are only 4 wires to connect to the PI. You can use any PI. As this is a simple program in a small enclosure I use a PI Zero, but a PI2 or PI3 should work just as well. In this design the reed switch grid is a 3 x3 matrix which can be controlled by just one MCP23017 and the LED driver controls the 3×3 LEDs.
Steps in building the Raspberry Pi NOX game:- Prepare the Pi and load software
- Build the case
- Mount the components
- Wire the LED grids
- Wire the Reed switches
- Connect the display
I am assuming that you know how to set up a Pi with the Raspian operating system, so go to the Raspberry Pi Download page and get the latest version. If you have an existing PI ready loaded you could update and upgrade it, but I find that its quicker to re-load from scratch, especially as the new version includes VNC and I2C.
As part of the Raspberry Pi configuration make sure you enable I2C in rasp-config. It is not vital but I find the easiest way to develop systems is to enable VNC and run the Pi headless from a PC over a wireless network.
Test you have I2C configured by typing:
sudo i2cdetect -y 1
and you should see:
pi@raspberrypi:~/$ i2cdetect -y 1  0 1 2 3 4 5 6 7 8 9 a b c d e f  00: — — — — — — — — — — — — —  10: — — — — — — — — — — — — — — — —  20: — — — — — — — — — — — — — — — —  30: — — — — — — — — — — — — — — — —  40: — — — — — — — — — — — — — — — —  50: — — — — — — — — — — — — — — — —  60: — — — — — — — — — — — — — — — —  70: — — — — — — — —
Which shows its working, but nothing is connected.
Load the Adafruit libraries for Raspberry Pi>git clone https://github.com/adafruit/Adafruit_Python_LED_Backpack.git
>cd Adafruit_Python_LED_Backpack
>sudo python setup.py install
>git clone https://github.com/adafruit/Adafruit_Python_CharLCD.git
>cd Adafruit_Python_CharLCD
>sudo python setup.py install
>git clone https://github.com/mdobres/maxnox.git
This will copy over the following files:
- noxled.py tests the LED grid
- noxreed.py tests the reed switches
- noxledreed.py tests the reed switch with LEDs
- noxfullsys.py tests all components
- maxnox.py full system game
REBOOT! – Always a good idea!
- Build the case
- Mount the components
- Wire the LED grids
- Wire the Reed switches
- Connect the display
For full details of the above steps go to chess.fortherapy.co.uk
Now we need to just finish off by installing a skin over the keypad/display to tidy up the front. This template: lcdfullcovertemplate
can be laminated using a home laminator and then fixed to the front cover as shown to give button labels and cover the rough hole. If you do this you will find there is a gap between the cover and the buttons. Fix this by gluing 8mm shirt type buttons to the back of the template as shown. Don’t glue them to the LCD buttons, you can easily glue then shut that way.
You will also have to decide how you are going to power this. You could build in a battery pack or just have a USB connection on the side as I have. I leave that to you.
If you are keeping this as a permanent project you should work out how to get the program to start at boot. If your Raspberry PI Naughts and Crosses / Tic Tac Toe system is working you now have all the skills and knowledge you need to build a Rasperry Pi chess system. The components are the same, there are just more of them.


Comments
Please log in or sign up to comment.