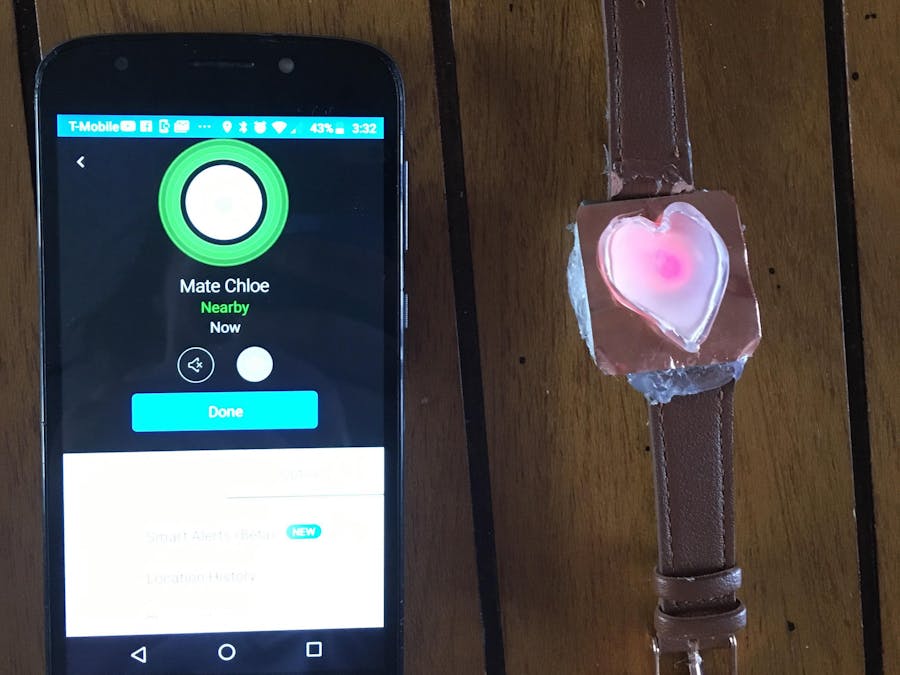
For this project, we wanted to make a bracelet that could light up when a special someone anywhere in the world is thinking of you. To do this we hacked a Tile Mate and replaced the internal speaker with a red LED, then nested it under a heart cut out of a ping pong ball. (Ping pong balls make for an excellent diffusion material when working with LEDs, and they are fairly easy to cut/manipulate).
We assumed that the tricky part of this project was going to be the communication aspect, especially since our ambition was for it to work from anywhere in the world (which would likely require Bluetooth).
The breakthrough came when we had the idea to try to hack a Tile Mate and use their app to handle the communication aspect. This turned out to be a remarkably easy solution- all we did was setup a single Tile and then share our Tile via email. We also had both parties on the same account, though this may not be necessary.
Within an hour we had a prototype up and running! My project partner was able to press the "Find my Keys" button and within 5 seconds my bracelet lit up with the beating heart effect from 300 miles away.
Total cost of the project came out to about 20 bucks. This was basically just the price of the Tile. I used a old broken watch's band for the bracelet, and the LED is less than a dollar if you don't already have one laying around.
First make sure you have all the additional materials, then scroll down to the step-by-step.
Additional Materials:- Ping Pong ball
- Watchband (optional- this device could also work as a backpack pin, or necklace)
1. Setup the Tile with the phone app on the phone of the Sender (MUST USE PHONE APPS- ONLINE TILE APP WILL NOT WORK)
2. Break open the Tile Mate device - We did this by taking two pairs of pliers and pulling apart the two plastic faces at the keychain hole.
3. Remove the circuit from the plastic
4. Find the face that has a metal circle attached to it- This is the speaker. Remove the speaker.
5. Drill a hole where the speaker was. This will be how you run the LED out to the face of the bracelet.
6. Now take the circuitboard and find the two metal prongs labeled Z1 and Z2 which were originally connected to the speaker.
7. Solder the positive pin (longer leg) of the LED to the Z1 prong. Solder the negative pin to Z2.
8. Test the circuit by attempting to find the Tile. Within five seconds the LED should start flashing/pulsing.
9. Now take the Ping Pong ball and cut it in half.
10. Draw a heart with pencil and cut that out of one half.
11. Dab some hot glue to the top of the LED and attach the plastic heart.
Now that your system is up and running, feel free to get creative with the rest of the aesthetic of the bracelet - Our next step is certainly making ours look better! Keep in mind that you can also use this device as a keychain, backpack pin, necklace, ect.
Expansion Ideas:
Since this project was so easy to do and uses Bluetooth (and in such a small form factor) the success has opened up a lot of expansion possibilities! Some ideas we had included hooking up different actuators for different effects like a haptic feedback response, comforting squeeze, warming sensation, LED matrix animation, ect. But feel free to get as creative as you want!
Side note... VALENTINE'S DAY IS COMING UP. ;-)


Comments