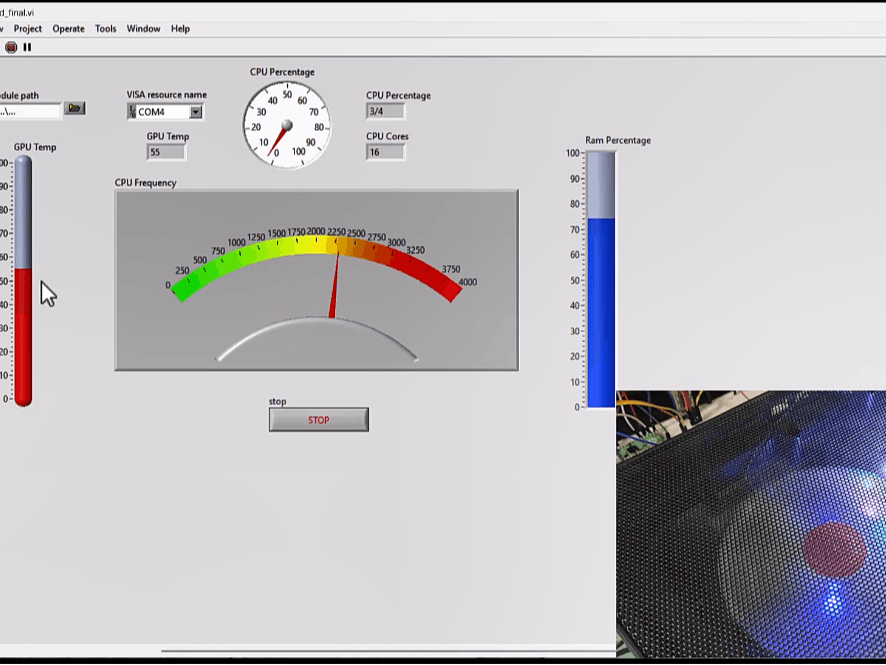
I had an old laptop Coolpad that I bought about 10 years ago. In addition to adding an RGB light to it, I thought to myself how nice it would be if the laptop could automatically control the coolpad. So therefore, I went through the following steps. I used the psutil and gputil libraries in Python to extract the laptop hardware information, you can see the python script below.
import psutil
import GPUtil as gu

def show_gpu_temp():

    gpu = gu.getGPUs()[0]
    return gpu.temperature


def show_cpu_freq():

    current_freq, _, _ = psutil.cpu_freq()
    return current_freq

def show_cpu_perecent():

    cpu_perecent = psutil.cpu_percent()
    return cpu_perecent

def cpu_core_count():
    cpu_cores = psutil.cpu_count()
    return cpu_cores

def show_memory_info():
    total_memory, available_memory, percent, used_memory, free_memory = psutil.virtual_memory()
    return percent
After obtaining the laptop hardware information, we send this information to the program that I have written in the form of a block diagram in LabVIEW graphical environment. LabVIEW's graphical panel displays information in an attractive way for us. After receiving the information and displaying them graphically, I send control commands to turn on the Coolpad fans via Bluetooth communication to the Raspberry Pi Pico microcontroller. An RGB light also turns on when the power-on command is sent to the Raspberry Pi Pico. You can see the program that written in block diagram form below.
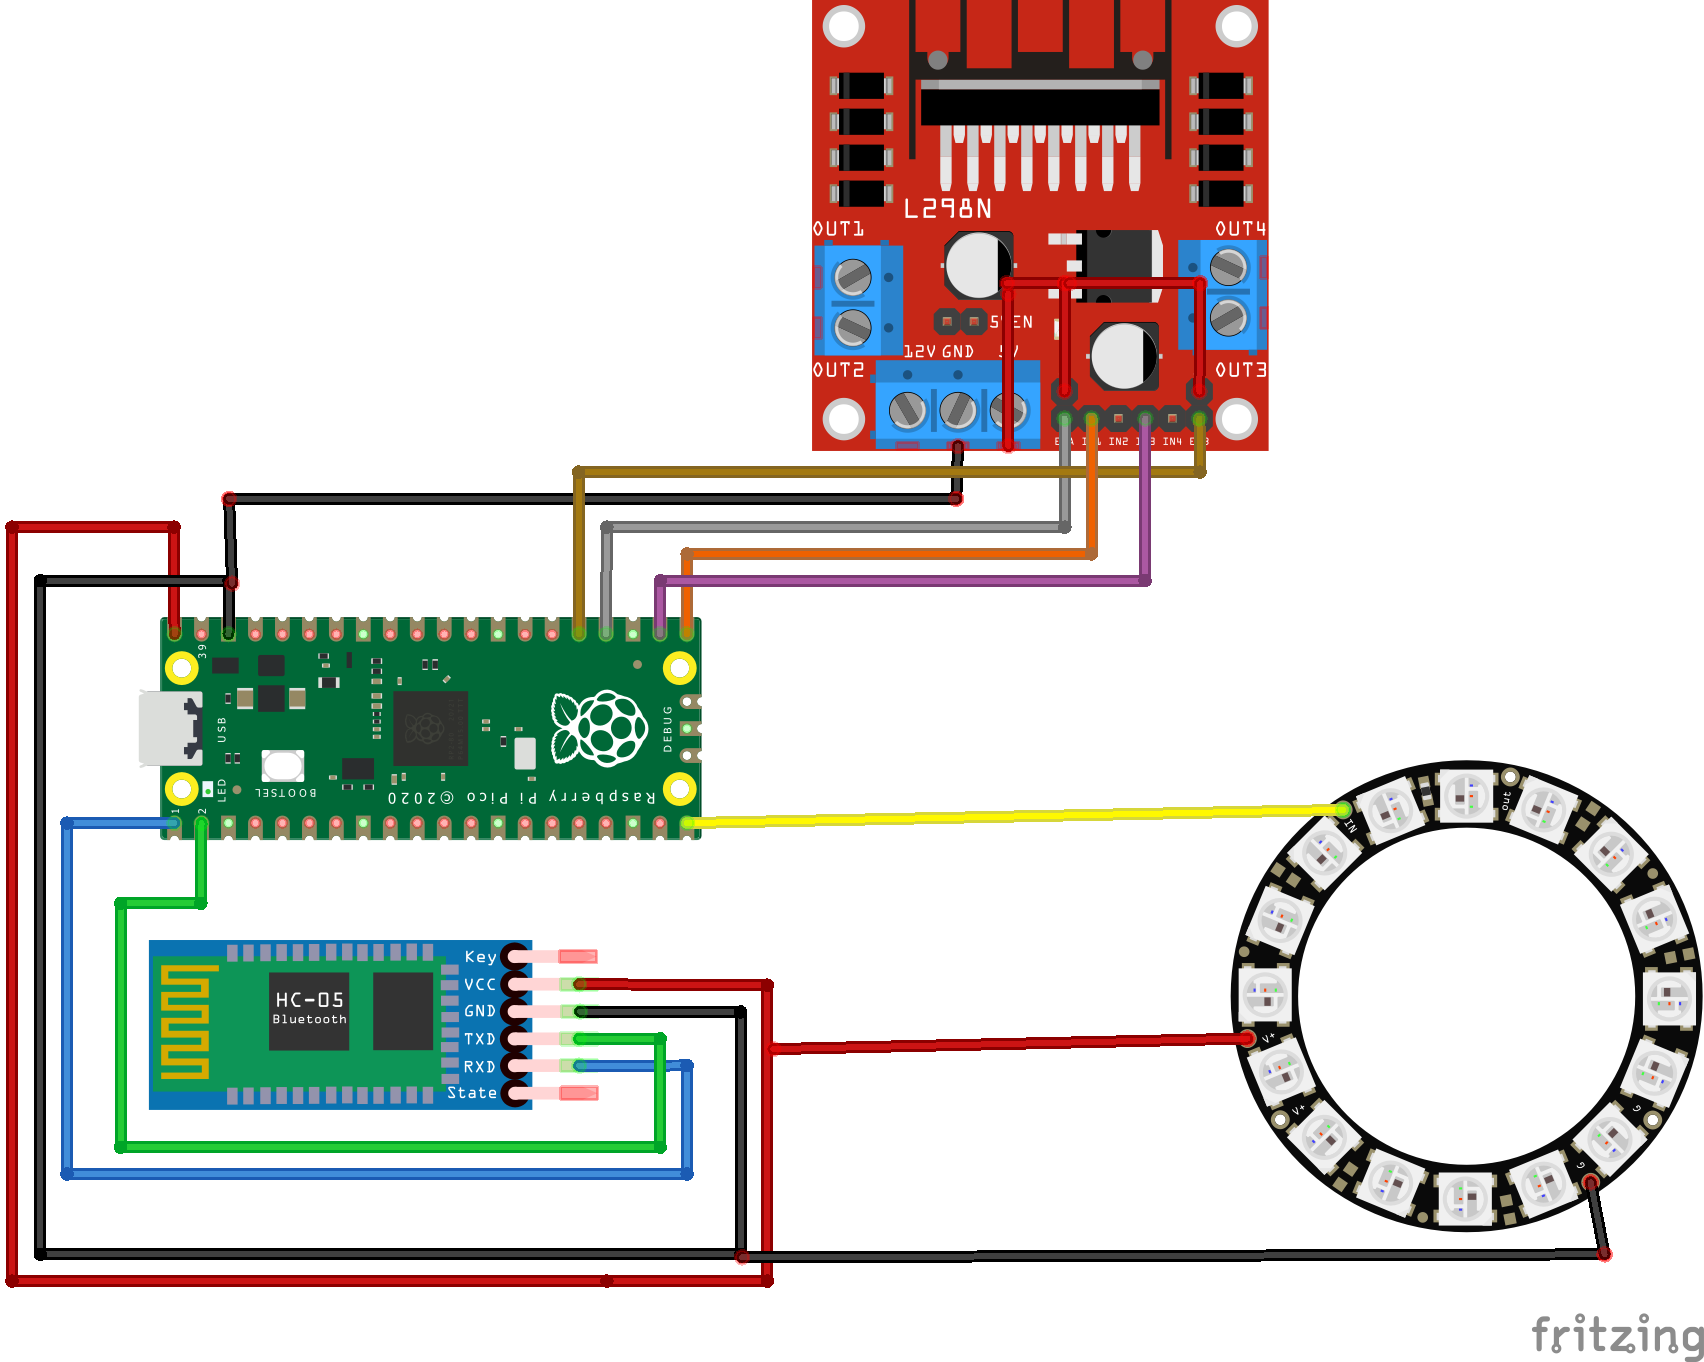
Finally, by help of a script that I wrote in Micropython language, I receive the control commands through the Bluetooth communication. As soon as the Raspberry Pi Pico receives the command, it can enable or disable the coolpad fans and RGB ring. You can see the program that I wrote for Raspberry Pi Pico along with the circuit diagram below. I also used a L298 motor driver to run the coolpad fans. I also used a HC-05 module for Bluetooth communication.
from machine import UART
from machine import Pin as pin
from time import sleep
import machine, neopixel

#####
#thanks to microsoft copilot for guiding me to write these functions to control RGB LED ring using neopixel library
# Pin number, number of LEDs, and bpp
PIN_NUM = 15
NUM_LEDS = 16
BPP = 4

# Create a neopixel object
np = neopixel.NeoPixel(machine.Pin(PIN_NUM), NUM_LEDS, bpp=BPP)

# Define the rainbow colors
RED = (255, 0, 0, 128)
ORANGE = (255, 128, 0, 128)
YELLOW = (255, 255, 0, 128)
GREEN = (0, 255, 0, 128)
BLUE = (0, 0, 255, 128)
INDIGO = (75, 0, 130, 128)
VIOLET = (148, 0, 211, 128)

# Store the colors in a list
COLORS = [RED, ORANGE, YELLOW, GREEN, BLUE, INDIGO, VIOLET]

# Loop through the colors and display them on the LEDs
def rainbow():
    for color in COLORS:
            # Set the color of each pixel
        for i in range(NUM_LEDS):
            np[i] = color
            # Write the data to the LEDs
        np.write()

        time.sleep(0.5)


def disable_rainbow():
    for color in COLORS:
            # Set the color of each pixel
        for i in range(NUM_LEDS):
            np[i] = (0, 0, 0, 0)
            # Write the data to the LEDs
        np.write()

#####
ut = UART(0,9600)

command = b'S'

#Define Driver pins
in1 = pin(16,pin.OUT)
in3 = pin(17,pin.OUT)


#########
ENA = pin(18,pin.OUT)
ENB = pin(19,pin.OUT)

ENA.value(1)
ENB.value(1)
#########

def enable_fan():
    in1.value(1)
    in3.value(1)


def disable_fan():
    in1.value(0)
    in3.value(0)


disable_fan()

while True:

    if ut.any():
        command = ut.readline()
        #print(command)

        if command == b's':
            disable_fan()

        elif command == b'o':
            enable_fan()
            rainbow()

        elif command == b'f':
            disable_fan()
            disable_rainbow()

        else:
            pass
I hope you enjoyed this project.
also, you can see full video of the project on my youtube channel.


_3u05Tpwasz.png?auto=compress%2Cformat&w=40&h=40&fit=fillmax&bg=fff&dpr=2)
Comments
Please log in or sign up to comment.