


Hardware components | ||||||
| × | 1 | ||||
| × | 1 | ||||
| × | 1 | ||||
Software apps and online services | ||||||
 |
| |||||
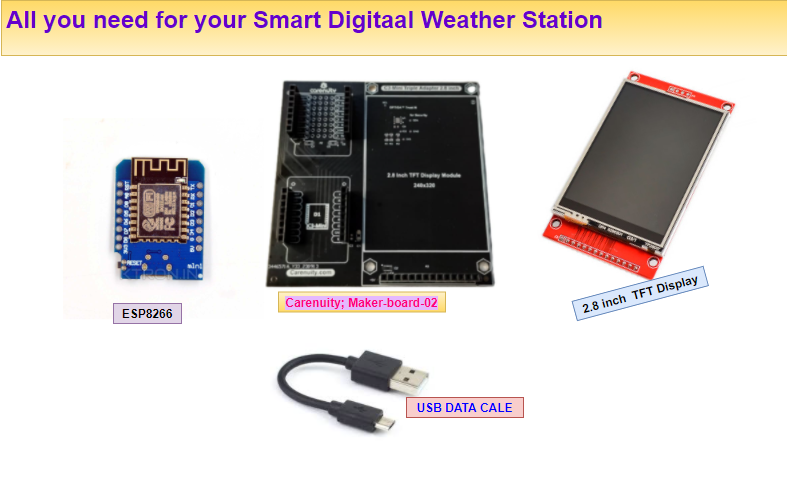
Ever wanted to know the weather forecast without checking your phone or watching the news? This DIY weather station project lets you create a real-time weather display that provides local weather data and adds a touch of visual flair with color-coded indicators. Powered by the versatile ESP8266 microcontroller and utilizing cloud-based weather data, this project is perfect for tech enthusiasts, DIYers, and IoT fans who want to build something fun and useful for their homes.
What You'll Need:- Wemos D1 Mini (I recommend using the Type C version)
- 2.8-inch LCD Display
- Carenuity Triple Adapter (Makerboard) — Soon available in the Chipglobe shop
- Internet Connection
This weather station allows you to check local weather conditions at a glance.
Code Modification:Step 1: Download and Setup the CodeAfter downloading the attached zipped file, unzip it into a folder and open the .ino file using the Arduino IDE. Follow these steps to customize the project for your needs.
Step 2: Modify Wi-Fi CredentialsTo ensure that the weather station connects to your local Wi-Fi network, open the settings.h file and update the Wi-Fi SSID and password fields with your network credentials:
This ensures that your ESP8266 board connects seamlessly to your home or office Wi-Fi.
Step 3: Get Your OpenWeatherMap API KeyTo pull real-time weather data, you’ll need an API key from OpenWeatherMap. You can easily get your API key by following this guide: Get OpenWeather API Key (carenuity.netlify.app)
Once you’ve obtained the API key, modify the code to include it:
The weather data is pulled based on the Location ID. You can find your location’s ID by searching for your city on the OpenWeatherMap website. Update the Location ID and Name in the code:
This ensures that the weather station shows data for your specific location.
Step 5: Language and Time Zone SettingsUpdate your preferred language and time zone in the code. Open the TZinfo.h file and refer your timezone format before you make these changes:
Once you have updated the necessary fields, you're ready to compile and upload the code to your ESP8266.
Uploading the Code:
- Select the Correct Board: In Arduino IDE, go to Tools > Board and select the correct ESP8266 board (Wemos D1 Mini or similar).
- Choose the Right Port: Connect the board to your computer via USB and select the appropriate port in Tools > Port.
- Compile and Upload: Finally, hit Upload to transfer the code to your board.
Once uploaded, the weather station will connect to your Wi-Fi and start pulling real-time weather data
With this project, you can create a colorful, real-time weather station that’s both practical and customizable. Whether you’re a beginner looking for a fun project or a seasoned maker interested in adding real-time weather and network monitoring to your IoT ecosystem, this weather station is the perfect addition to your home or workspace.


Comments
Please log in or sign up to comment.