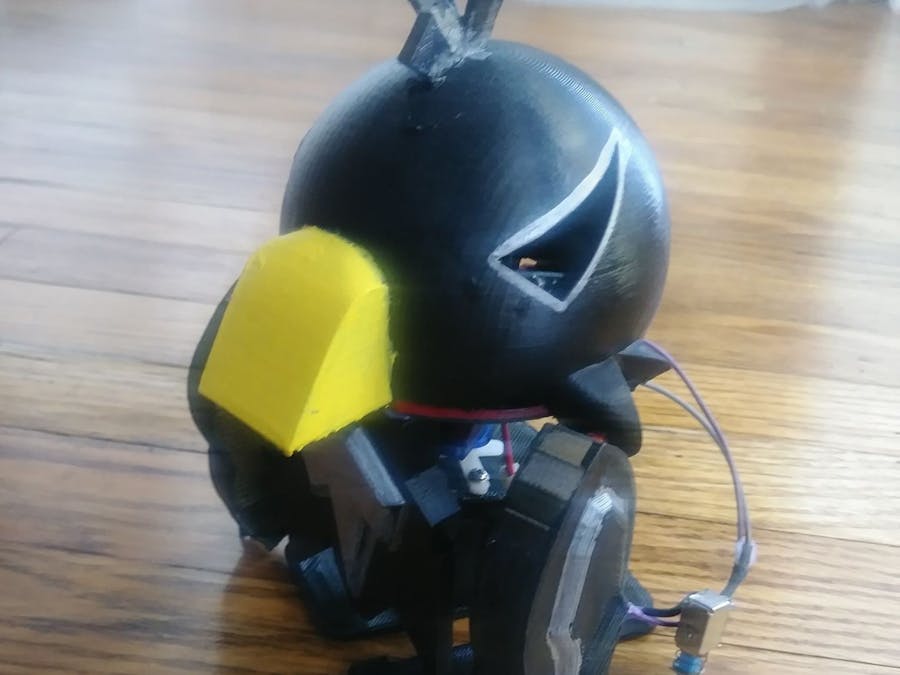
A small robot for you, small human. Meet Odin, the small, easy to make companion bot.
I got this idea after Maker Faire Bay Area, where I had a talk with Alex Glow! We talked about our companion bots, little wearable robots you can wear and take places with ya. During my last days in San Francisco, I got to hang with Alex and we talked about how to get other people into making companion bots, and my first thought was giving something for young makers.
I thought up Odin once I got back Home to LA, I was able to take a good look at Archimedes, Alex's Companion Bot, and I loved it so much I based Odin mostly off her design. Kids like birds more then spiders.
AssemblyI tried to make Odin as easy to make as possible. Including the head, it has 6 printed parts to the entire body.
Of course, I recommend starting with the bottom of the print – the base. It's a simple holder with a go pro holder; that way you can fit it on any type of backpack. The neck part is a special because it holds the servo; at this point I recommend printing it and adding the servo to the holder, and attach it to the body. It should look something like this.
Continue printing out the rest of the parts; I'd say print the head next, and that way you can test the fitting. It should be able to fit right onto the circle of the neck.
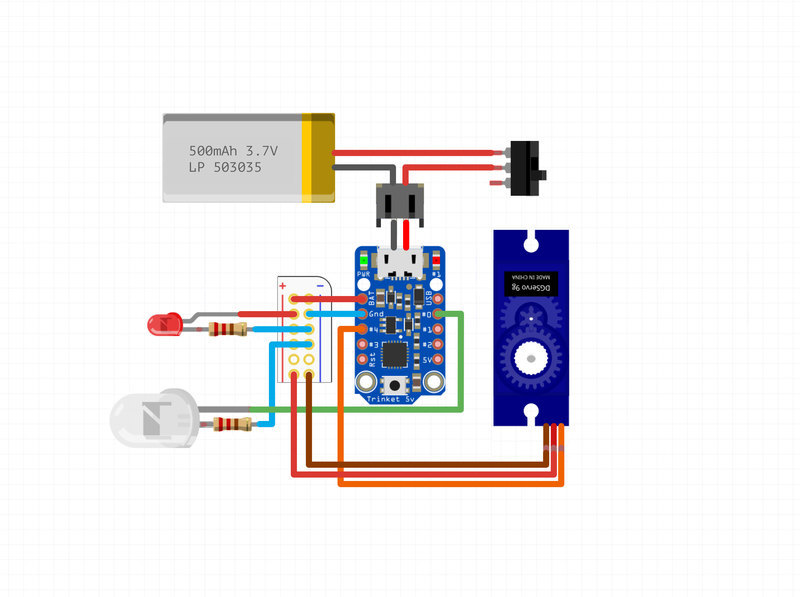
When you print the head, you will notice that the head is hollow, that's intentional. Of course it means you have to print it with supports, but the head is hollow that way you can stuff the circuit into the head. This is the diagram I used:
But I used a lithium ion 3.7 volt battery; I also added a led for fun, with a resistor of 33ohms. I always Permaboard attachment pins and then attach the wires together with the power source, I also use hot glue to keep them in.
At this point I recommend uploading the code and giving the system a check. The servo should start moving back and forth. If all is well take the circuit and stuff it inside the head, it all should fit. Lastly Is the decals of the body: the chest and wings.
I use pretty much the same idea Archimedes has, I just CAD my own version of them. To secure the wings to the head, there are holes I made in the CAD file so you can easily use zip ties:
For the chest piece I just used my good friend hot gLUE, and glued it right under the beak. It should looks something like this.
It's super easy and I even added a switch for the power source.
Of course I recommend painting it – you don't have to keep it crow colors, you can paint it blue, and make it a blue Jay, all up to ya.


Comments