


Hardware components | ||||||
 |
| × | 1 | |||
Software apps and online services | ||||||
 |
| |||||
| ||||||
 |
| |||||
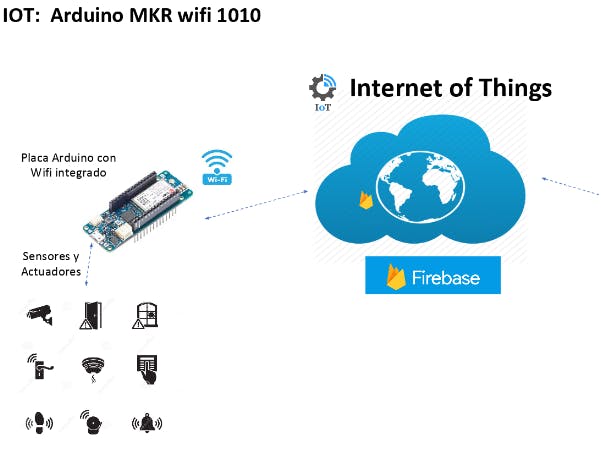
In this example we have tried to send and receive data from a database in real-time in Firebase, learning how to create the DDBB, the application in Arduino, and then finally to access it from a mobile application created with App Inventor. Let's see each part in detail.
In Firebase we have two types of databases: Realtime Database and Cloud Firestore. In most cases it is recommended to use the second one, which is also more recent, but for our example we will use the Realtime Database.
Realtime Database
Let's describe the main features of the Realtime Database:
- The data is stored in a single JSON type tree. This makes it complicated to organize complex data structures.
- You can define rules for the database to grant read/write permissions.
- The queries are deep, that is, they return the whole sub-tree of the selected nodes. This implies cascading permissions, so you should avoid nesting data as much as possible.
- It allows to filter or sort in each executed query (only one of the two options).
- They are a regional solution, i.e. the data is stored in a single regional server. This leads to lower latency, but more limited availability. This is because there is no redundancy in the information
- If the database requires many connections (more than one hundred thousand simultaneous or more than one thousand read/write per second) it is necessary to partition it into several databases.
- For payment options, the cost is based on the storage and bandwidth used. We will use it educationally and for free.
Creating a Realtime Database in Firebase
We will use the free account, and specifically the Realtime Database.
Steps to create our Database:
We will connect to this URL: https://firebase.google.com using a gmail account, we will register and create a real time database.
We explain graphically the steps and fields to collect/send information.
Let's go to the console and inside we'll create the database in real time. To do this we add a project, putting an identifying name.
The following graphics show the steps, first create a new project, selecting "add project":
Once assigned, click on the + sign of "add project", we will put a name to our service, for example skateboard_sharing, we will choose our country and the server of Western Europe. We accept privacy and click on create project.
Once inside, we'll have to create the real-time database. We have to create the Realtime Database. Choose the following figure and click on Create database.
Once created, we will save that string, because it is the one that will be used from the Arduino application, since with that we will communicate with it, with the DDBB. In this example it is:
https://pruebafinal-a255d.firebaseio.com/
For the arduous application it will also be necessary to take the authentication code, we paste the screenshots in order to take it. First Setting and then we will enter in Service Accounts:
Here we will select Secrets from the Database
When we get on top of the **** we will get the option to show the secret, which we will copy to paste it into the example application that we are going to develop.
Finally, and in an illustrative way, we will show you that you can see the content of the database from the browser and that you can interact with it by adding or removing elements.
Here, although in the next point we will detail it, our idea is to create a main tag Skates, from which hang the skates and the state of it (free or reserved) by some user.
We can always go to this page to see the status of the DB and see if it is being filled in correctly. Remember to go to console, to our project and then to our recently created DDBB.
To ensure that we can access the DB remotely without problems, we must configure it as follows:
We are now ready to move on to the Arduino IDE and explain how to realize the Arduino program for writing and reading the DDBB.
Arduino ApplicationWe are going to make an incremental program with the Arduino IDE that we configured before, so we will be teaching each part. The idea is that the assistants make the program and upload the code to experiment in a practical way. The steps to follow are:
- How to connect by WiFi
- Installing the library to be able to use Firebase
- Set and Get method. Send a whole number to Firebase and then read it
- Set and Get method. Send a string to Firebase and then read it
- Set and Get method. Send a JSON to Firebase and then read it
- Push method. Add a number
- Push method. Add a JSON
- Update method. Adapting elements using a JSON
- Delete method. Delete nodes and their children.
WIFI client mode connection
The first thing we are going to do is to connect to the router as our mobile phones, tablets, PCs, laptops, etc. do.
We have to configure the name of the network and its password and then a few simple lines of code. We repeat, it is a Client Mode connection because you can also configure your device to work, for example, as an access point and connect the devices to the Internet through us. This last case will not be dealt with here.
These two lines must be configured:
#define WIFI_SSID "xxxxxxxxx"
#define WIFI_PASSWORD "tttgfgfdsfdfsdfsdfdf"
We'll activate the serial console to diagnose every step by itself:
the code would be as follows:
Operations with the remote DB
Now we have to replace the WifiNiNa library with the Firebase library which already includes this one internally. The library is installed from the Arduino repository, and it is this one:
https://github.com/mobizt/Firebase-Arduino-WiFiNINA
For the connection we'll define the variable that manages all the communications and then, two Firebase constants for the authentication:
#include "Firebase_Arduino_WiFiNINA.h"
#define FIREBASE_HOST "skate-sharing.firebaseio.com"
#define FIREBASE_AUTH "eLMov0QaKPqk8TbPrbLtZ2jp9BCDLKxkqH9UOU41"
//Define Firebase data object
FirebaseData firebaseData;
We will make the first insertion with the SET method of an integer, and then we will read it. This method inserts an element in the database, in the path that we define. It is convenient to remember how the information is organized in the database.
After the WiFi connection we will connect to the DDBB with these lines:
//Connection to Firebase
Firebase.begin(FIREBASE_HOST, FIREBASE_AUTH, WIFI_SSID, WIFI_PASSWORD);
Firebase.reconnectWiFi(true); //Let's say that if the connection is down, try to reconnect automatically
String path = "/Test_Burg"; //Path in the Database. We can hang from the root if we want to
We will do all the example operations in the Setup because it is for an example, and we only want to do them once.
The program would look like this:
Write and read a whole number. SET and GET method
It is done with the SetInt method, and what it does is create an entry in the DB in the configured path, in this case under /Test_Burg and then we are going to create it in our example in: /Int/Data1 and with the value 10575.
For the reading we will use the GetInt method that recovers an integer from the path we put. We will represent this in the traces:
Write and Read a String SET and GET method
After the example, we will ask them to do the same but for a string, the one they want. It is done with the SetString method, and what it does is to create an entry in the DB in the configured path (in this case, under). Then, to read we will use the GetString method that recovers a string from the path we put. We will represent this in the traces:
Write and Read a JSON. SET and GET method
We have this URL to create JSON : http://jsoneditoronline.org/ there are more but we decided to use this one. In order to send it by code, we have to "escape" JSON because we will send it within a string and the special characters have to be marked, escaped with the / character. For this we can use this URL:
https://codebeautify.org/json-escape-unescape
Vamos a aprovechar esta URL para insertar un JSON de ejemplo predefinido:
Pulsaremos en Get Sample y nos pondrá este ejemplo:
{
"employees": {
"employee": [
{
"id": "1",
"firstName": "Oscar",
"lastName": "Per",
"photo": "https://pbs.twimg.com/profile_images/735509975649378305/B81JwLT7.jpg"
},
{
"id": "2",
"firstName": "Maria",
"lastName": "Sharapova",
"photo": "https://pbs.twimg.com/profile_images/3424509849/bfa1b9121afc39d1dcdb53cfc423bf12.jpeg"
},
{
"id": "3",
"firstName": "Pedro",
"lastName": "Bond",
"photo": "https://pbs.twimg.com/profile_images/664886718559076352/M00cOLrh.jpg"
}
]
}
}
{\n \"employees\": {\n \"employee\": [\n {\n \"id\": \"1\", \n \"firstName\": \"Oscar\", \n \"lastName\": \"Per\", \n \"photo\": \"https://pbs.twimg.com/profile_images/735509975649378305/B81JwLT7.jpg\"\n }, \n {\n \"id\": \"2\", \n \"firstName\": \"Maria\", \n \"lastName\": \"Sharapova\", \n \"photo\": \"https://pbs.twimg.com/profile_images/3424509849/bfa1b9121afc39d1dcdb53cfc423bf12.jpeg\"\n }, \n {\n \"id\": \"3\", \n \"firstName\": \"Pedro\", \n \"lastName\": \"Bond\", \n \"photo\": \"https://pbs.twimg.com/profile_images/664886718559076352/M00cOLrh.jpg\"\n }\n ]\n }\n}
and again now with the SetJSON method we insert it in the DB:
An error occurs when reading it because it overflows the size. For this reason, for the reading process, what we are going to do is to read a JSON but only from one employee, the one from 1, since this does not overflow the internal buffer of the Firebase library and it does return the value. Let's see the example:
Important note: If you make a set of an element that already exists, it is automatically changed, so this operation serves to update as well.
Add a new whole element. PUSH method
In this case, the difference from Set is that it always adds an element and the element's name is created by Firebase. In the end, this method could be used to add values to a log for example and have them inserted. We'll look at this in another step in our example:
If we run the example again, another element will appear in the database
Add a new JSON element. PUSH method
We're going to do the same thing but with a JSON. We will do as before, although this time a little smaller, and insert it three times:
jsonStr = "{\"Data" + String(i + 1) + "\":" + String(i + 1) + "}"
and if you execute again:
Modify from a JSON. UPDATE method
This method is like a set and thought only through JSON, not with integer, float... when you are going to execute if it does not exist you create it and if it exists you change it. Here the only thing we would do of several fields. This is the JSON to change, in the INT folder and for three elements:
jsonStr = "{\"Data" + String(i + 1) + "\":" + String(i + 5.5) + "}"
If now from the DDBB we change the values, for example:
and we run it again, it will update its value again:
Delete a node and its children. DELETE
Finally, to touch the basics of the database, we would have to delete, in our case we will delete everything inserted in this practice, leaving the database clean. The code is very simple:
The DDBB will be empty. We wait 10 seconds to see how it is erased:
Thanks to the fact that it is integrated in AppInventor, it can be used to create simple Android applications that allow us to work with the values stored in the database. Let's put here the example of the Skate Sharing project, we should change the configuration of the database and then read or write as required by our application.
Creating the management application
Our management application will be simple, allowing you to add skates, delete skates and remove the reservation made by a user.
We assume that students have previously worked with AppInventor. However, it is recommended, in order to test the application until it is the definitive one, to use MIT AI companion that allows us to quickly debug it.
Here is a solution. There are different and above all many design possibilities. Depending on the duration of the workshop, more or less focus can be put on it. Remember that to do this you will need a gmail account and then download the MIT AI2 Companion application to your mobile or Google play tablet.
Before explaining the solution at the programming level, when we add the Firebase component, which is not visible, it must be configured to point our created DB, and it must be put as indicated in this figure. I empty the token because we haven't put authentication, and then the connection URL, and finally the basket or bucket where we're going to put the data. This is the way we have put it, but it can be indicated in a programmatic way and not in a fixed way. In our case it will be fixed.
In the AppInventor application:
IMPORTANT: The BBDD FireBase component is in the left menu EXPERIMENTAL.
VERY IMPORTANT: (TO BE TAKEN INTO ACCOUNT DURING THE WHOLE PROJECT)
The FIREBASETOKEN field is automatically filled in when we make a change or reload the project. ALWAYS DELETE THIS FIELD TO LEAVE IT EMPTY BEFORE LOADING THE APP TO THE MOBILE DEVICE.
The PROJECTBUCKET field must have a different name than the DB.
The criterion we have defined is to identify each skate with Idx where x is the skate number.
Now we will perform three operations, which are represented graphically in the following interface:
- Registering a skate
- Removing a skate
- Removing the reserve of a skate
Here you will put on the idx of the skate and perform the operation we tell you to do.
Let's start by registering a skate in the system.
It's very simple, you write in the DDBB (from the AppInventor programming) the idx that the management user enters and it is saved as free, to indicate that it has no reserve.
The blocks to be programmed are:
The other simple operation is to remove a skate from the system.
It's very simple, you write in the DDBB the idx entered by the management user and delete it. The blocks are very simple too:
Important note: In both cases it is not checked previously if it exists, but both "crush" the existing content so if it is, it is recorded and if not, nothing happens.
The last operation is to remove a reservation when the skate is returned. Today it is done by hand, but in future versions it will be done automatically (possible improvement).
Here are two parts,. First, check if it exists and second, operate in case it does. The programming is also very simple but you have to explain that first you call the method of searching the skate by its idx tag and then, depending on the result, if it is favorable it is deleted and if it is not indicated that the operation was not carried out
Programming to search for a tag, a skate idx and it will return the value if it exists and if not, a "0" if the id entered is not found
Then, depending on the result, we will release the reservation by writing freely or, on the contrary, it will be indicated that the skate does not exist.
The programming of this part is estimated to take between 45 and 75 minutes. If a student finishes before this time, we can offer him/her challenges oriented to the design of the application.
Creating the end-user application
In this part, the application will be created by the end users (they can be students, teachers, school staff, etc...) If the application were real, it could be downloaded from Google Play to rent the skates. If there is time you can explain how to upload an application to Google play, costs etc... It is attached in the appendix.
For workshops with a large group of students, one application will be created for each group of 3 or 4 students.
Our application consists of 2 parts and in both parts you need to consult the database. On the one hand, to list the skates available for booking and on the other hand, to make the reservation.
List of free skates
For this we have created a switch to list the free skates when we want to book and so that it is not refreshed every time there is a change in the database.
If the switch is activated, it will ask to update the list of free skates and it will process the event that warns us of any change in the real time database. This last one we do in case any skate changes from free to occupied or vice versa, it is notified and when listing, only those available at that moment appear.
It must be emphasized here that this is a real-time database!
Also emphasize again the database connection parameters, as before: when we add the Firebase component, which is not visible, it must be configured to point out our created database and it must be configured as shown in this figure:
- Token, empty because we haven't put authentication,.
- Configure the connection URL.
- And finally, define the basket or bucket where we are going to place the data. We have put this like this but it can be indicated in a programmatic way and not fixed. In this case it will be fixed.
Let's put the blocks of the two main functionalities, in which there is one in common: the event of collecting the data after telling it to get a value from the Database. To differentiate when it is requested for the search of free skates or when it is due to a reservation.
We are going to do this by changing the value of a global variable, called Status:
Search and list of free skates
To do this we will ask for all the idx skates in the DB, and from the list, we will ask for those that are free to show in the label. We explain it below, individually:
This first one is executed every time the switch is activated or deactivated. If it is deactivated, we empty the list of free skates and if not, we ask for all the skates to see their status:
This block will request that for each skate in the DDBB, it will "tell" you if it is free, and for that it has previously set the variable to State 1 (for that part to be executed). Here the important thing of this block is to know how to use the for each item. That is, for each item found in the database that gives us the status.
And now the update, taking the part of Status=1 of the reading block of the status values of each skate that the previous block indicated to us.
This whole part can be confusing but it can be summarized in three actions:
When the switch is active, it triggers a search for all the skate tags in the database.
The result of that list implies us to make a search for each one of them, of its value, to know if it is free or occupied. And finally, in case the skate is free, it is painted in the label in an incremental way to the value it already had.
Many users could be booking a skate at a certain time. Then the same steps are performed: every time the database changes and we have the switch activated, the list of free skates will be refreshed automatically. It is the same code as when we activate the switch manually but here the one that generates it is any change in the database.
Booking a skate
This second part consists of the booking of a skate where the user will put the idx of the skate together with the booking data (name, password, etc... ). It is very simple because the only thing that is done is to check if the skate exists and if it is not occupied and in case of being this way, it reserves it marking in the BBDD the idx of the skate and the name or key that the user has put.
It is very important that you remember your reservation name or password because when the user is in front of the application of the skate you reserved, you must enter it.
Here the value of the status variable is equal to 2, so that this part is executed in the search if the skate is free or not:
If the skate is reserved, the confirmation will be indicated by a text box.


Comments