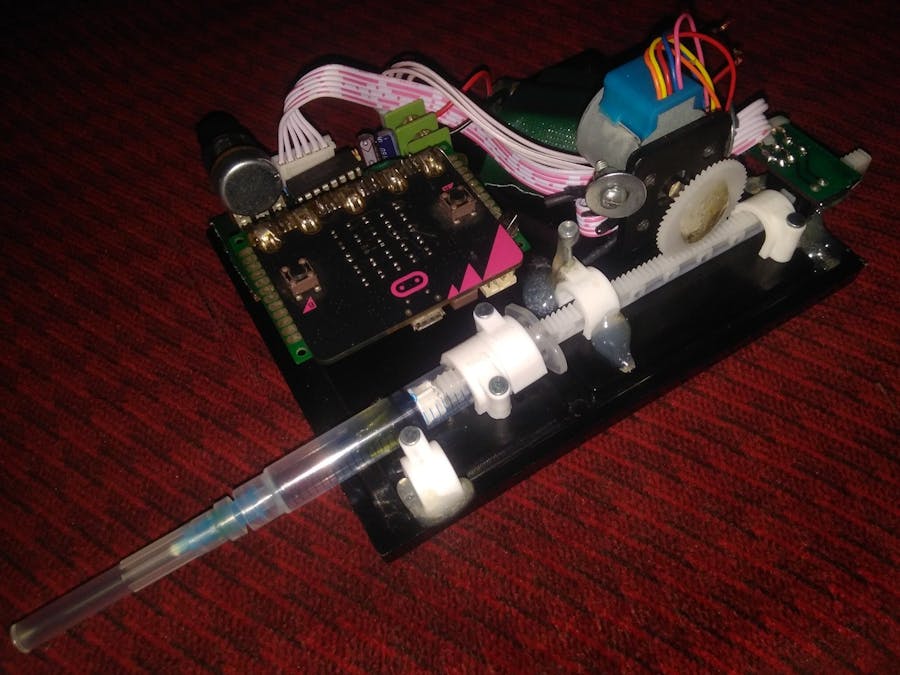
This project demonstrates an electronic fluid dropper or injecting device, which can safely transfer controlled volume of liquid periodically.
Possible Areas of Applications
- Smart injection timer for medication (Insulin)
- Controlled dropper for chemical mixing (acid in water)
- Nutrients injector for agriculture (liquid fertilizer)
- Scientific tool for fluid mechanics (mass flow rate)
- Slow burning fuel injector
Following parts are put together to assemble the hardware :-
Mechanical parts
Electronics & Electro-Mechanical parts
- Microbit : Runs safe firmware written in ADA for the system
- 3 RGY LEDs: Status and operation indication
- Protoboards: Substrate and interconnection between components
- Power Supplies: 2 LiPo Batteries for motor and CR2032 for Microbit
- Gear and Linear Drive : Convert rotary motion into linear motion
- Stepper Motor: Precise step rotation for controlled motion
- B & A button: User control for starting/stopping operation
- 20 k Pot : Timing delay adjustment input
- Plastic Breadboard Holder Base : Support base for the build
- Syringe : Hold the fluid to be injected
- Photo Interrupt : Optional position sensor
Hardware Pin Map
All the GPIO and ADC, pins are utilized as follows:-
Schematic
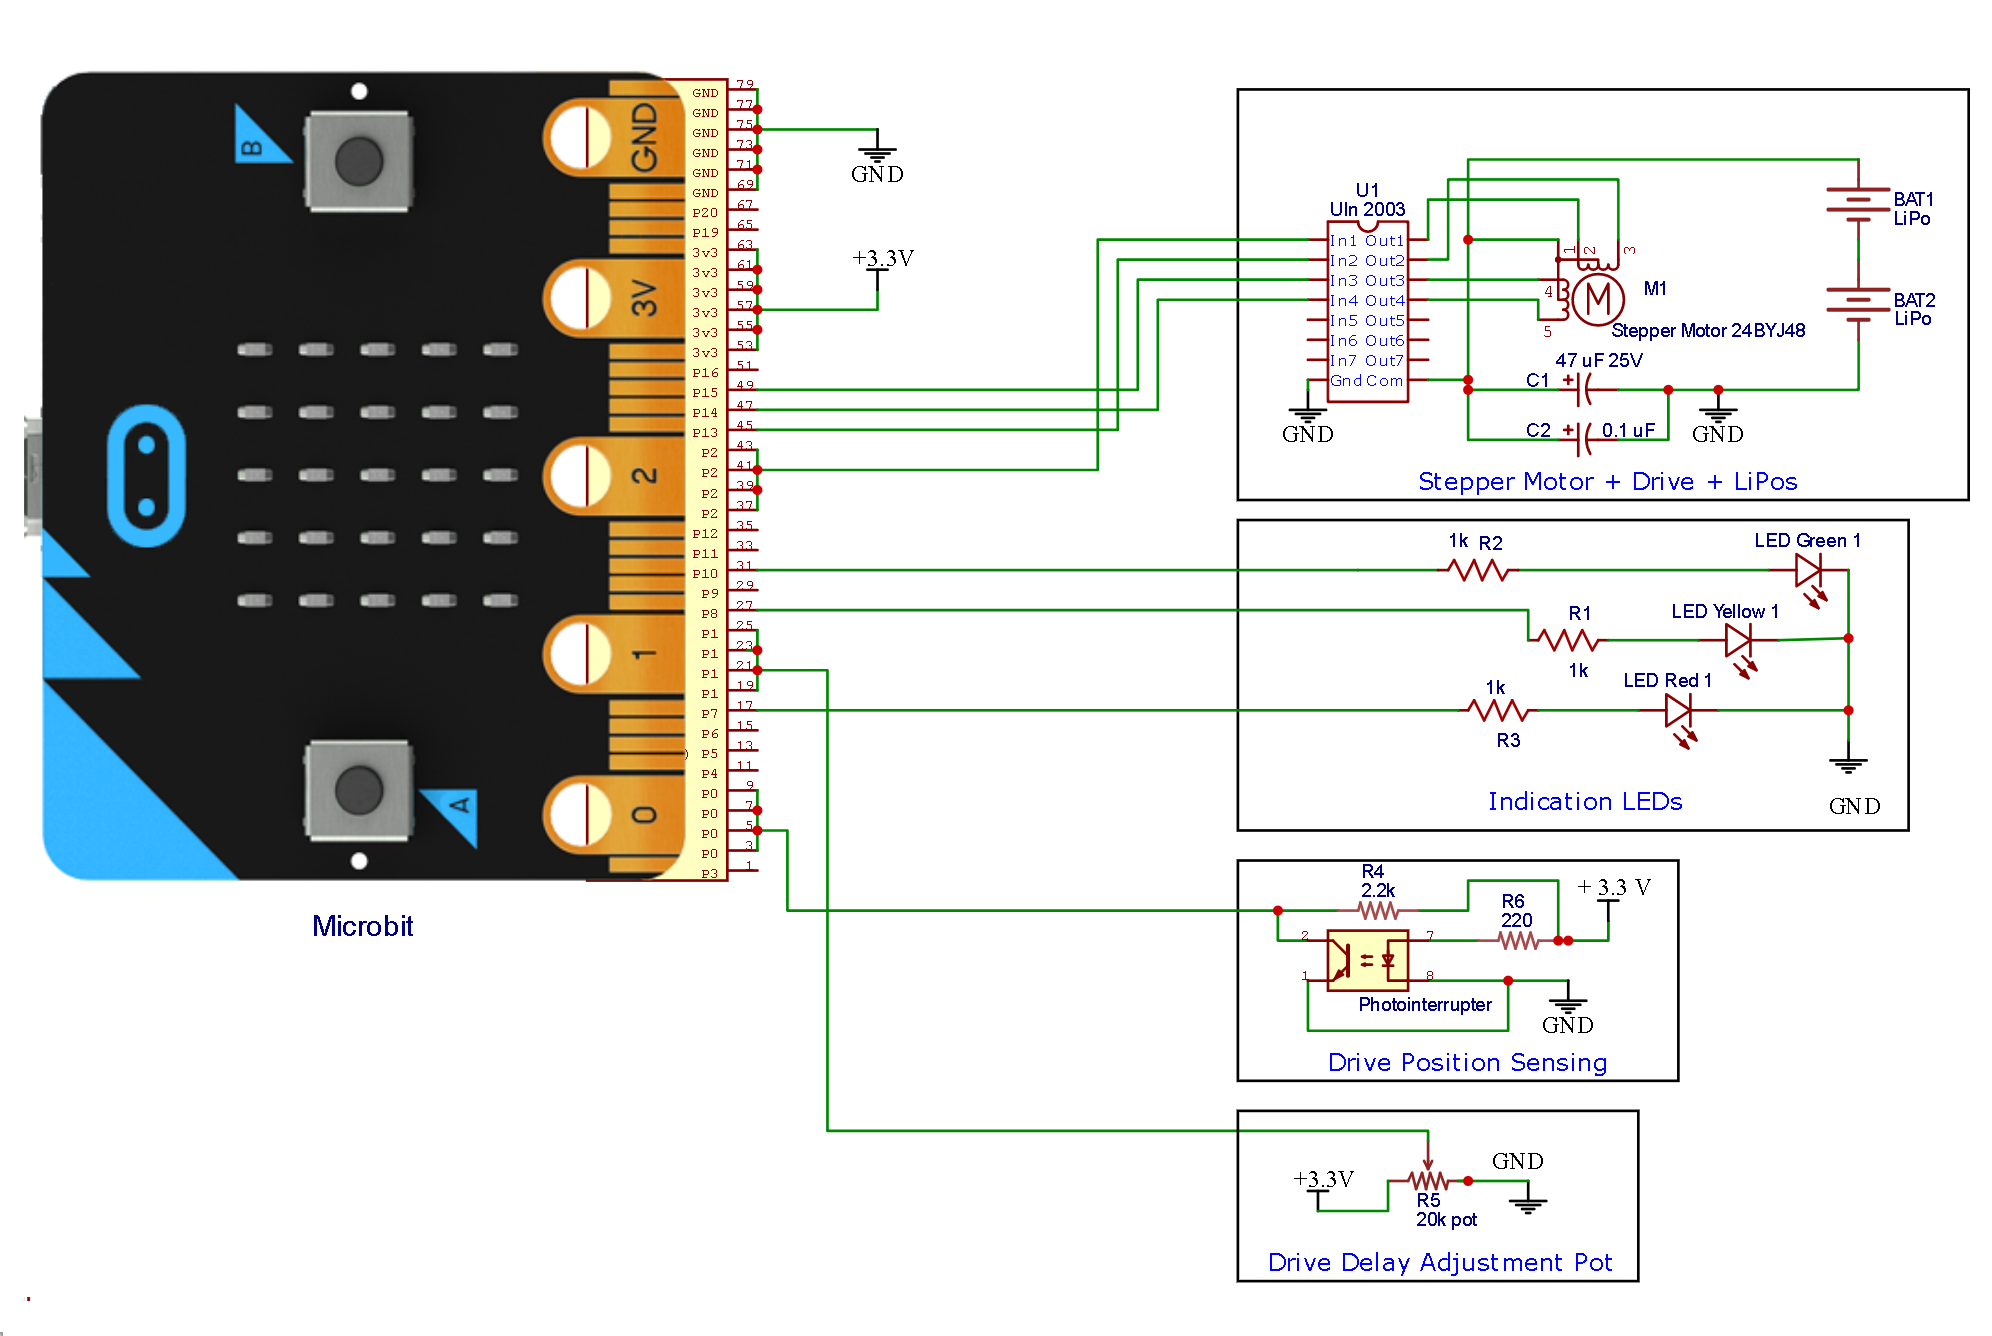
Here is the schematic for Fluid Ejection Controller hardware prototype :-
Build
On a piece of breadboard holder base, a 3ml syringe and a stepper motor is attached with screw, cable clip. Hot glue and epoxy glue is applied as needed:-
Microbit, other electronics components and necessary connectors are soldered together on a protoboard :-
All the wiring are connected according to the schematic to complete the circuit:-
- GNAT IDE: download and install GNAT Studio
- ARM Driver: download and install ARM Elf Driver
- Example Codes : https://github.com/AdaCore/Ada_Drivers_Library
Install all of these in the same directory/folder.
Where to start: GNAT Programming StudioAfter downloading/installing GNAT IDE, arm driver into the same directory, open example code from :
C:\GNAT\2019\share\gps\templates\microbit_example
Open one of the examples (i.e. digital_out.gpr) for Microbit according to following steps and edit example project code as needed.
- Step 1: Run GPS (GNAT Programming Studio)
- Step 2: Select digital_out.gpr example project and double-click to open
- Step 3: Copy this project's code attached below and replace the example code in main.adb file
Following files are the most important files when working with GNAT Studio: -
.gpr file is the GNAT project file for a project
.adb file is the file where Ada code resides (src folder)
.ads files is where the definitions and declarations goes
Once the editing of the code is done, connect Microbit to computer with USB cable ( Windows will make ding-dong sound ).
Then click : Build > Bareboard > Flash to Board > main.adb to flash code to Microbit. The Message window below will show code size and upload percent.
If upload problem occurs, check USB cable or reinstall pyOCD
if compiler throws errors, check the code and fix those.
This prototype is designed in a way, so that it can be demonstrated easily. But for practical use, consider following issues :
- There are different kinds of stepper motor available with various step size and power output. Depending on the fluid viscosity or piston area, more powerful motors might be necessary for some other applications
- User interface on this project is very basic, a proper interface will have a display allowing user to choose different options for different types of fluid and timing sequence
- Device body should be designed in such a way so the refilling of liquid would be easier for the user
- Although stepper motor control is open-loop yet precise position can be determined entirely on the firmware, thus photo-interrupt used in this project is not necessary for position sensing. But it can help to correct the rack and pinion errors in the drive (not implemented yet).


_9nsOFQ7ama.png?auto=compress%2Cformat&w=48&h=48&fit=fill&bg=ffffff)


_3u05Tpwasz.png?auto=compress%2Cformat&w=40&h=40&fit=fillmax&bg=fff&dpr=2)
Comments
Please log in or sign up to comment.