Remember high school trigonometry ? Most, students don't know why do they need to learn such crazy stuffs ! But, if you are an engineer, programmer, scientist, astronaut, pilot, mathematician - you know the use is everywhere. This project is a practical example how trigonometry can be used for real purpose.
The project utilizes the formula : tan θ = opposite side/ adjacent side , In a right triangle.
- Using a typical HC-SR 04 ultrasonic sensor distance between the base of the wall and the device is measured (adjacent leg)
- A dot Laser is attached to the 3D magnetic sensor, the laser beam is targeted on the top part of the wall/building (which forms the hypotenuse. As the laser is adjusted to shine on the top part of the wall, it forms an angle which is measured with the 3D magnetic sensor.
- Wall height (opposite) is calculated with the above formula and shown on a epaper display.
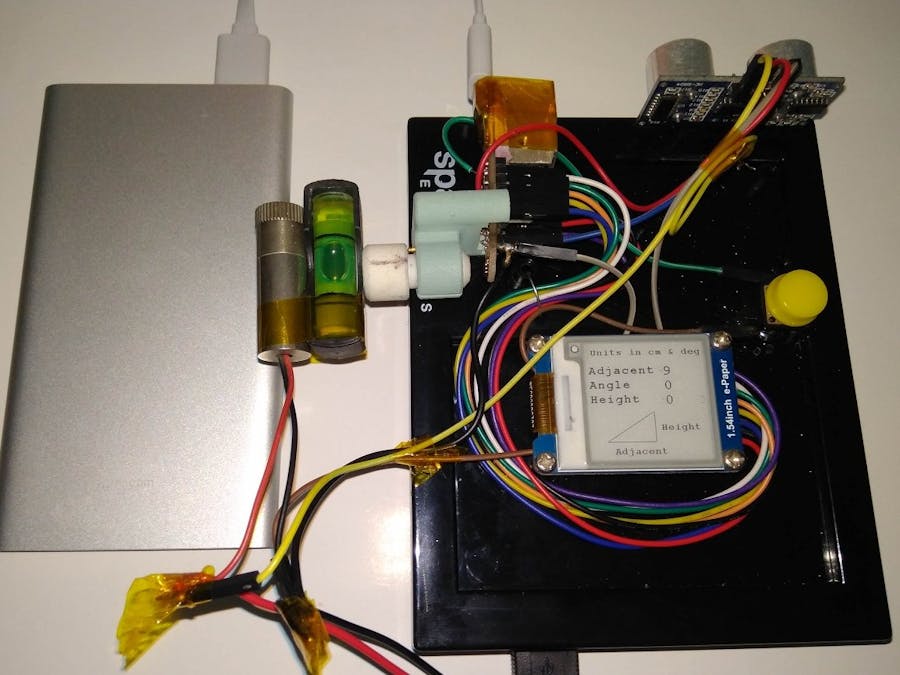
First the 3D sensor, rotary knob and XMC1100 mcu board is glued (super/hot) on a breaboard holder plastic base. A leveling piece is glued on the rotary knob to measure initial angle.
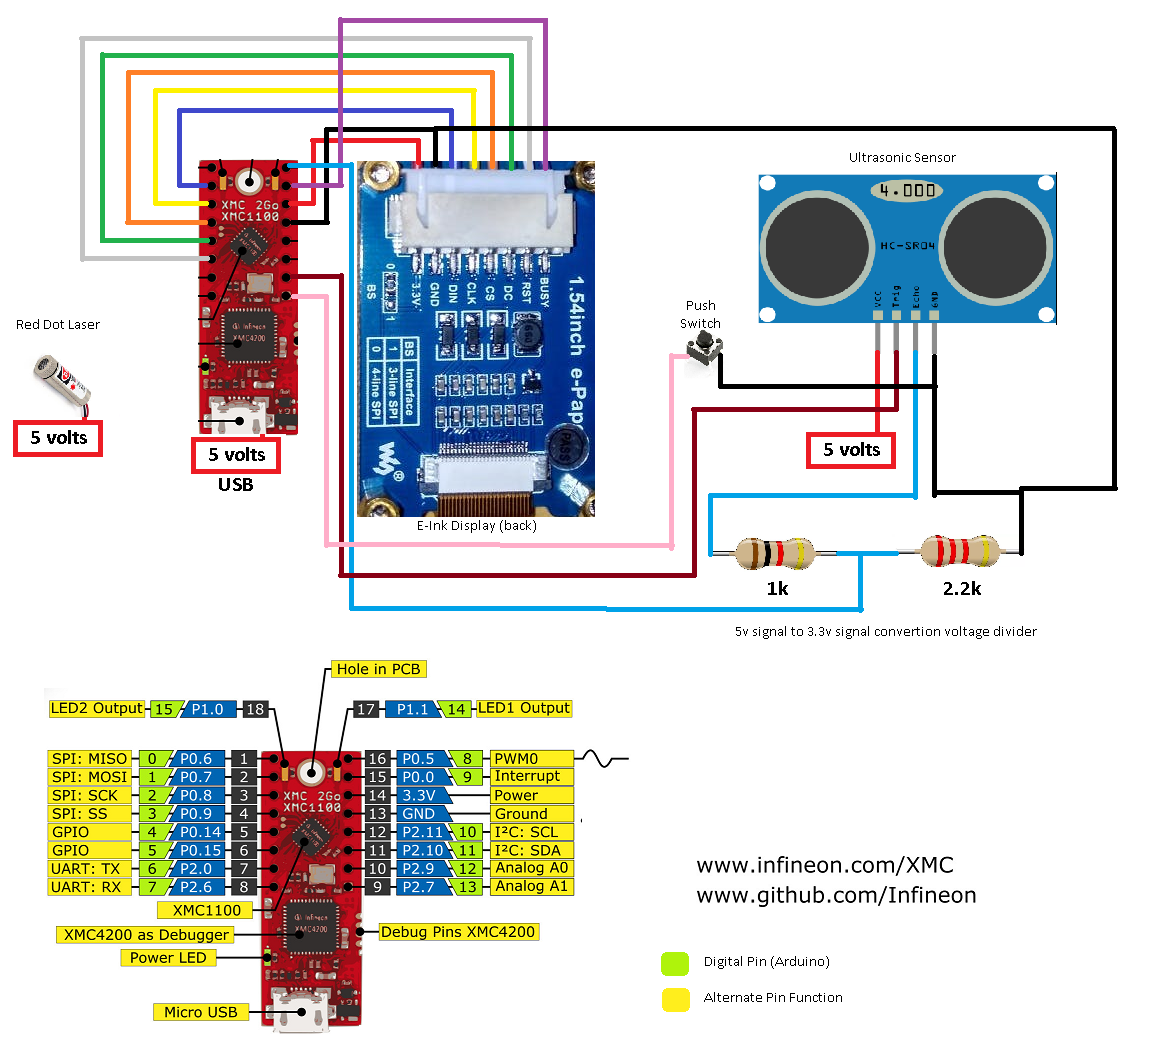
Next, HC SC04 ultrasonic sensor, a laser, a user switch and a e-ink display is placed on the board to make electrical interconnections like this :
Finally all the interconnection according to the schematic looks like this -
To program the system in Arduino IDE, the 2GO kit's board support must be added. This is done by following these steps -
- Install and run Arduino IDE 1.8.5
- Go to File > Preferences > Additional Board Manager URLs and paste https://github.com/Infineon/Assets/releases/download/current/package_infineon_index.json
Adding 2GO kit support on Arduino IDE
- Now go to Tools > Board Manager > type "xmc" in search box and download board support files
- Now, we need Library for TLE493D 3D magnetic sensor.
Go to: https://github.com/IRNAS/TLV493D-3D-Magnetic-Sensor-Arduino-Library
Download the zip library and add to IDE
- Next, Install Segger Link for communication between kit and IDE from here:
https://www.segger.com/downloads/jlink/JLink_Windows_beta.exe
- Then, go to tools and set
Board: XMC1100XMC2Go
Serial Output Selection: On-board
Port: Port 11 (select whichever new port appears after plugging kit into USB)
The following video demonstrates the device application. Enjoy -
Step 5: Conclusion
This device can be used in high school math classes in for practical experiments. Also can be used in survey for civil installations. Modified version can be used in astronomy and position sensing too.
Please note that, this system will start to produce significant measurement error if too small or too large ( above 80 degrees ) angle are measured. In other words, objects with few cm height or hundred meters height will cause instrumentation error due to ultrasonic distance resolution, 3D magnetic sensor angular resolution, design alignments mismatch. It is also important to put the device with 2-3 meter of the base of the target object. Since, HC SR-04 ultrasonic sensor can measure upto 4 meters with 1-2 cm accuracy. This is a prototype design, for more accuracy, proper alignment and use of higher resolution sensors are recommended.


_3u05Tpwasz.png?auto=compress%2Cformat&w=40&h=40&fit=fillmax&bg=fff&dpr=2)
Comments
Please log in or sign up to comment.