This project is about detecting tampering/warranty void of sensitive or secured products like electronic meters, measurement instruments or consumer products like laptops, smart TVs against unauthorized tampering/repair attempts and modification of device from consumers side.
The idea is to develop a detection system using TLV493D 3D magnetic sensor, XMC1100 MCU and E-ink display inside the chassis or enclosure of such products.
The system will be ultra low power, robust and reliable for detecting warranty void and tampering attempts and work as a reminder.
- The magnetic sensor detects any enclosure opening.
- The XMC1100 works as the host MCU to communicate with sensor & display.
- The E-ink (e-paper) display serves as a dynamic tag for information.
All these options are realized as a low power solution, thanks to the low power sensor and display. The E-ink display will be attached on the product's enclosure, magnets will be placed inside the target products such a way that trying to open the product will cause the magnetic sensor to detect tampering. The MCU will operate in periodic wake-check_sensor-sleep cycle.
E-ink display can retain data for years without power. So whenever warranty status changes only then a power up-update_info-power_down cycle will be necessary.
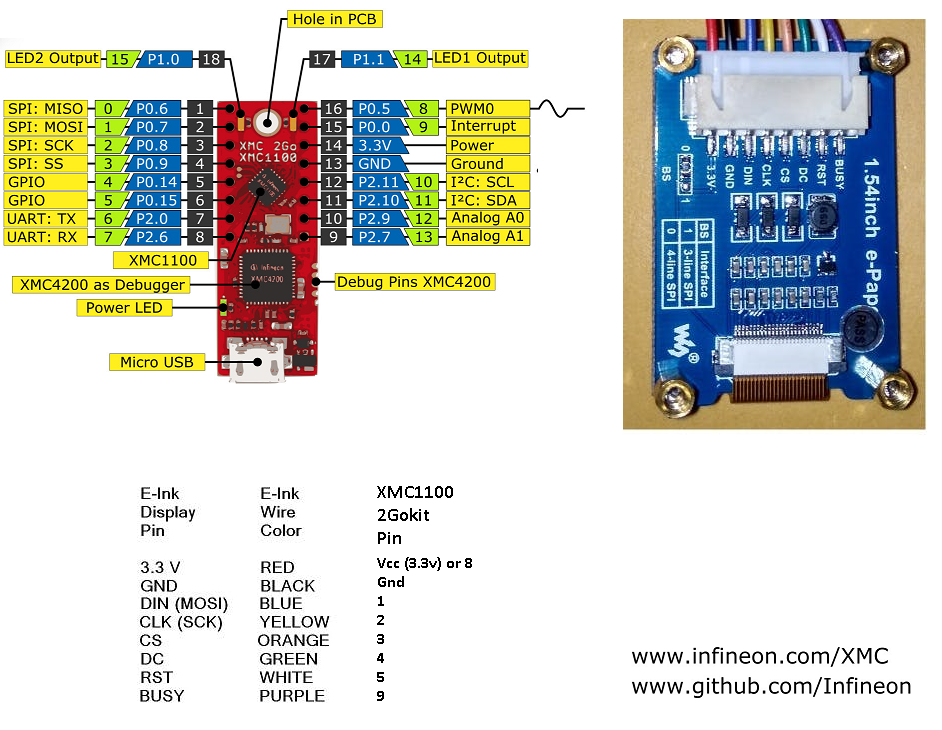
Step 1: Preparing the HardwareConnecting the hardware is very easy. The E-ink display is connected to the 2Go kit according to the schematic below.
Next the, magnetic knot is attached to the kit
To program the system in Arduino IDE, the 2Go kit board support must be added. This is done by
- Run Arduino IDE
- Go to File > Preferences > Additional Board Manager URLs and paste https://github.com/Infineon/Assets/releases/download/current/package_infineon_index.json
- Now go to Tools > Board Manager > type "xmc" in search box and download board support files
- Now, we need Library for TLE493D 3D magnetic sensor.
Go to: https://github.com/IRNAS/TLV493D-3D-Magnetic-Sensor-Arduino-Library
Download the zip library and add to IDE
- Next, Install Segger Link for communication between kit and IDE from here:
https://www.segger.com/downloads/jlink/JLink_Windows_beta.exe
- Then, go to tools and set
Board : XMC1100XMC2Go
Serial Output Selection : On Board
Port : Port 11 (select whichever new port appears after plugging kit to usb )
- Finally, download the "full code" , unzip it, open the .ino file in Arduino, compile and upload to see results !
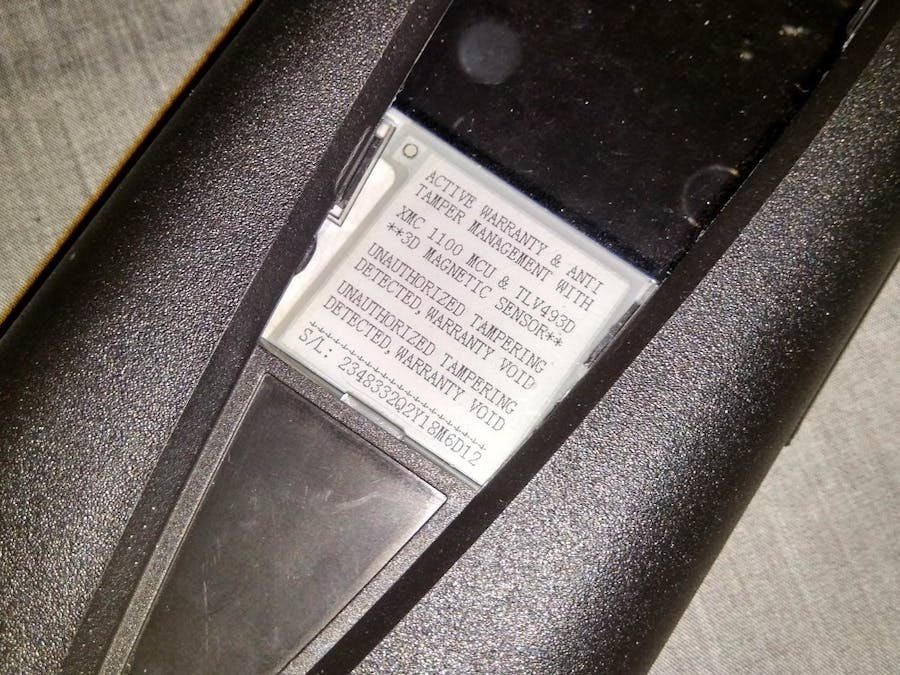
This system allows smart replacement of old warranty stickers "warranty void if sticker removed". Now product is covered under active warranty and anti-tampering protection.
A mock product enclosure/casing/cover displaying warranty info on E-ink display.
Step 4: Operation DemoTechnical Notes- Both SPI (for display) and I2C (for sensor) options are used, since there are only 2 Universal Serial Interface Channels available on XMC1100 mcu, UART serial can not be used.
- Effect of Low power option can not be realized while using XMC2Go kit because of the debugger mcu. To enable that feature system must be designed with XMC1100 mcu only.
- E-ink display can retain data even after power down for years


Comments
Please log in or sign up to comment.