Building the cluster
Building the rack
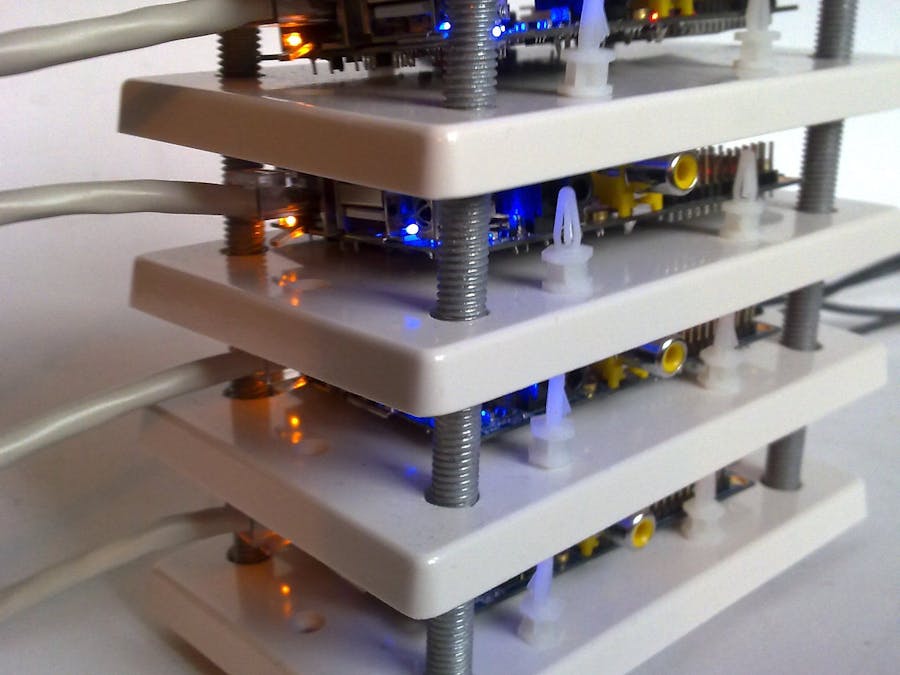
I built a rack for the Banana Pi boards using blanking plates for mains sockets, and four large bolts. I made a wooden template from a piece of MDF, and used the template to drill holes in each of the banking plates. I drilled small holes for plastic PCB supports which I use to hold each board in place. The bolts are inserted through the holes at the corners of the blanking plates, and held in place with glue.
I placed the Pi computers in the rack, and connected them to the ethernet switch.
Set up rsync and ssh
The master node uses rsync over ssh to synchronize cached files.
All the pages on this site are cached, meaning each page is stored in a static file in the web root directory tree, so we just need to sync the web root folder. There's no need to synchronize the databases or scripts in each node.
Set up the master node's ssh keys
This process is initiated when the admin user clicks on the 'Build Cache' button, so it runs as user www-data. This means user www-data needs ssh keys to log into the other nodes.
Normally a user's ssh keys would be stored in that user's home directory. Www-data's home directory is /var/www. It isn't safe to put the ssh keys in the web root directory where anyone could download them, so I've put them in /usr/share/pyplate/.ssh.
I used this command to start a shell as user www-data:
exec sudo -u www-data -s
Then I created the .ssh directory and made sure it can only be accessed by www-data:
cd /usr/share/pyplate
mkdir ./.ssh
chmod 700 ./.ssh
The next step is to create the ssh rsa keys:
ssh-keygen -t rsa -f ./.ssh/id_rsa
You'll be prompted to enter a pass phrase. Just hit return to leave it blank. This command will generate a pair of public and private keys in /usr/share/pyplate/.ssh.
Setting up the worker nodes
On each server, there must be a user that can write to the folders in /var/www. Rsync on the master node will log in as that user over ssh.
I changed the name of the default user on each server, and added that user to the www-data group:
sudo usermod -a -G www-data node0
Reboot for changes to take effect:
sudo reboot
Change the owner and permissions of /var/www:
Create a directory where ssh keys will be stored:
Transfer master node's public key to each of the worker nodes:
cat ./.ssh/id_rsa.pub | ssh node0@192.168.1.20 'cat >> ./.ssh/authorized_keys'
cat ./.ssh/id_rsa.pub | ssh node1@192.168.1.21 'cat >> ./.ssh/authorized_keys'
cat ./.ssh/id_rsa.pub | ssh node2@192.168.1.22 'cat >> ./.ssh/authorized_keys'
You'll be prompted for a password each time you execute these commands. Once you've transferred the keys you should be able to ssh from the master node to the server nodes without being prompted for a password. Test your ssh set up by running this command on the master node:
ssh node0@192.168.1.20
If you are prompted for a password, go back and check the previous steps.
Rsync
I modified the code in pyplate to execute a script when the cache is built. When the admin user clicks on the button to 'Build the Cache' on the Caching page, the cache is built in the normal way, and then a script named sync.sh is called. This script uses rsync to copy the contents of /var/www to each of the worker nodes:
rsync -a --no-perms -e "ssh -i /usr/share/pyplate/.ssh/id_rsa" /var/www/. node0@192.168.1.20:/var/www
rsync -a --no-perms -e "ssh -i /usr/share/pyplate/.ssh/id_rsa" /var/www/. node1@192.168.1.21:/var/www
rsync -a --no-perms -e "ssh -i /usr/share/pyplate/.ssh/id_rsa" /var/www/. node2@192.168.1.22:/var/www
Now when I click on the build cache button in the admin UI, the cache is built and synchronized with the other servers.
At this point, all four nodes are up and running.


Comments
Please log in or sign up to comment.