Project Abstract
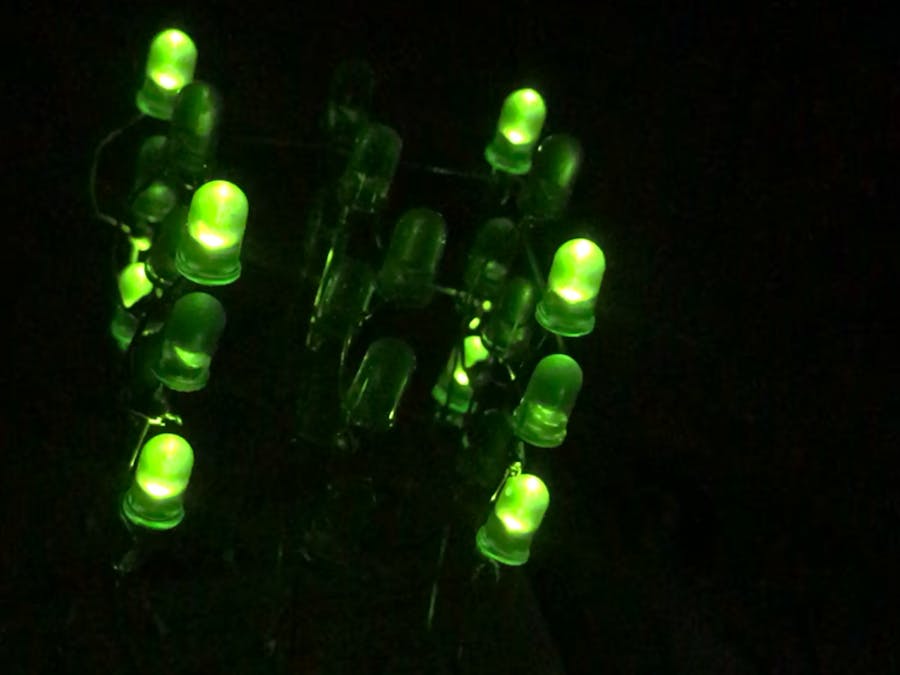
I have developed an interest in Arduino programming. This is my first Arduino project. The goal is to make an arduino-based 3D LED cube 3x3x3 which can produce different light patterns.
The LED cube is made by using 27 LEDs arranged as cubical lattice. This LED cube can be used to give 3 dimensional light patterns. A microcontroller is used to produce the light patterns.
Status
The project has been completed successfully. The apparatus is able to give the light patterns according to the arduino code.
Specifications
Hardware
I built this apparatus using an arduino-uno microcontroller. I used arduino because I had already purchased a one and had some experience with it and I wanted to learn more.
I used 27 LEDs and 9 resistors for this. I used a arduino based small voltmeter (developed by myself) to find out the forward voltage of an LED. I used 220 resistors for my project because I wanted to avoid the risk of burning the transistors of digital output pins of the arduino board due to high output current.
Structure
I welded 3 separate layers of 9 LEDs with a common anode. The welding part took a little bit of patience as I had make sure that anodes and cathodes wouldn’t get contacted. Then I completed the lattice by welding the 3 layers together forming a cubical lattice with a common cathode for each pillar of 3 LEDs. Welding 3 layers together was hard because I had to make sure that the short circuit won’t happen and had to maintain the cubical structure.
The next part was connecting the LED cube to the breadboard. Since my cubical structure is not rigid, I couldn’t connect it to the breadboard without altering the structure of the bottom layer. In order to overcome this I welded the resistors directly to the cube and connected them to the breadboard. By bending the pins of the resistors, I could keep up the structure and balance.
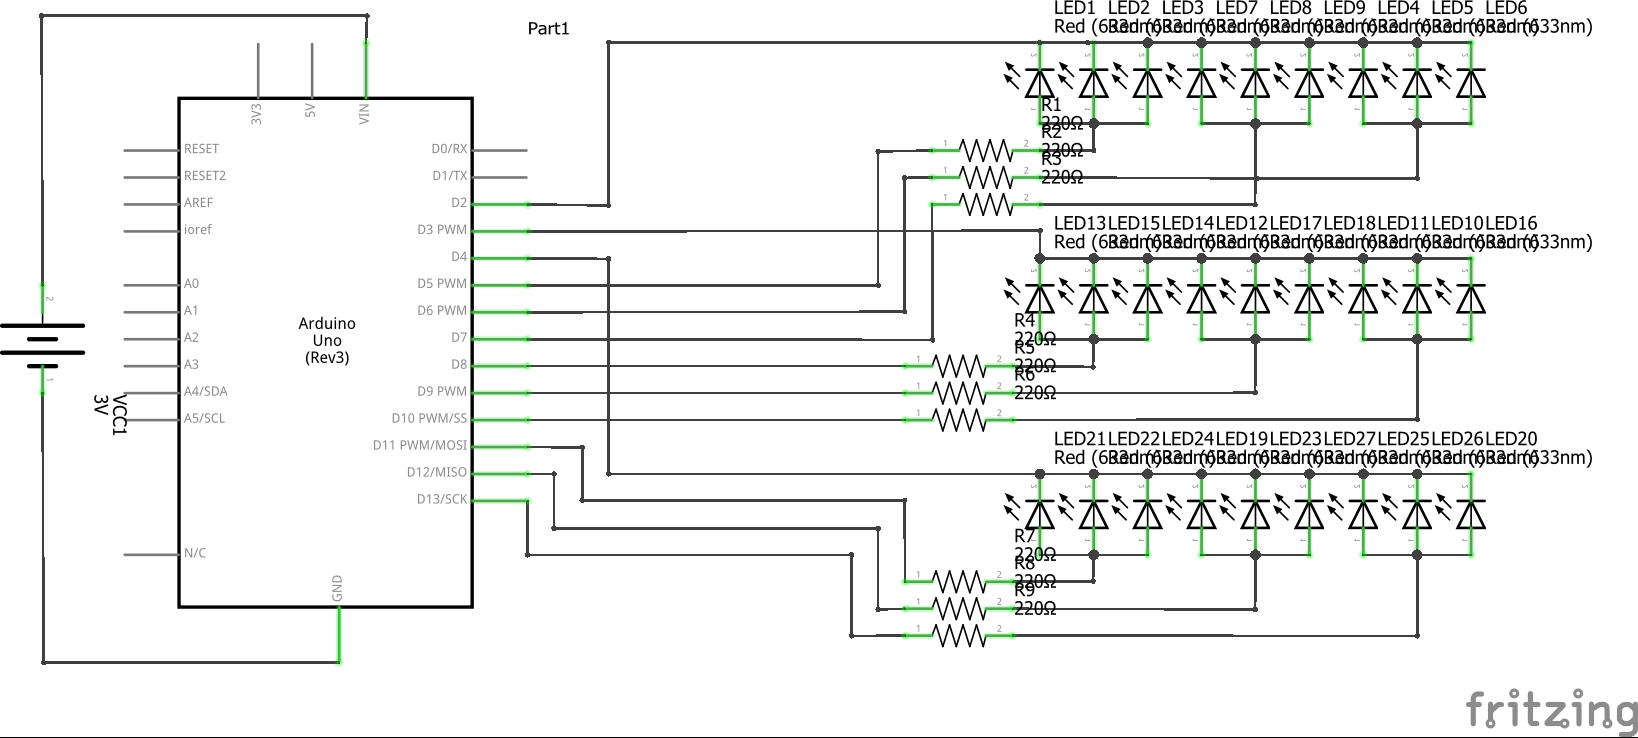
I connected the 3 common anodes of each layer and the resistors of 9 common cathodes of each pillar to the digital pins of arduino-uno board.
Implementation & Construction
LED Cube Construction
1.Carefully solder the anodes of 9 LEDs together making an E shaped structure.
2.Cut the unnecessary parts of the anode after soldering.
3.Repeat the process producing 3 such layers.
4.Solder the 3 layers together by soldering the cathodes of each pillar of LEDs together.
5.Connect the common cathodes of LED pillars to the resistors.
6.Solder wires to the each layer of common anode.
7.Connect the 9 resistors and common anodes to the digital pins of the arduino-uno board.
8.Program the arduino (Arduino Code is attached to the report).
Figure 1 - Software block diagram
Figure 2 - Hardware block diagram
Functional testing
Power
When I light up more number of LEDs, the brightness of LEDs decreased. This occurred due to low current input to LEDs. I reduce the current output from each digital pins (connected to cathodes of LED pillars) to 13.3mA. I did this because I didn't know about the maximum current output value through the digital pins. As a result of this, each LED got only 4.4 mA current. To overcome this I should replace the resistors. I’m hoping to produce a much more developed version of this cube avoiding these problems.
Unwanted LED bulbs light up problem
After I had programmed some light patterns, results was not as expected. Some LED bulbs that was programmed to be turned off, kept turned on. I didn’t use a separate wire for each bulb so I couldn’t control each bulb separately. In order to overcome this problem I blinked some lights with intervals of 10ms. So it appeared to be lighten up continuously since the brain can’t process the difference.
Retrospective
I’m glad that I chose and finished this project successfully. This was my first project on Arduino platform.Programming arduino makes much fun and gives productive experience.
One thing I learned from this is that we can create an illusion using the delay() function and turning on and turning off some LED bulbs. I’m looking forward to develop this cube and increase its size, and also replace the arduino uno board with an arduino-nano board since it takes lesser space.


_ztBMuBhMHo.jpg?auto=compress%2Cformat&w=48&h=48&fit=fill&bg=ffffff)


Comments