What would it be like to visualize data from Walabot Sensors into Virtual Reality? And maybe use it to sense moving objects in front of us.
WalabotImagine seeing through solid objects? Sense moving objects in 3D space? Sense breathing?
The Walabot is whole new way for sensing the space around you using low power radar.
Walabot senses the environment by transmitting, receiving and recording signals from multiple antennas. The broadband recordings from multiple transmit-receive antenna pairs are analyzed to reconstruct a three dimensional image of the environment.
Getting StartedWhen I first received my Walabot, I used the walabot api tutorial Guide. Then I started looking at example walabot projects. I found this one:
https://github.com/Walabot-Projects/Walabot-SensorTargets
Walabot - Sensor TargetsThis app displays graphically the targets given by a Walabot over it's arena.
How to use- Install the Walabot SDK and the WalabotAPI Python library using pip.
- Run
SensorTargets.py.
It helped me a lot to learn how the Walabot API works and try different settings.
Very useful app.
This gave me an idea to visualize this app into Virtual Reality.
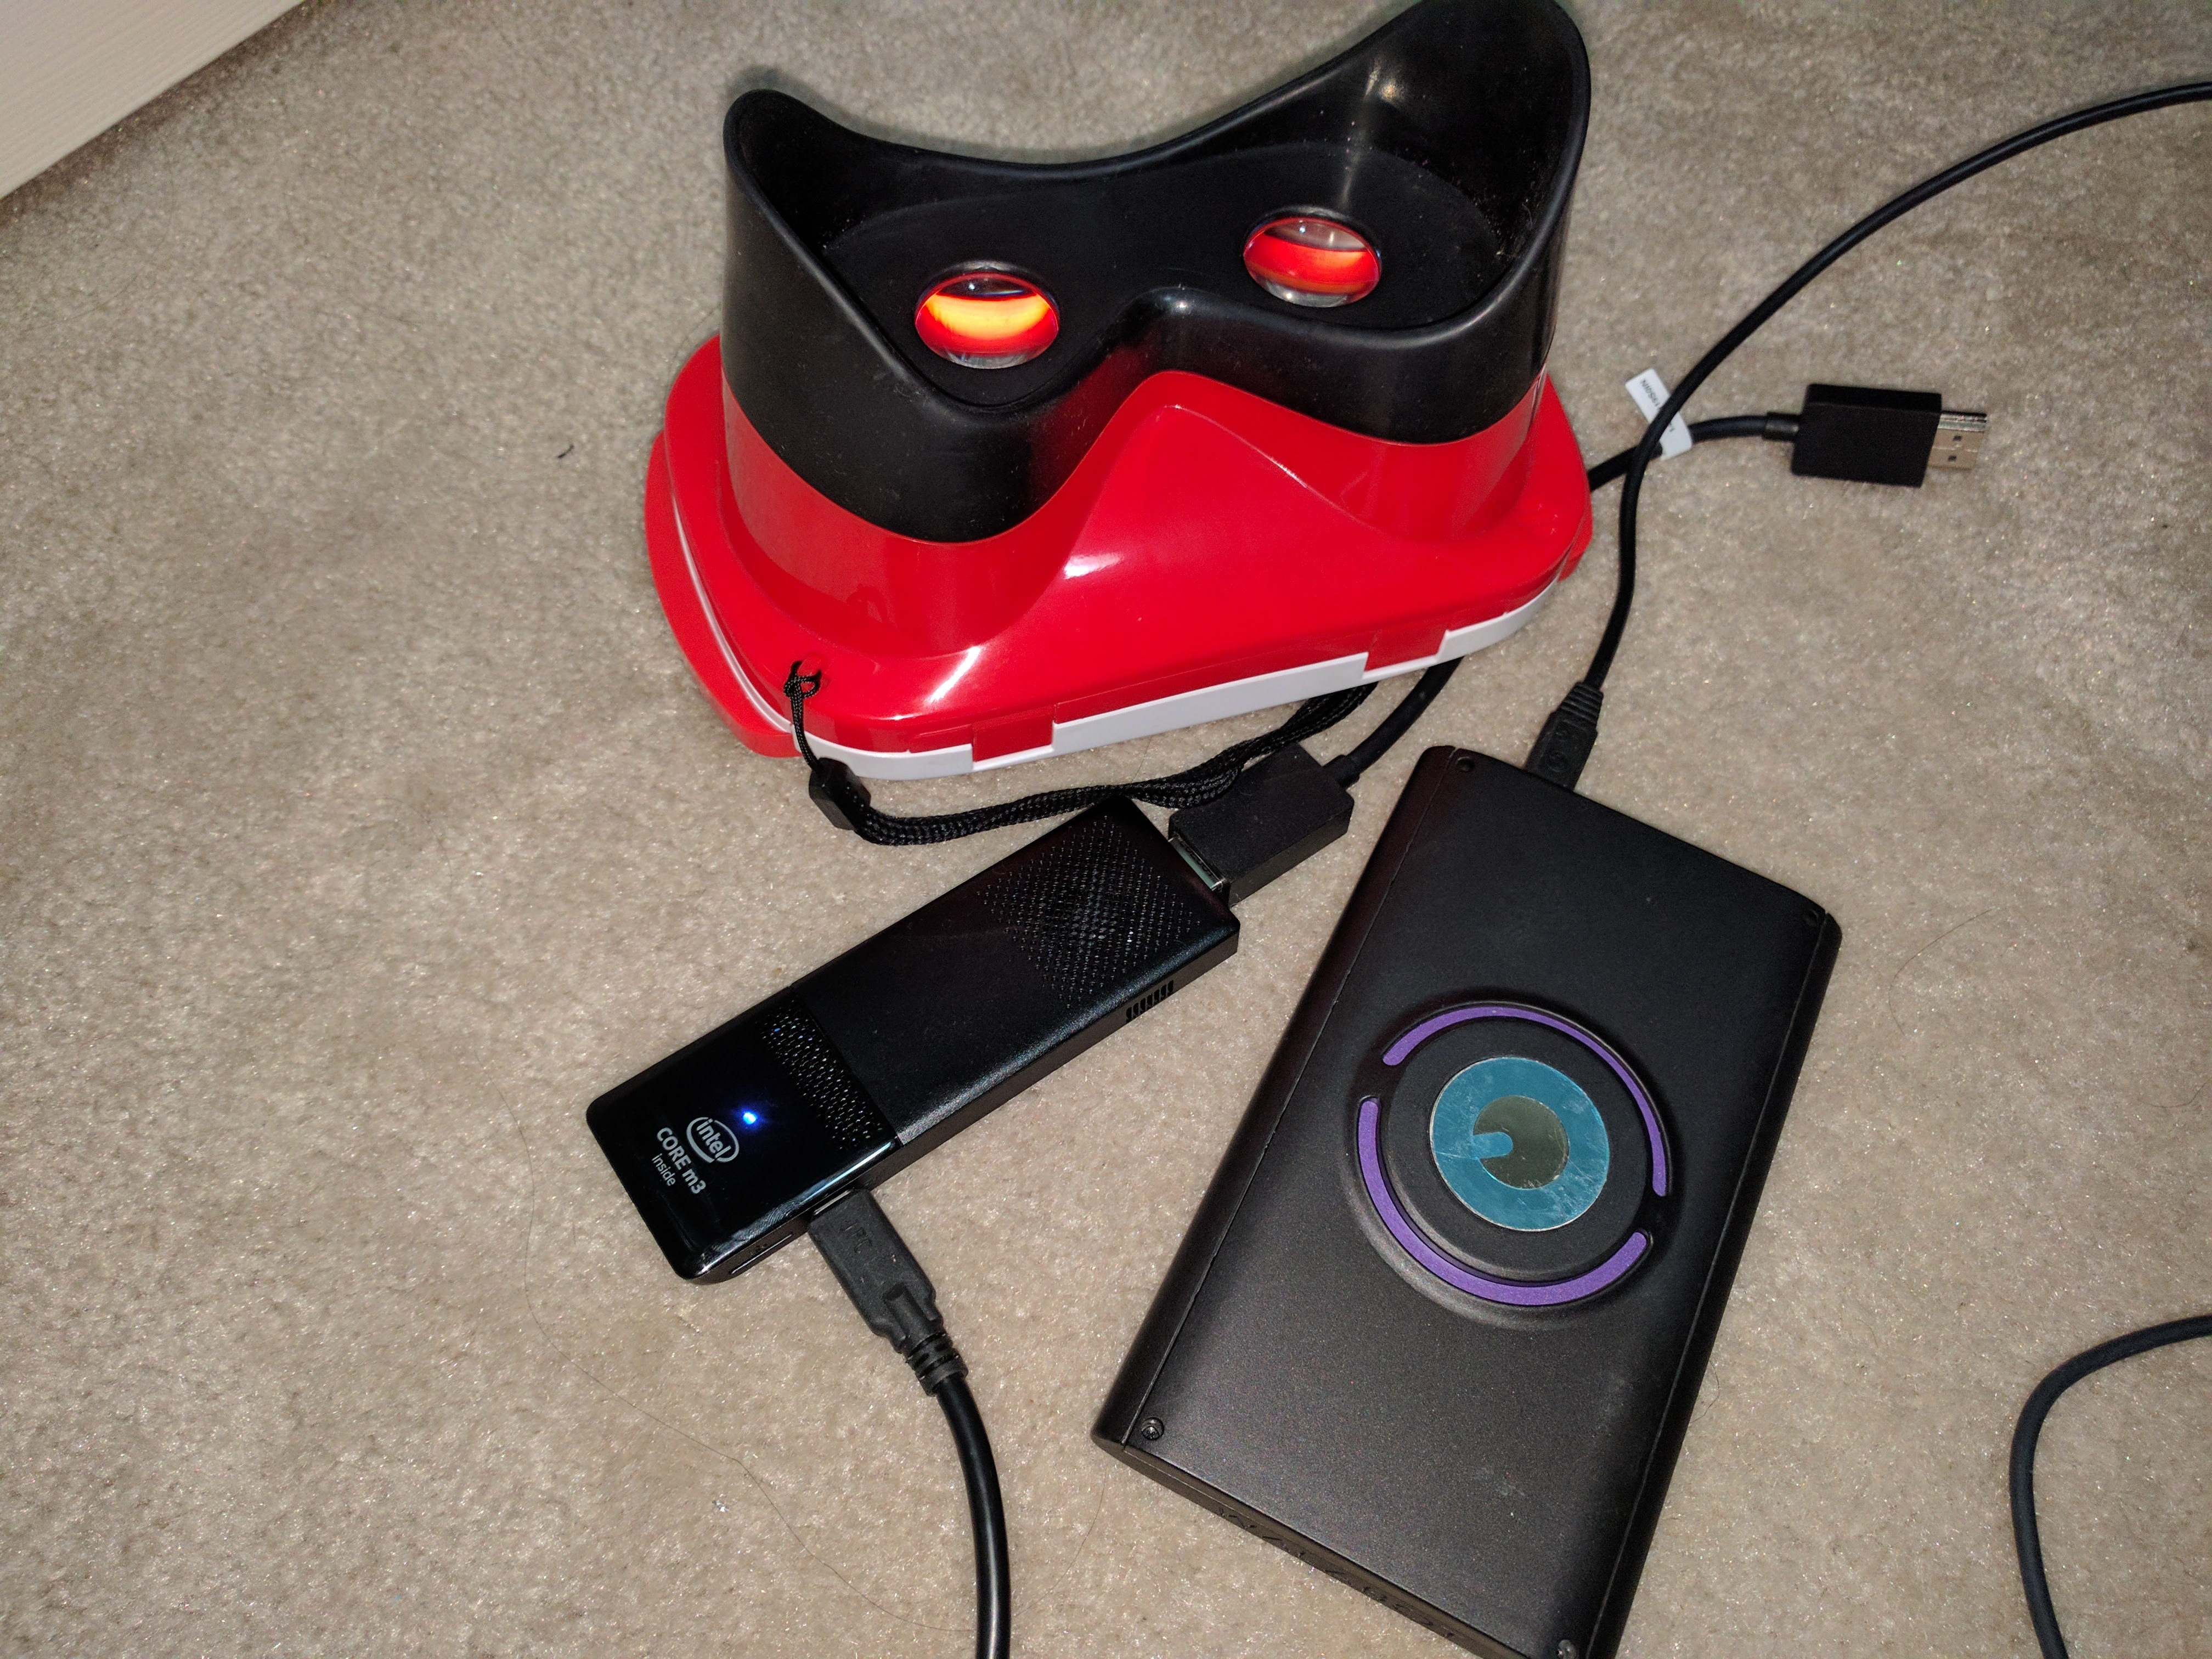
Intel Compute StickThe Intel Compute Stick is a single-board computer designed to be used in media center applications that was developed by Intel. The computer, according to Intel, is designed to be smaller than conventional desktop or other small-form-factor PCs, while keeping comparable performance.
The Intel® Compute Stick is a device the size of a pack of gum that can transform any HDMI* display into a complete computer.
The quad-core Intel® Atom™ processor delivers max performance but uses minimum power, enough to power Walabot device.
I did install full Windows 10 on it and install Walabot API. With it's small factor and processing power, it works well with Walabot rather than a Raspberry Device.
A-Frame is a web framework for building virtual reality experiences. It works on Vive, Rift, Daydream, GearVR, desktop. It was started by Mozilla VR to make WebVR content creation easier, faster, and more accessible.
A-Frame lets you build scenes with just HTML while having unlimited access to JavaScript, three.js, and all existing Web APIs. A-Frame uses an entity-component-system pattern that promotes composition and extensibility. It is free and open source with a welcoming community and a thriving ecosystem of tools and components.
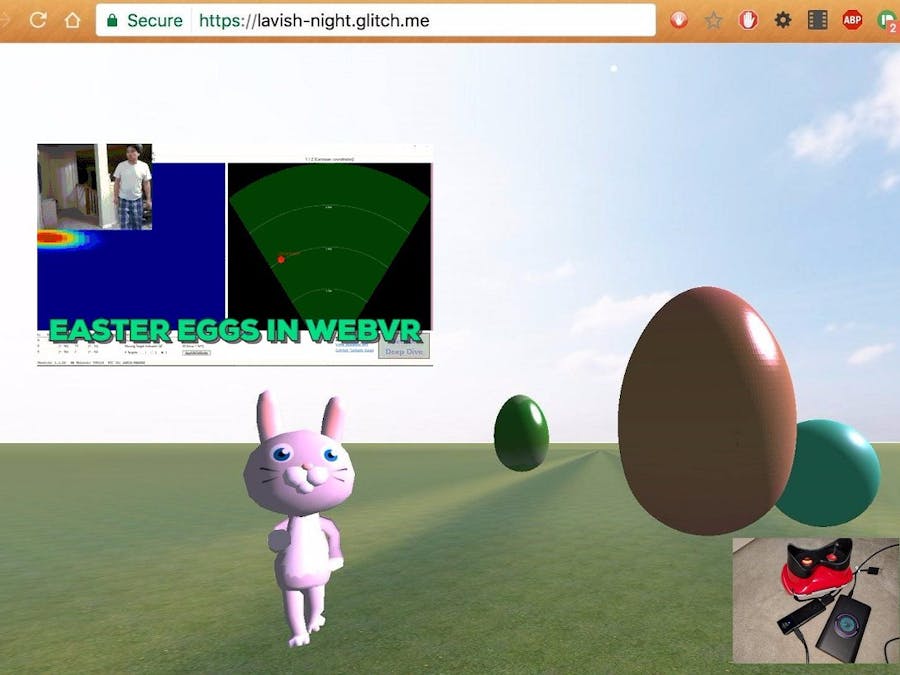
One of the projects I recently worked on using A-Frame is this Social VR Bunny. It's my Easter celebration project.
You can check it out at https://lavish-night.glitch.me/
Here's the Github Repo: https://github.com/rondagdag/aframe-social-bunny
Putting It TogetherSince it's Easter Time, I decided to extend the project a little bit more and use Walabot to place the eggs.
- What if I can visualize Walabot sensor target information and push it to VR as Easter Eggs.
Here's a video
Currently Walabot API only supports
- C#
- VB
- C++
- python
- Matlab
How about NodeJS?
So, I embarked on creating a way to stream data from python API to NodeJS.
I created a NodeJS app that communicates to a python program via sockets.
Here's the repo: https://github.com/rondagdag/walabot-vr
The python code is simple: (pyton/WalabotService.py)
from __future__ import print_function
from sys import platform
from os import system
import WalabotAPI as wlbt
import socket, sys
if __name__ == '__main__':
	wlbt.Init()  # load the WalabotSDK to the Python wrapper
	wlbt.SetSettingsFolder()  # set the path to the essetial database files
	wlbt.ConnectAny()  # establishes communication with the Walabot
	wlbt.SetProfile(wlbt.PROF_SENSOR)  # set scan profile out of the possibilities
	wlbt.SetThreshold(35)
	wlbt.SetArenaR(50,400,4)
	wlbt.SetArenaPhi(-45,45,2)
	wlbt.SetArenaTheta(-20,20,10)
	wlbt.SetDynamicImageFilter(wlbt.FILTER_TYPE_MTI)  # specify filter to use
	wlbt.Start()  # starts Walabot in preparation for scanning
	system('cls' if platform == 'win32' else 'clear')  # clear the terminal
	numOfTargetsToDisplay = 1
	if len(sys.argv) == 2:
		TCP_IP = '127.0.0.1'
		TCP_PORT = int(sys.argv[1])
		s = socket.socket(socket.AF_INET, socket.SOCK_STREAM)
		s.bind((TCP_IP, TCP_PORT))
		s.listen(1)
		conn, addr = s.accept()
		while True:
			wlbt.Trigger()  # initiates a scan and records signals
			targets = wlbt.GetSensorTargets()  # provides a list of identified targets
			finds = '{"targets": ['
			index = 0
			for i, t in enumerate(targets):
				if i < numOfTargetsToDisplay:
					index += 1
					print('Target {}\nx = {}\ny = {}\nz = {}\n'.format(i+1, t.xPosCm, t.yPosCm, t.zPosCm))
					finds += '{"x": "%s", "y": "%s", "z": "%s"}' % (t.xPosCm, t.yPosCm, t.zPosCm)
					#if index < len(targets):
					#	finds += ','
			finds += ']}'
			my_str = 'TARGETS%s' % finds
			conn.sendall(str.encode(my_str))
		conn.close()
		wlbt.Stop()  # stops Walabot when finished scanning
		wlbt.Disconnect()  # stops communication with Walabot
Open a socket, Get Sensor Targets from Walabot then send it thru the socket. It formats to a json file to make it easy to parse in javascript.
The NodeJS program looks like this. (walabot.js)
It runs the python script, listens to port 4003 (default port) for data coming from walabot sensors.
var child = require('child_process'),
   path = require('path'),
   net = require('net'),
   fs = require('fs');
var options = {
   encoding: 'UTF-8'
};
exports.pythonVersion = function() {
   var script = path.resolve(__dirname, 'python/version.py');
   return child.execSync('python ' + script, options);
};
exports.detector = Detector;
function Detector(conf) {
   var port = 4003;
   if (conf) {
       if (conf.port) {
           port = conf.port;
       }
   }
   var script = path.resolve(__dirname, 'python/WalabotService.py');
   var command = 'python ' + script + ' ' + port;
   child.exec(command, options, function(error, stdout, stderr) {
       if (error) {
           console.log(stderr);
       }
   });
   this.client = new net.Socket({
       readable: true
   });
   currclient = this.client;
   setTimeout(function() {
       console.log('ready');
       currclient.connect(port, '127.0.0.1');
   }, 5000); //wait 5 seconds
   this.callback = null;
   var self = this;
   var marqueur = 'TARGETS';
   var tmp_image = null;
   this.client.on('error', function(err) {
       if (err) {
           self.callback(null, err);
       }
   });
   this.client.on('data', function(data) {
       var str = data.toString('UTF-8');
       var pos = str.indexOf(marqueur);
       if (pos >= 0) {
           if (tmp_image !== null) {
               tmp_image += str.substring(0, pos);
               if (self.callback !== null) {
                   self.callback(tmp_image);
               }
           }
           tmp_image = str.substring(pos + marqueur.length);
       } else {
           tmp_image += str;
       }
   });
};
Detector.prototype.frame = function(callback) {
   this.callback = callback;
};
Testing is easy. Now I have a way to receive data in NodeJS.
var walabot = require('./walabot');
var detector = new walabot.detector({
   port: 8091
});
detector.frame(function(data) {
   console.log(data);
});
A-Frame Broadcast Component
This is a component to send and consume entity data over WebSockets for simple multi-user A-Frame. I can create server that simply relays all broadcasted data through WebSockets to the rest of the clients.
Here's the link to the original repo: https://github.com/ngokevin/aframe-broadcast-component
When the broadcast component is attached to an entity, it will emit all specified component data, the entity ID, and the parent's ID to the WebSocket server once every 10ms.
When another client receives that data, it uses it to create an element with the ID if it doesn't exist, and then sync the component data to the entity with setAttribute.
Now I can start using for simply seeing other users walk and look around in the same scene or send walabot data down to each webclient.
It's modified it a bit to work with A-Frame 0.5.0
https://github.com/rondagdag/aframe-broadcast-component
Walabot VRHere's the repo for the whole project: https://github.com/rondagdag/walabot-vr
Here are the packages it needs:
"dependencies": {
   "express": "^4.15.2",
   "serve-static": "^1.12.1",
   "socket.io": "^1.7.3"
 }
To run:
> npm install
> npm start
Here's the server code (index.js)
var walabot = require('./walabot');
var http    = require("http");              // http server core module
var express = require("express");           // web framework external module
var serveStatic = require('serve-static');  // serve static files
var socketIo = require("socket.io");        // web socket external module
Initialize Walabot Detector
var detector = new walabot.detector({
   port: 8091
});
var app = express();
app.use(serveStatic('basic', {'index': ['index.html']}));
Start Express http server and Socket.Io server
var port = process.env.PORT || 12000;
var webServer = http.createServer(app).listen(port);
// Start Socket.io so it attaches itself to Express server
var socketServer = socketIo.listen(webServer, {"log level":1});
console.log('Server started on port', port);
We rebroadcast data from each connection.
socketServer.on('connection', function (socket) {
 console.log('Connection received');
 socket.on('broadcast', function (data) {
   //console.log(data);
   socket.broadcast.emit('broadcast', data);
 });
});
Add some variables for calculating how far the markers/eggs would be in front of us.
Math.radians = function(degrees) {
 return degrees * Math.PI / 180;
};
var width = 100;
var height = 100;
var rMax = 400;
var phi = 45;
When a walabot frame is received, process each target
detector.frame(function(data) {
     //console.log(data);
     var sendQueue = [];
     //console.log(data);
     if (!data) { return; }
     var result = JSON.parse(data);
     if (!result.targets) { return; }
     console.log(result.targets);
Only process the first one, calculate position, and create a unique id, in this case egg0
collect the id, the component position and obj-model.
Then broadcast this data to each socket.io clients.
     result.targets.forEach(function addQueue(element, index, array) {
       color = "pink";
       if (index == 0)
       {
           x = (width / 2 * (element.y / (rMax * Math.sin(Math.radians(phi))) + 1))
                - (width / 2)
           z = height * (element.z / rMax)
           sendQueue.push(
               {
                   id: "egg" + index,
                   components: [ [ "position" , x  + " " + 10 + " " + -z ],
                   [ "obj-model" , "obj: #" + color + "egg-obj; mtl: #" + color + "egg-mtl" ]]
               }
           );
       }
     });
       socketServer.local.emit('broadcast', sendQueue);
       //console.log(sendQueue);
   });
Let WebServer start listening
webServer.listen(port, function () {
   console.log('listening on http://localhost:' + port);
});
The socket.io server only has to emit this. The client code handles the rest.
{
    id: egg0,
    components: [ [ "position" , "8 10 -5" ],
    [ "obj-model" , "obj: #pinkegg-obj; mtl: #pinkegg-mtl" ]]
}
Here's the Client code (basic/index.html)
I'm using a-frame, aframe-interpolate-component, a-frame-broadcast-component, aframe-extras.
<html>
 <head>
   <title>A-Frame Broadcast Component - Basic</title>
   <script src="https://aframe.io/releases/0.5.0/aframe.min.js"></script>
   <script src="lib/aframe-interpolate-component.min.js"></script>
   <script src="https://rawgit.com/rondagdag/aframe-broadcast-component/master/dist/aframe-broadcast-component.js"></script>
   <script src="https://cdn.rawgit.com/donmccurdy/aframe-extras/v3.3.4/dist/aframe-extras.min.js"></script>
   <script src="components/follow.js"></script>
 </head>
Notice the broadcast tag, need to be replaced by the location of the server
 <body>
   <a-scene broadcast="url: http://localhost:12000">
Some assets needed, like bunny rabbits and easter eggs.
    <a-assets>
       <img id="sky" src="img/sky.jpg" crossorigin="anonymous" />
       <a-asset-item id="grass" src="img/grass.jpg"></a-asset-item>
       <a-asset-item id="bunnyrabbit-obj" src="models/bunnyrabbit.obj"></a-asset-item>
       <a-asset-item id="bunnyrabbit-mtl" src="models/bunnyrabbit.mtl"></a-asset-item>
       <a-asset-item id="pinkegg-obj" src="/models/egg.obj"></a-asset-item>
       <a-asset-item id="pinkegg-mtl" src="/models/pinkegg.mtl"></a-asset-item>
       <a-asset-item id="orangeegg-obj" src="/models/egg.obj"></a-asset-item>
       <a-asset-item id="orangeegg-mtl" src="/models/orangeegg.mtl"></a-asset-item>
       <a-asset-item id="greenegg-obj" src="/models/egg.obj"></a-asset-item>
       <a-asset-item id="greenegg-mtl" src="/models/greenegg.mtl"></a-asset-item>
    </a-assets>
Here's the camera, noticed it's broadcasting the position, rotation, obj-model so it can be a multi-user experience.
The page does not define the easter eggs. It's emitted by the server and will be created and updated as it's received by socket.io client wrapped inside a-frame-broadcast-component .
     <a-entity camera look-controls wasd-controls
               broadcast="send: position, rotation, obj-model"
               obj-model="obj: #bunnyrabbit-obj; mtl: #bunnyrabbit-mtl"
               material="color: #222"
               position="0 8 0">
     </a-entity>
     <a-sphere color="#FFF" radius="0.2" shader="flat" position="0 0.2 0"></a-sphere>
     <a-entity position="0 0 0" static-body
       geometry="primitive: plane; width: 10000; height: 10000;" rotation="-90 0 0"
       material="src: #grass; repeat: 10000 10000; transparent: true; metalness:0.6; roughness: 0.4; sphericalEnvMap: #sky;"></a-entity>
     <a-sky src="#sky" rotation="0 -90 0"></a-sky>
   </a-scene>
 </body>
</html>
To learn more about aframe-broadcast-component, each time that "broadcast" is received, it will search for #egg0, if it doesn't exist, create one. loop thru all "components" parameters and set Attribute of each one.
   this.socket.on('broadcast', function (data) {
     data.forEach(function syncState (entity) {
       var el = sceneEl.querySelector('#' + entity.id);
       if (!el) {
         var parentEl = sceneEl.querySelector('#' + entity.parentId) || sceneEl;
         el = document.createElement('a-entity');
         el.setAttribute('id', entity.id);
         parentEl.appendChild(el);
       }
       entity.components.forEach(function setAttribute (component) {
         el.setAttribute(component[0], component[1]);
       });
     });
   });
Clever Indeed.
Good luck! If this project made you interested in learning more about WebVR, A-Frame, Walabot or started using Intel Compute Stick, please click the "Respect Project" button and follow me. Thanks.


_copy_P5AWOdT4dX.png?auto=compress%2Cformat&w=48&h=48&fit=fill&bg=ffffff)


Comments