Where did I get this idea?
This project started when I saw a listing of some cheap 5v impulse counter on the electronics goldmine in the spring of 2022.
The little counter reminded my of the stat/death clocks in one of my other favorite games, Team Fortress 2, specifically the ones seen on strange weapons and in the ExpirationDate short. In fact my original intention was to make a stat clock connected to one of my strange weapons in that game, however I really want sure how to do it at the time and didn't know if it would be possible at least in a stand alone device. I have recently been looking at client side app development for TF2 and may do that project in the future, who knows.
The next thing I thought of was making it for Planetside 2, after a few hours of research and advice from the Planetside2 API dev discord I found the Census API which is the backbone of many apps like Outfit Tracker, Voidwell, and FISU to name a few. Eventually after learning to use JSON for the first time as well as accessing a REST API I had the first working prototype, the problem was that the API updated way too slowly sometimes hours or even days after events happened, there had to be a better way. That's when I scrolled down the API documentation to find "PS2 Event Streaming" which was a real time websocket that would give me the data I needed. After learning how to use the websocket and parsing it's data with ArduinoWebsockets I got a tracker that counted kills in real time.
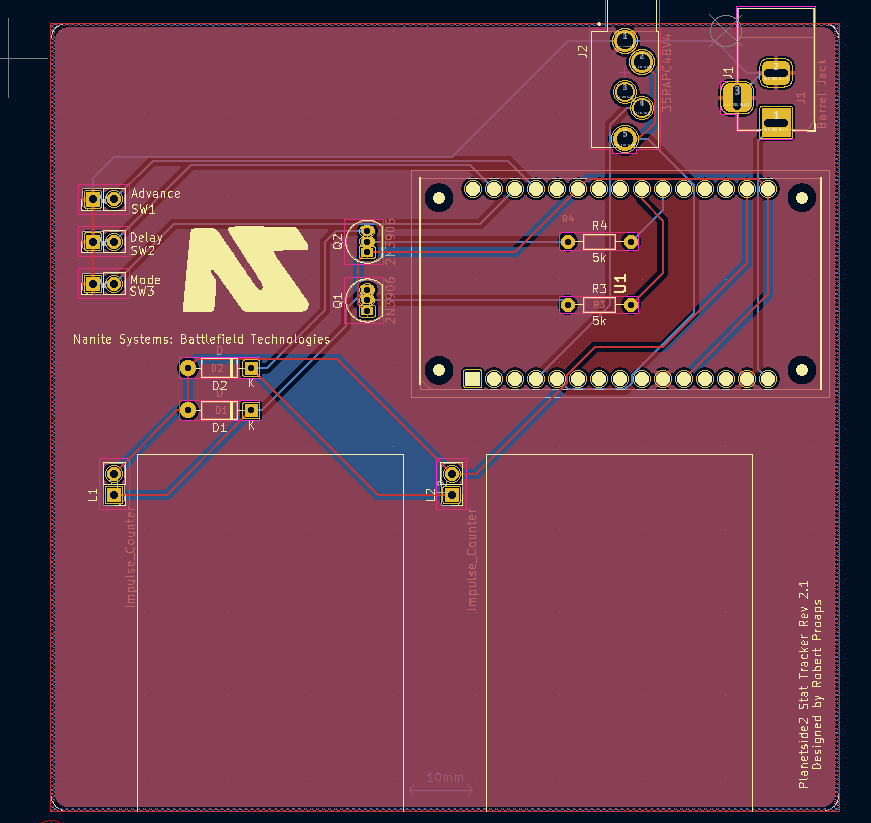
At that point this project sat on the backburner for a bit as I started college engineering classes and this last spring in 2023 I opened up my old sketches and got to work. I had to rewrite all the code to make it neater and more efficient, I troubleshooted the old circuit I completely forgot and got a working model. I promptly began to convert my drafts to schematics and PCBs, I found a case I liked and started modeling, once it all fit together I ordered parts a put it together.
Now I'm happy to say I have if not the best, the most satisfying performance tracker in the Planetside2 community, the only downside I see with my creation is it makes dying just as satisfying as getting a frag.
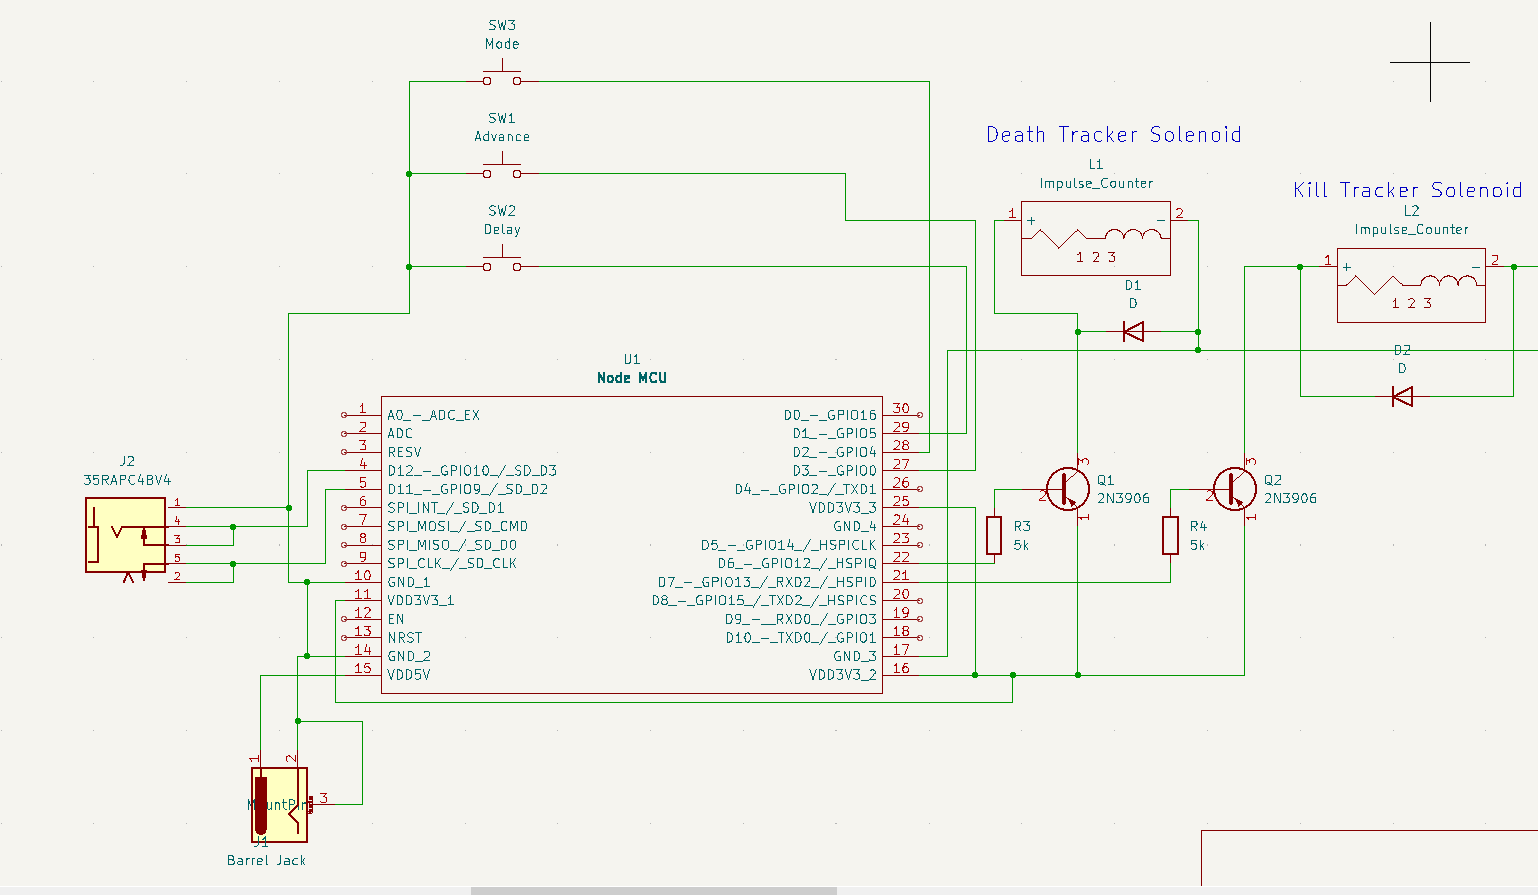
FeaturesSome features of the project are of course its analog odometer displays, being conveniently powered by a barrel jack, and an auxiliary output jack.
The output jack while not currently configures is wired to two digital pins so that hopefully in the future I may make other devices capable of being triggered by an in game event. The 3.5mm jack also provides two data channels and a ground so bus protocols like I2C are possible. While I don't yet know what I will use this for the opportunities are limitless, be it turning on a light, or launching a firework. Feel free to leave a comment of what you would do with it. I plan to post the code configured such that a kill event will pulse the tip, and a death event will pulse the ring so that potential users could easily make use of the port.
How It Works
The Stat Tracker connects to your Wi-Fi with an ESP8266, it then sends a subscription command to the Daybreak Games Census API which listens to websocket death events involving your character ID. Whenever a message is received it is parsed to see who was the attacker and who was the victim. Then it actuates the stat clock accordingly while filtering out noise such as heartbeats.
Continuing Development
I will upload videos of the tracker working very soon, and if any problems arise in the code I will try to patch the public version. Note that this project is entirely dependent on Census API, if it goes down so does the project.


_4YUDWziWQ8.png?auto=compress%2Cformat&w=48&h=48&fit=fill&bg=ffffff)


_Ujn5WoVOOu.png?auto=compress%2Cformat&w=40&h=40&fit=fillmax&bg=fff&dpr=2)

Comments
Please log in or sign up to comment.