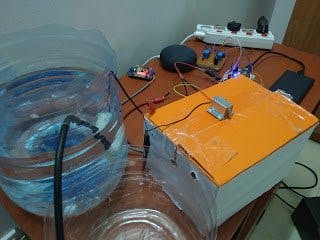
Home automation is a modern technology that modifies your home to perform different sets of tasks automatically.
In this project, I will be explaining you about my IoT Home automation using Google Home Mini and Arduino. You will be needing the Blynk and IFTTT apps for this project.
- NodeMCU DEVKIT 1.0
- Google Home Mini
- Breadboard power supply module - 3.3V/ 5V
- Solderless Breadboard - Half +
- Relay module (x4) - 5V single channel
- 5V DC mini water pump - Submersible
- Solenoid door lock - 12V DC
- RGB LED - Common anode
- Resistors (x3) - 220Ω
- Male-to-Male Jumper wires
- Female-to-Male Jumper wires
- Plug extension
- Voltage regulator/ 12V DC power adapter
- Arduino IDE
- Blynk App
- If This Then That App - IFTTT
- Standard Screwdriver (aka Flat head screwdriver)
- Soldering iron
- Solder
- (+) - 5V
- (-) - Ground (GND)
- S (Pedestal Fan) - D1
- S (Soldering station) - D2
- S (Water pump) - D3
- S (Solenoid door lock) - D4
- Red - D5
- Green - D6
- Red - D7
- (+) - 5V
For this project, you will be needing the Blynk and IFTTT app. To get started with Blynk, please visit this link:
https://blynk.io/en/getting-started
Use the example code builder to choose your hardware model and connectivity type, and copy the whole code to buffer.
Upload this code to your Microcontroller board and connect your board with Blynk app. Visit ifttt.com to get started with IFTTT. Create applets using Google Assistant and Webhooks services. Make sure that you use the same gmail address for the IFTTT account and your Google Assistant/ Google Home Mini.
Here is an example of my applet used to switch on the fan:
If anyone has any questions with the coding, please feel free to comment below or send me an email at arduinoprojectsbyr@gmail.com.
Final LookIf anyone has any questions, or suggestions, with this project, please feel free to comment below.


_3u05Tpwasz.png?auto=compress%2Cformat&w=40&h=40&fit=fillmax&bg=fff&dpr=2)


Comments
Please log in or sign up to comment.