Hey everyone
I guess you may be wondering how to stream sensor data using the Infineon's PSoC6 board and some of you may already have an idea about how this could be done. Don't worry. I will be guiding you throughout this process and I hope you enjoy this project.
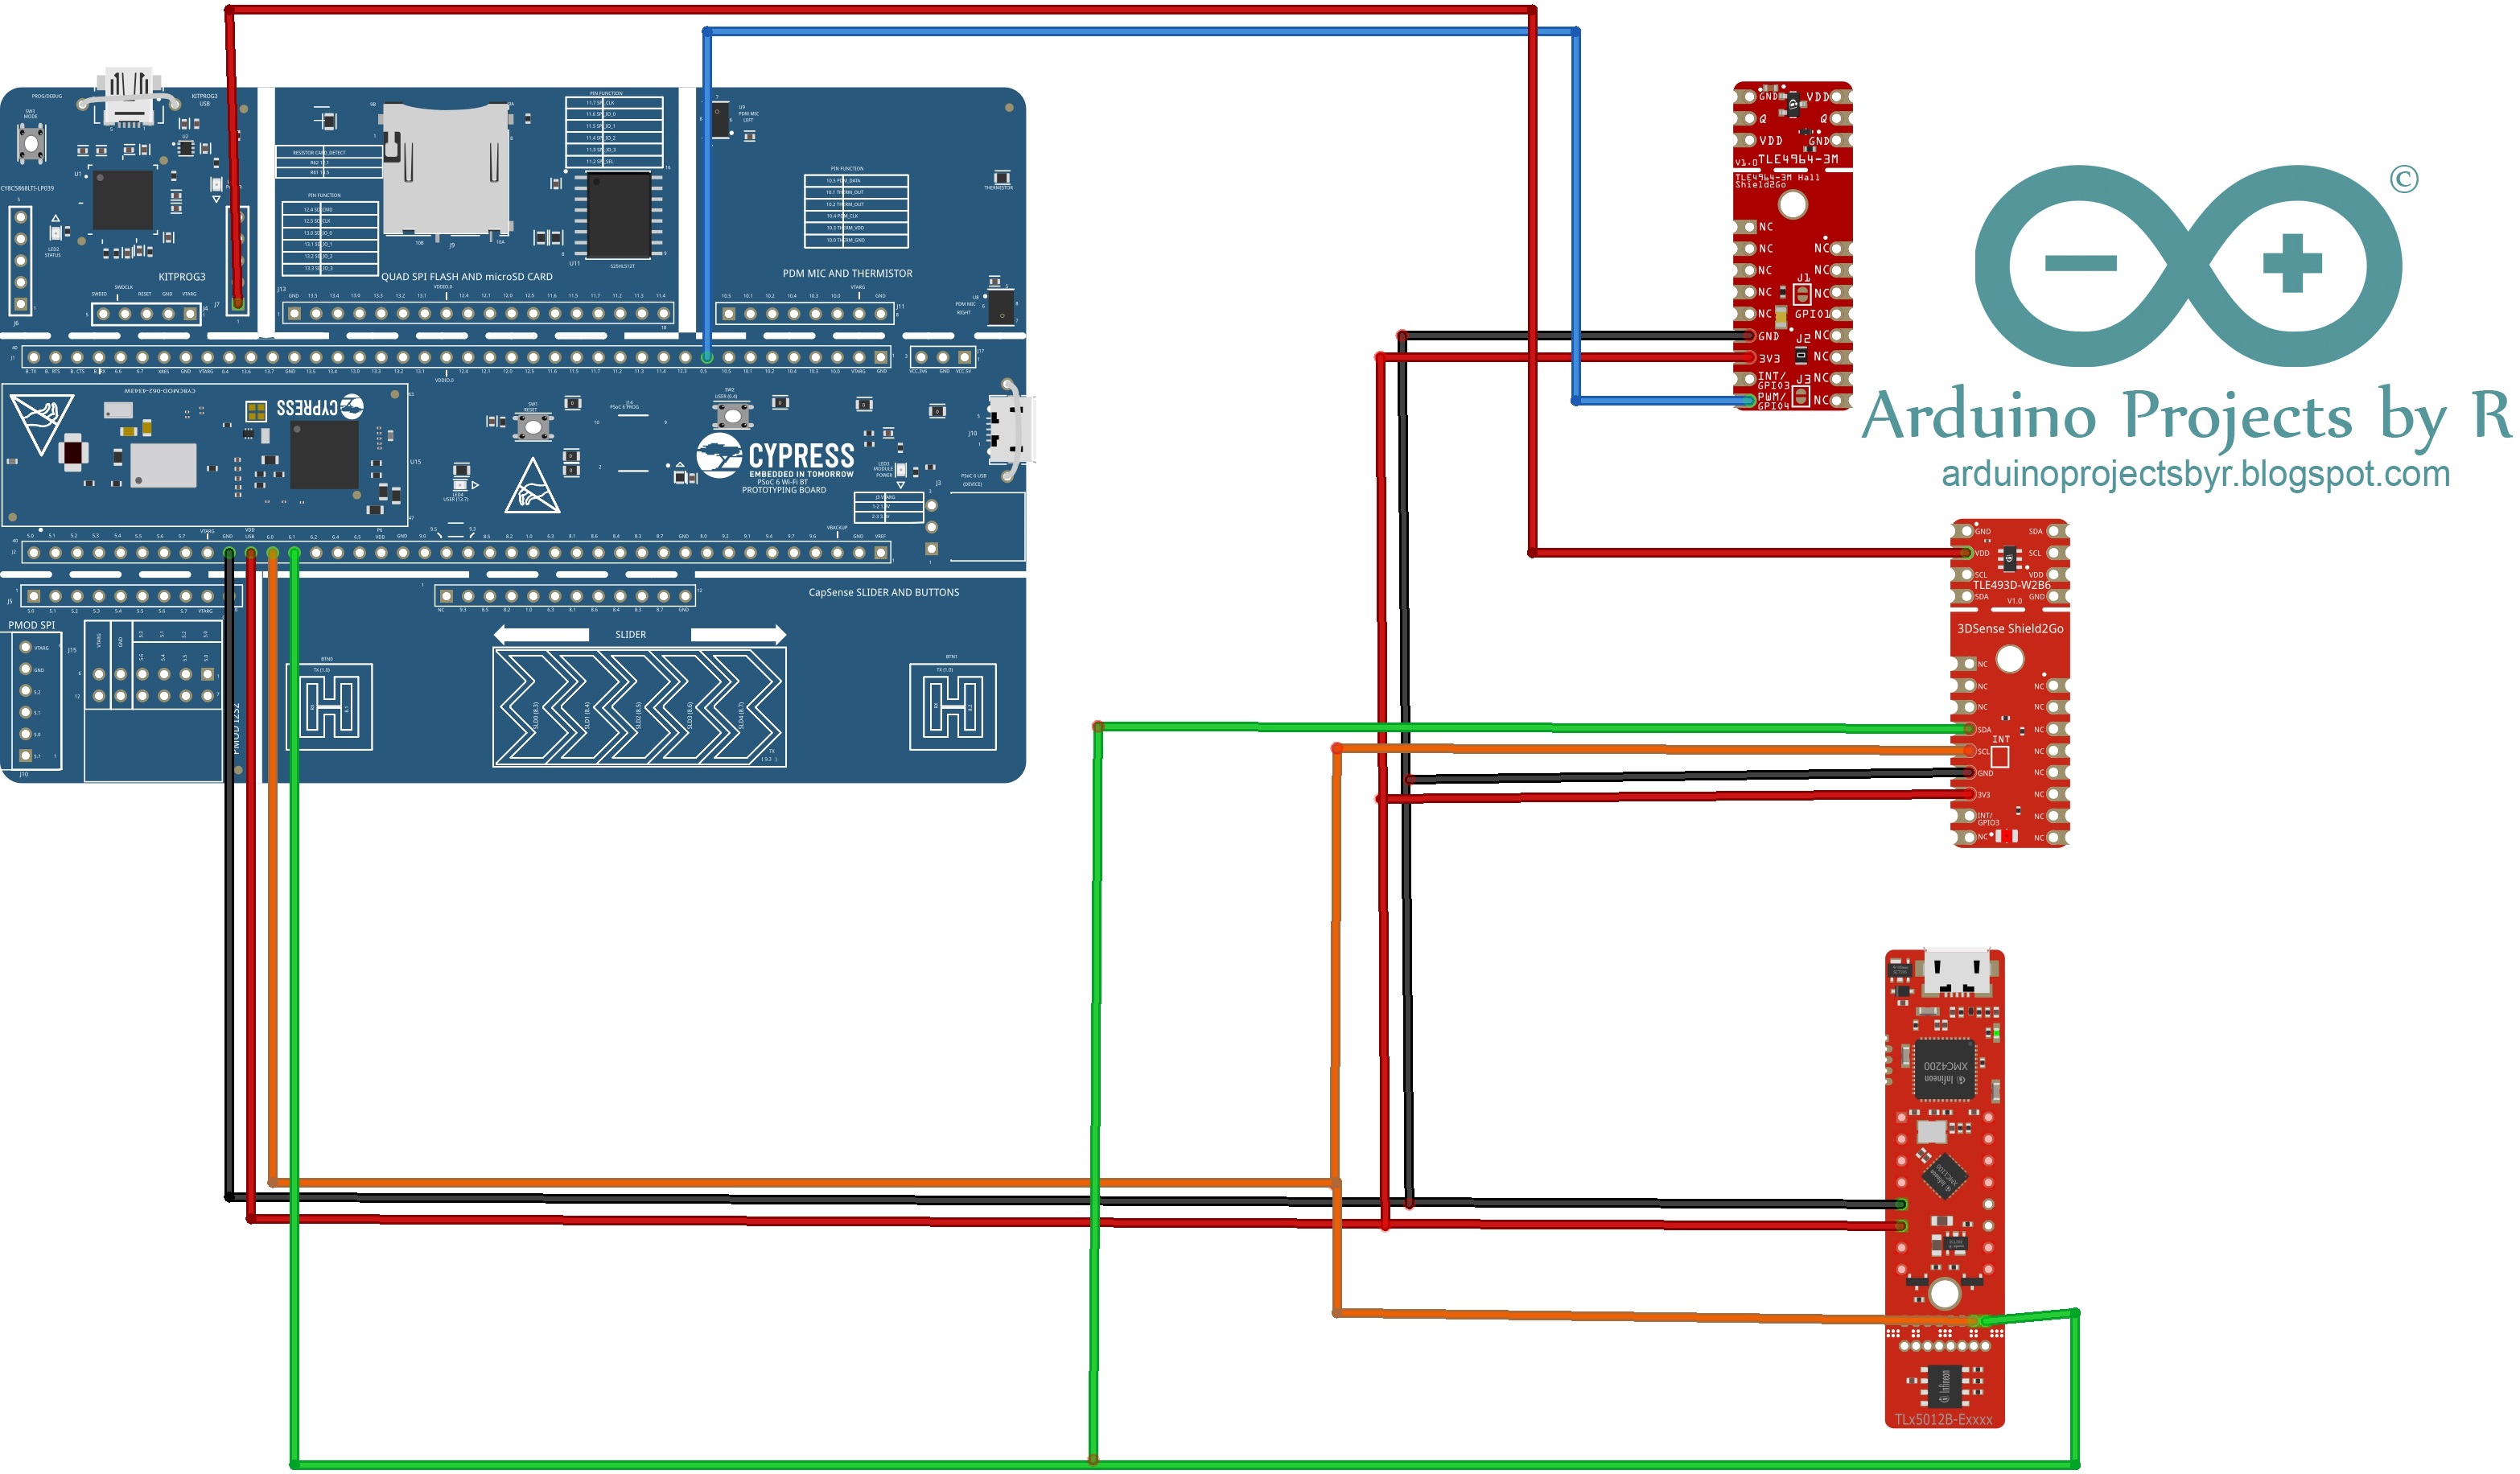
Hardware- PSoC™ 6 Wi-Fi BT Prototyping Kit:CY8CPROTO-062-4343W. This low-cost hardware platform enables the design and debugging of PSoC™ 6 MCUs. It comes with a CY8CMOD-062-4343W module, industry-leading CAPSENSE™ for touch buttons and slider, on-board debugger/programmer with KitProg3, microSD card interface, 512-Mb Quad-SPI NOR flash, PDM microphone, and a thermistor. It also includes a Murata LBEE5KL1DX module, based on the CYW4343W combo device.
- Magnetic field sensor: S2GO 3D TLE493DW2B6-A0. This shield in Infineons 2Go form factor senses magnetic fields in three dimensions.
- Hall effect switch shield:S2GO HALL TLE4964-3M. This shield in Infineons 2Go form factor detects the position of a magnet.
- Magnetic angle sensor:TLE5012B E1000 MS2GO. This XENSIV™ TLx5012B 2GO kit is a evaluation kit equipped with a TLE5012B /TLI5012B digital GMR angle sensor.
- Arduino Lab for MicroPython:Arduino Lab for MicroPython is a lightweight editor for MicroPython programs, supporting connection with a board, code upload, file transfer, interactive REPL shell.
- Adafruit: A cloud service to which you can connect over the internet. It can be used to store and retrieve data while also enabling you to visualize them in real-time and there's so many other interesting features.
Now that you have the required hardware and software, it is time for you to run MicroPython on your microcontroller to make this project feasible. MicroPython is an open-source programming language that allows developers to write a stripped-down version of Python that has been optimized for microcontrollers and provides a high-level programming interface to interact with low-level hardware. The MicroPython ecosystem includes the MicroPython firmware, which can be flashed onto microcontrollers, allowing you to run Python code directly on your controller.
Follow this tutorial to help you get started with running MicroPython: https://www.hackster.io/Infineon_Team/micropython-on-psoc-fcf1d0
Setting up your cloudThe first step is to create an account in Adafruit IO if you don't have one already. After creating your account, you can try learning how the cloud works and create a new feed where the data from your sensors will be visualized.
This is the core of the Adafruit IO system and this is where you can find the data as well as meta-data that you have sent to Adafruit IO. You can also download the data for later use.
You will need to create one feed for each unique source of data you send to Adafruit IO so please create your feeds accordingly.
Final LookYou can now view your sensor data within the respective feeds and the image above shows the analog output of the Thermistor from the PSoC 6. More information can be found in the code to see how this was done.
The data from your feed can also be downloaded later for other purposes.
CodeThe code for this project can be found in the Code section below. You can obtain your username and adafruit IO key as shown in the image above.
The code shows how this project can be run using the hall effect switch shield and the thermistor which can be found in the PSoC 6. When using multiple sensors on the same I2C bus, please make sure to scan their I2C address to read data accordingly.
Problems faced- Unable to find Micropython library for the magnetic field sensor and magnetic angle sensor so unfortunately, I was unable to incorporate these sensors into this project. The only libraries I found was the Arduino libraries but I had insufficient time to try and incorporate the Arduino microcontroller.
The overall process has helped me to learn more and this is my first time trying Micropython as well as the Adafruit cloud service. My hardware was stuck at the customs and I received my hardware like three weeks ago. I am glad to have succeeded in learning this much in a short span of time. However, I wish I could have had more time so that I could have completed this project successfully.
Future Applications- Datalogging system with SD card: By utilizing the SDHC interface with microSD cards, the data can be recorded in the microSD card without the use of Wi-Fi.
- Datalogger and a real-time monitoring systemusing Google sheets: This can also be done using Google sheets and sending the data via an API
- Machine Learning applications: The data that is being visualized can be downloaded and used later to test and train machine learning models or neural networks depending on the size of collected data.


Comments
Please log in or sign up to comment.