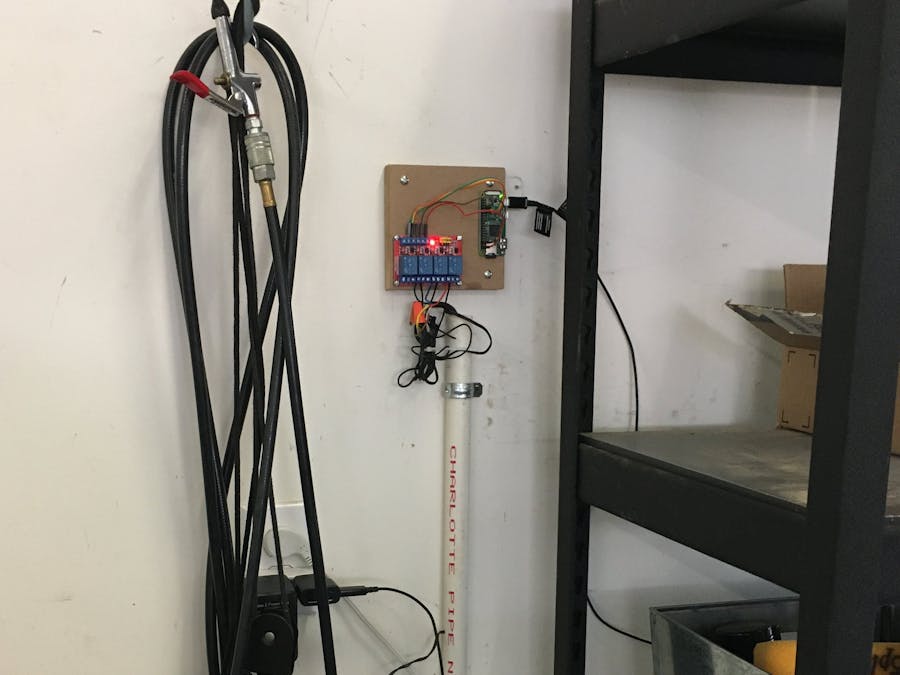
Replace the old sprinkler controller in your garage with a web-page based Raspberry Pi controller.
In this project, I took a new Raspberry Pi, installed OpenSprinkler on it, and used a simple relay board to trigger my home sprinkler system. To schedule my sprinkler system, I access a web page served by the Raspberry Pi on my home network. The web page is accessible only on my home WiFi network.
Step 1: Prepare SD CardThe SD card that I suggest comes pre-loaded with a 'lite' version of Raspian. Since this is a Raspberry Pi Zero, I did not connect any monitors or keyboards to it. I recommend connecting the Raspberry Pi Zero to your wireless network and accessing it remotely from your computer.
The following steps allow the Raspberry Pi access to your WiFi network and enable remote access.
- Put the SD card into your card reader on your computer.
- Add file to enable WiFi access.
Create a filewpa_supplicant.confin the base directory of the SD card. Enter your WiFi details, replacing the placeholder text with your own details.
country=AU
ctrl_interface=DIR=/var/run/wpa_supplicant GROUP=netdev
update_config=1
network={
ssid="TheWiFiNetwork"
psk="ThePassword"
key_mgmt=WPA-PSK
}- Add a file to enable SSH
Create an empty file in the boot directory calledssh. This will enable Secure Shell, which will allow you to connect to your Raspberry Pi from a remote computer.
- Put the SD card in your Raspberry Pi and power it up.
- Install and run Putty on your computer.
- Using Putty, open a remote session to the Raspberry Pi
default hostname: raspberrypi
user: pi
pass: raspberry- Configure your Raspberry Pi.
Change the hostname, passwords, and configure it:
run:sudo raspi-configEnable SSH permanently. - Update/install any other packages you want
For example:
apt-get update
apt-get upgrade
Could update raspian: sudo apt-get dist-upgrade- Install GPIO Zero
(optional, so you can run thepinoutcommand later)sudo apt install python3-gpiozero
sudo su
so you don’t have tosudofor every command.- Install git.
apt-get install git - Change directory to /usr/local
cd /usr/local - Clone the OpenSprinkler firmware repository.
This will create a directory in /usr/local called OpenSprinkler.git clonehttps://github.com/OpenSprinkler/OpenSprinklerGen2OpenSprinkler - Go into the OpenSprinkler directory and build the firmware.
cd OpenSprinkler
./build.sh - The build script will ask if you want to run the software on startup, answer yes. If it compiles ok, you should have an executable
/usr/local/OpenSprinkler/OpenSprinklerready to go. Go ahead and run the executable to test it. Press control-C to exit. - Reboot your Pi and OpenSprinkler should be started automatically. You can test with
pgrep OpenSprinklerIf it returns the process id number, then OpenSprinkler was started automatically and is running. If it returns nothing, then something went wrong; check the previous steps. - Open a browser on your computer to
http://hostname:8080, where hostname is the name of your Raspberry Pi. This will access the OpenSpinkler web interface. Default password:opendoor. The computer must be on the same network as the Raspberry Pi.
- The web page is being served by your Raspberry Pi.
- I used a relay board with 4 relays on it. Each of the relays on the board will control 1 sprinkler zone. When a relay receives a signal from the Raspberry Pi's General Purpose Input/Output (GPIO) pin, that relay will activate the sprinkler zone it is connected to.
- While connected remotely to your Raspberry Pi, run the GPIO Zero pinout command.
pinoutThis will show a diagram of the GPIO pins on your Raspberry Pi. - Decide which pins you want to use to activate your sprinklers.I chose pins 5, 6, 13 because they were all right next to each other on my Raspberry Pi Zero WH.
- Shut down your Raspberry Pi.
sudo halt - Unplug the power source.
- Connect the GPIO pins on the Raspberry Pi to the relay's input terminals. Each relay will control one sprinkler zone. I have three sprinkler zones.
- Make a note of which pins are connected to which relay.
- Connect a 5V output and a ground pin from your Raspberry Pi to the power input and ground of the relay.
- With the relay now connected, restart your Raspberry Pi.
- On your home computer or tablet, go to:
http://hostname:8080default password:opendoor
This web page is being served by your Raspberry Pi, which is running the OpenSprinkler software that was installed earlier. - Add your sprinkler zones to OpenSprinkler via the web interface.
- For each zone, you must configure which GPIO pin will be used for that zone.
- Active state High or Low: The relay and OpenSprinkler should both be configured the same way. Both active high, or both active low. I used High as the active state.
- Activate one of the sprinkler zones via the web interface. You should hear a click from the relay that is connected to that zone's GPIO pin.
- Many sprinkler systems activate each zone by sending a 24V AC current to the sprinkler valve. This opens the value. This is how my system works.
- I used the 24V power source from my old sprinker controller.
- I connected one side of the 24V power source to the common terminal of the relay for each zone. When the Raspberry Pi signals the relay (GPIO to relay input terminal), the relay completes the circuit. When the relay closes the circuit, the sprinkler valve receives the 24V current and activates. The other side of the sprinkler valve's wire is connected to the other side of the sprinkler power source.
Power flow: sprinkler power source => through relay => through sprinkler valve =>back to other terminal of the sprinkler power source
Step 7: Access OpenSprinkler, Activate Your Sprinklers- Go to:
http://hostname:8080Trigger a sprinkler zone via the web interface and test that your sprinkler system activates.


Comments