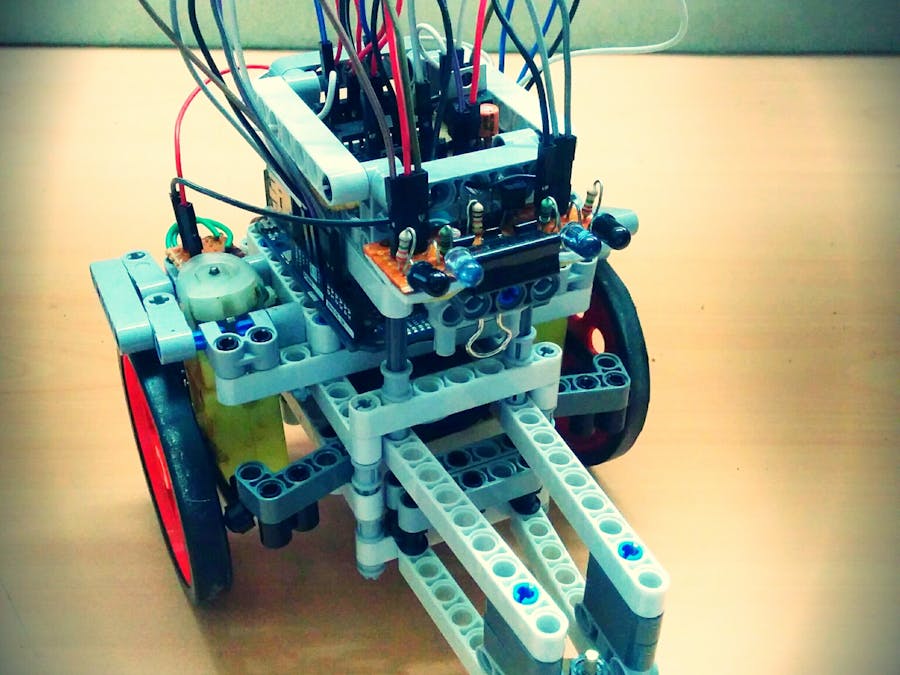
The IoT Dune Buggy is an attempt at controlling the locomotion of a robot over the Internet. As an Internet of Things device, its USP is that it can be controlled from just about anywhere on the globe with an internet connection.
Using the lightweight M2M cloud service, Dweet.io, this robot receives commands from the service, and moves accordingly.
It is also equipped with two IR Obstacle Sensors which allow it to see the obstacles that you can't, because well, you're not there. It can maneuver around these obstacles so that it does not crash.
There is also a Temperature Sensor on board which can be used to detect ambient temperature, as well as a Photo-sensitive Resistor which is used to detect the ambient light intensity to tell whether it is light or dark.
Now you may be wondering how the robot is controlled.
The user can send the robot commands using an Android App especially designed for this robot. It allows the user to make the robot move in all four directions, as well as scan the environment to log the sensor parameters.
This project is divided into the following parts:
- Robot Chassis
- Electronic Interfaces
- Setting up a Dweet Device
- Coding the Arduino Yun
- Developing the Android App
Robot Chassis
The chassis for the robot is a highly subjective matter in terms of choice, because the requirements of a chassis are not very critical. At the very least, it must be sturdy, non conductive and workable. I'm a fan of rapid prototyping, so I've used the Lego Mindstorms set to whip up a quick chassis for my robot.
Electronic Interfaces
As stated before, the robot has quite a few sensors on board. However, apart from that, it also has a voltage regulator to ensure that a smooth 5 volt supply be provided to the Yun.
It also has an L293 Motor driver circuit to allow sufficient current to power the motors via the Yun's GPIO. It is essentially a boost for the GPIO outputs.
All the aforementioned sensors are mounted on a single PCB, so that there is a minimal amount of cumbersome wiring.
I've made all the circuits using a good old fashioned printed prototyping board, so they may not be the tidiest in the world, but cleanliness fans may opt for a designed board as well.
Setting Up a Dweet Device
Dweet.io is a very useful little cloud service with a unique twist. Its a messaging service based on a lightweight M2M protocol, which means that it is very fast. It used a HAPI interface, which makes it very human friendly in terms of readability.
A dweet request is usually of the form
https://dweet.io/dweet/for/testdweet?what=dis
And a dweet response is as follows
{"this":"succeeded","by":"dweeting","the":"dweet","with":{"thing":"testdweet","created":"2016-03-20T17:59:17.216Z","content":{"what":"dis"},"transaction":"18ec09b3-1158-4531-be31-b7bcf3c28cc9"}}
Using simple string formatting or array formatting techniques, one can retrieve sent data.
Coding the Arduino Yun
The code for the Arduino Yun is attached to this project, you have to add in your Dweet device name before uploading the code, else the code will not work. (Not a safety precaution, pure laziness.)
The way the code flows is as follows
- Initialize GPIOs as Outputs and Inputs
- Begin Bridge communication with the processor side
- Get values of left and right obstacle sensors
- If obstacle detected in front of the bot ; Move Back and Turn Left
- If obstacle detected on the right ; Turn Left
- If obstacle detected on the left ; Turn Right
- If none of these conditions are satisfied, read data from Dweet
- Move robot according to command
- Wait for 1 second
- Return to step 3
Developing the Android App
An application specific Android App was developed for this project using the MIT App Inventor service, which allows you to develop your Android app without knowing Java by using a Scratch Programming Interface.
The App is very simple, and it sends the appropriate Dweet codes as specified in the program to the Dweet server via buttons. It also has functionality to include sensor readings remotely.
The app looks as follows:
The finished robot looks as follows:


Comments
Please log in or sign up to comment.