Hackster is hosting Hackster Holidays, Ep. 7: Livestream & Giveaway Drawing. Watch previous episodes or stream live on Friday!Stream Hackster Holidays, Ep. 7 on Friday!
Seafox_C
Published © GPL3+

Using PLC Languages to Control an Arduino with OpenPLC

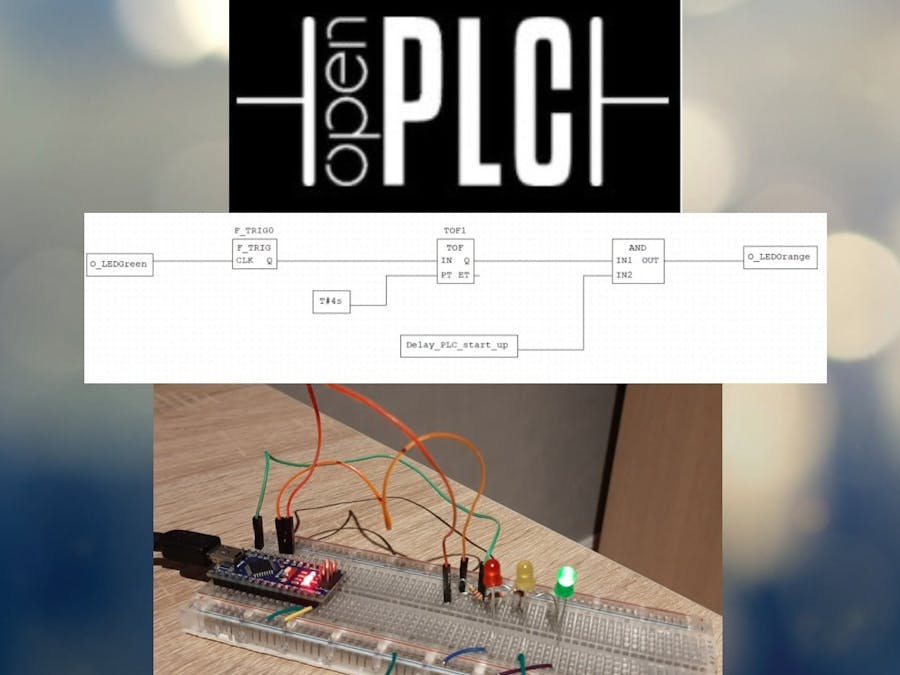
I was looking for ways to teach students the basics of PLC and found the OpenPLC project. Opensource, free and uses the IEC 61131 standard.

IntermediateProtip4 hours13,111
Using PLC Languages to Control an Arduino with OpenPLC

Things used in this project

Hardware components

Arduino Nano R3
Arduino Nano R3
×1
5 mm LED: Red
5 mm LED: Red
×1
5 mm LED: Green
5 mm LED: Green
×1
LED, Orange
LED, Orange
×1
Breadboard (generic)
×1

Software apps and online services

ThingsHub OpenPlc

Story

Read more

Schematics

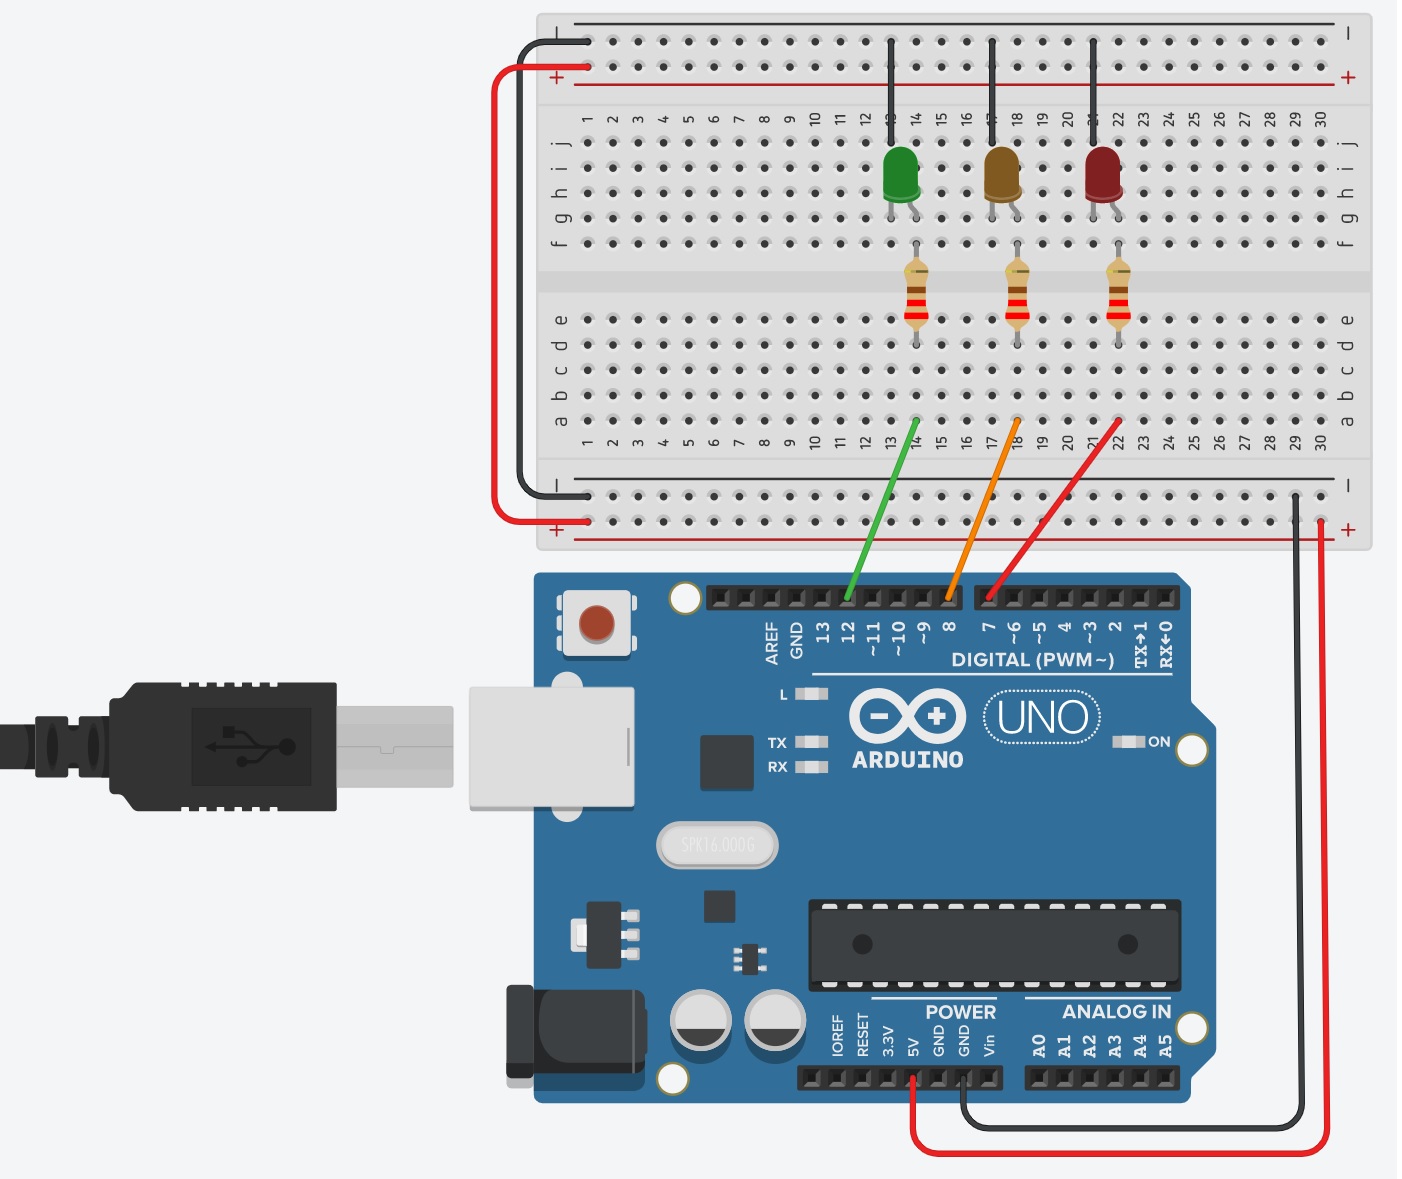
Arduino_Nano_Traffic_light

Code

Arduino_code_open_PLC_Nano_DONWLOAD_THE_LATEST_VERSION_FROM_WEBSITE

C/C++
This the code you have to upload to the Arduino so it will function as a slave for the OpenPLC. You can call it the firmware. Please check for the latest version on https://www.openplcproject.com/ to run the latest version.
This is just added to the project so you can see what is running on the Arduino. You need some library files etc. to let be enable to run it. Download the latest version on https://www.openplcproject.com/


//-----------------------------------------------------------------------------
// Copyright 2018 Thiago Alves
// This file is part of the OpenPLC Software Stack.
//
// OpenPLC is free software: you can redistribute it and/or modify
// it under the terms of the GNU General Public License as published by
// the Free Software Foundation, either version 3 of the License, or
// (at your option) any later version.
//
// OpenPLC is distributed in the hope that it will be useful,
// but WITHOUT ANY WARRANTY; without even the implied warranty of
// MERCHANTABILITY or FITNESS FOR A PARTICULAR PURPOSE.  See the
// GNU General Public License for more details.
//
// You should have received a copy of the GNU General Public License
// along with OpenPLC.  If not, see <http://www.gnu.org/licenses></http:>.
//------
//
// This is the main file for the OpenPLC Arduino firmware. It contains the a
// Modbus RTU library to communciate with OpenPLC host as a slave device.
//
// Thiago Alves, Aug 2018
//-----------------------------------------------------------------------------

/******************PINOUT CONFIGURATION*******************

Digital In: 2, 3, 4, 5, 6           (%IX100.0 - %IX100.4)

Digital Out: 7, 8, 12, 13           (%QX100.0 - %QX100.3)

Analog In: A0, A1, A2, A3, A4, A5   (%IW100 - %IW105)

Analog Out: 9, 10, 11               (%QW100 - %QW102)

**********************************************************/

#include <Arduino.h>
#include "Modbus.h"
#include "ModbusSerial.h"

//ModBus Port information
#define BAUD        115200
#define ID          0
#define TXPIN       -1

//Define the number of registers, inputs and coils to be created
#define NUM_DISCRETE_INPUT      5
#define NUM_INPUT_REGISTERS     6
#define NUM_COILS               4
#define NUM_HOLDING_REGISTERS   3

//Create the I/O pin masks
uint8_t pinMask_DIN[] = {2, 3, 4, 5, 6};
uint8_t pinMask_AIN[] = {A0, A1, A2, A3, A4, A5};
uint8_t pinMask_DOUT[] = {7, 8, 12, 13};
uint8_t pinMask_AOUT[] = {9, 10, 11};

//Modbus Object
ModbusSerial modbus;

void configurePins()
{
    for (int i = 0; i < NUM_DISCRETE_INPUT; i++)
    {
        pinMode(pinMask_DIN[i], INPUT);
    }
    
    for (int i = 0; i < NUM_INPUT_REGISTERS; i++)
    {
        pinMode(pinMask_AIN[i], INPUT);
    }
    
    for (int i = 0; i < NUM_COILS; i++)
    {
        pinMode(pinMask_DOUT[i], OUTPUT);
    }

    for (int i = 0; i < NUM_HOLDING_REGISTERS; i++)
    {
        pinMode(pinMask_AOUT[i], OUTPUT);
    }
}

void setup()
{
    //Setup board I/O
    configurePins();
    
    //Config Modbus Serial (port, speed, rs485 tx pin)
    modbus.config(&Serial, BAUD, TXPIN);
    
    //Set the Slave ID
    modbus.setSlaveId(ID); 
    
    //Add all modbus registers
    for (int i = 0; i < NUM_DISCRETE_INPUT; ++i) 
    {
        modbus.addIsts(i);
    }
    for (int i = 0; i < NUM_INPUT_REGISTERS; ++i) 
    {
        modbus.addIreg(i);
    }
    for (int i = 0; i < NUM_COILS; ++i) 
    {
        modbus.addCoil(i);
    }
    for (int i = 0; i < NUM_HOLDING_REGISTERS; ++i) 
    {
        modbus.addHreg(i);
    }
}

void loop()
{
    //Run the main modbus task
    modbus.task();
    
    //Update modbus registers
    for (int i = 0; i < NUM_DISCRETE_INPUT; ++i) 
    {
        modbus.Ists(i, digitalRead(pinMask_DIN[i]));
    }
    for (int i = 0; i < NUM_INPUT_REGISTERS; ++i) 
    {
        modbus.Ireg(i, (analogRead(pinMask_AIN[i]) * 64));
    }
    for (int i = 0; i < NUM_COILS; ++i) 
    {
        digitalWrite(pinMask_DOUT[i], modbus.Coil(i));
    }
    for (int i = 0; i < NUM_HOLDING_REGISTERS; ++i) 
    {
        analogWrite(pinMask_AOUT[i], (modbus.Hreg(i) / 256));
    }
}

Credits

Seafox_C
10 projects • 49 followers
I'm 29 years old and live in Belgium. I love the Arduino community and like to learn and make projects.
Thanks to Thiago Alves.

Comments