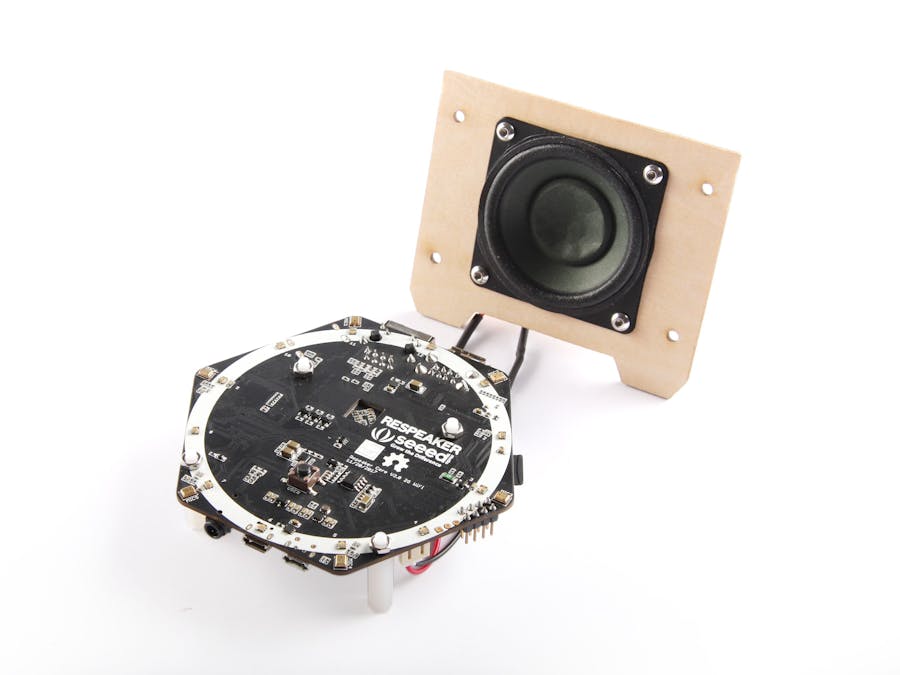
The basic function of the reception service is to greet visitors, make them feel welcome and prevent unauthorized access to the office. We leverage the ReSpeaker Core v2.0 functions to design a Voice Reception Service. The system can interact with visitor and drop message to the person to be visited. In future, we can design a small office employee phone list database, the employee can drop a message to the system, the system uses the GPIO functions of the ReSpeaker Core v2.0 to open the doors for the visitor. We use the Microsoft Bing Speech to text services and Twilio/Tencent message APIs to come out the python scripts.
Interaction Video*Guest presses the button*
ReSpeaker: Welcome to x.factory. Who are you here to see?
Guest: I am here to see <employee>.
ReSpeaker: Thank you. What is your name?
Guest: My name is <guest>.
ReSpeaker: Thank you. I will send them a message.
*The device sends a message to the employee*
Message: Hello, <employee>. <guest> is here to see you. Please meet them at the door.
Hardware Setup1. Apply Bing/Twilio/Tencent keys: please apply bing speech to text API,twilio keys, or tencent keys.
2. Install dependencies
#update the system
sudo apt-get update && sudo apt-get upgrade
#apt install dependencies
sudo apt-get install -y libpulse-dev libasound-devportaudio19-dev libportaudiocpp0 pythonpython-dev python-pip build-essential swig git python-pyaudiopython-numpy python-virtualenv libffi-dev libssl-devlibxml2-dev python3-pyaudio sox swig
# pip install dependencies
sudo pip installpocketsphinx webrtcvad requests monotonic pyaudio cffi twilio qcloudsms_py evdev pixel_ring respeaker
# Install snowboy
cd ~
git clone --depth 1 https://github.com/Kitt-AI/snowboy.git
cd snowboy
sudo virtualenv --system-site-packages env
source env/bin/activate
sudo python setup.py build
sudo python setup.py bdist_wheel
sudo pip install dist/snowboy*.whl
# Install voice engine
cd ~
git clone https://github.com/voice-engine/voice-engine.git
cd voice-engine
sudo python setup.py bdist_wheel
sudo pip install dist/*.whl
#Install webrtc-audio-processing
cd ~
git clonehttps://github.com/xiongyihui/python-webrtc-audio-processing.git
cdpython-webrtc-audio-processing
git submodule init && gitsubmodule update
python setup.py build
sudo python setup.py install
#Enable access
sudo chmod 0777 /dev/input/event0
3. Download Voice_Reception_System from github
cd ~
git clone https://github.com/SeeedDocument/Voice_Reception_System.git
cd Voice_Reception_System
nano Speech.py
#Modify Bing/Twilio/Tencent keys
python Speech.py
A Quick Start Guide1. Download the code from GitHub.
2. Extract them onto ReSpeaker Core v.2(‘home’ is a default folder of this code.).
P.S.If you are still not familiar with ReSpeaker Core v.2, please visit http://wiki.seeedstudio.com/ReSpeaker_Core_v2.0. You can try out-of-box demos on the wiki first.
Adding API keys to the code
1. Location of Bing Speech API key:
2. Location of Tencent cloud service API key:
3. Location of Twilio API
At this point, you should be able to interact with ReSpeaker.
1. Plug in the speaker
2. Press a button on the back of ReSpeaker Core v.2
3. You should be able to hear the welcome message and be able to interact with the device. You can say “I want to see Bill” to ReSpeaker and then the device will ask your name. (Because a default database has “Bill” entry so the device is able to recognize the name.)
Adding names to the database
1. Access these two files on extracted : “username_en.txt” and “allname.txt”
2. Add names to the list by using the same format as seen on text files.
Changing the message content
1. Search for the message part in the code and change.
2. Make sure your new message structure is exactly the same as in Tencent Cloud, otherwise it will fail.
Project Source FileWe uploaded the project resources into Seeedstudio Github.


Comments
Please log in or sign up to comment.