


Hardware components | ||||||
_ztBMuBhMHo.jpg?auto=compress%2Cformat&w=48&h=48&fit=fill&bg=ffffff) |
| × | 1 | |||
| × | 1 | ||||
 |
| × | 1 | |||
 |
| × | 1 | |||
 |
| × | 1 | |||
Software apps and online services | ||||||
 |
| |||||
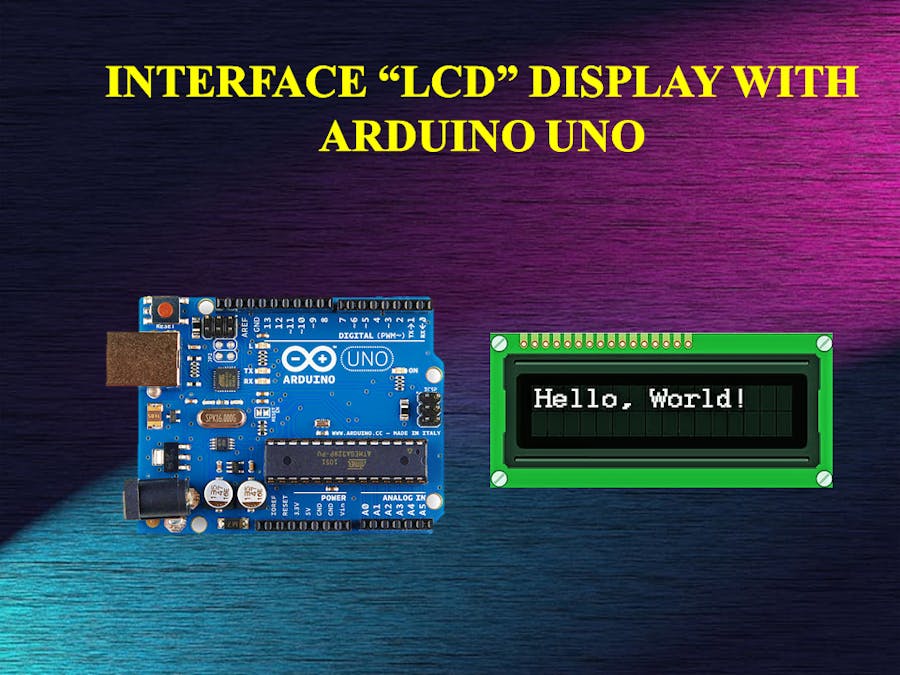
Hello friend welcome to “Techno-E-Solution” Today, we are going to interface 16×2 LCD with Arduino UNO.
To interface LCD to the Arduino we need Liquid crystal library. The LCD module is use liquid crystal to print visible text on display, Mainly this display are used for DIY project. Friends as you know 16×2 LCD comes with 16 columns and 2 rows hence it's called as 16×2 LCD Module, In this display you can print maximum 32 characters. This LCD module is very general purpose LCD, we can use this LCD in our project very easily. This LCD comes with 16 Pins to connection I provide the pinouts of the LCD See below. The LCD has many types like 8×1, 8×2, 10×2, 16×1, 20x4 etc. This display comes with blue or green backlight, with white or black text. This display has 16 pins, The first six pins are used to control contrast of the display and 7 to 14 means 8 pins are Data pins and last to pins are used to control backlight. If you want to make this project on PCB I will provide PCB layout of this project just Comment to provide PCB layout. So friend now I'm going to interface LCD with Arduino. Let's get started..........
Follow Me On :-
YOUTUBE | INSTAGRAM | FACEBOOK | INSTRUCTABLES | DAILYMOTION | HACKSTER
Here is complete video tutorial :-
If you like this project subscribe us on Youtube, So without wasting time Let's get started...............
--------------------------------------------------------------------------------------------------
NextDFM Software From NextPCB
2 / 4
A PCB Design Problems Detector, An Engineering Solution Provider Import the Gerber file with one click. No need for complicated file reading steps to review easily and improve efficiency.
Help you quickly familiarize DFM design specifications and production needs to determine whether there are any manufacturing constraints
1 / 3
Features
Make PCB design more standard Prevent the quality flaw
Impedance calculation function and lamination automation
Automatically generate the best puzzle
CAM350 free alternative version
Check Gerber files anytime, anywhere and parse it with one click
Instate Quote and evaluate delivery time Reduce cost and improve benefit
these are advantage comparing to Eagle and Altium
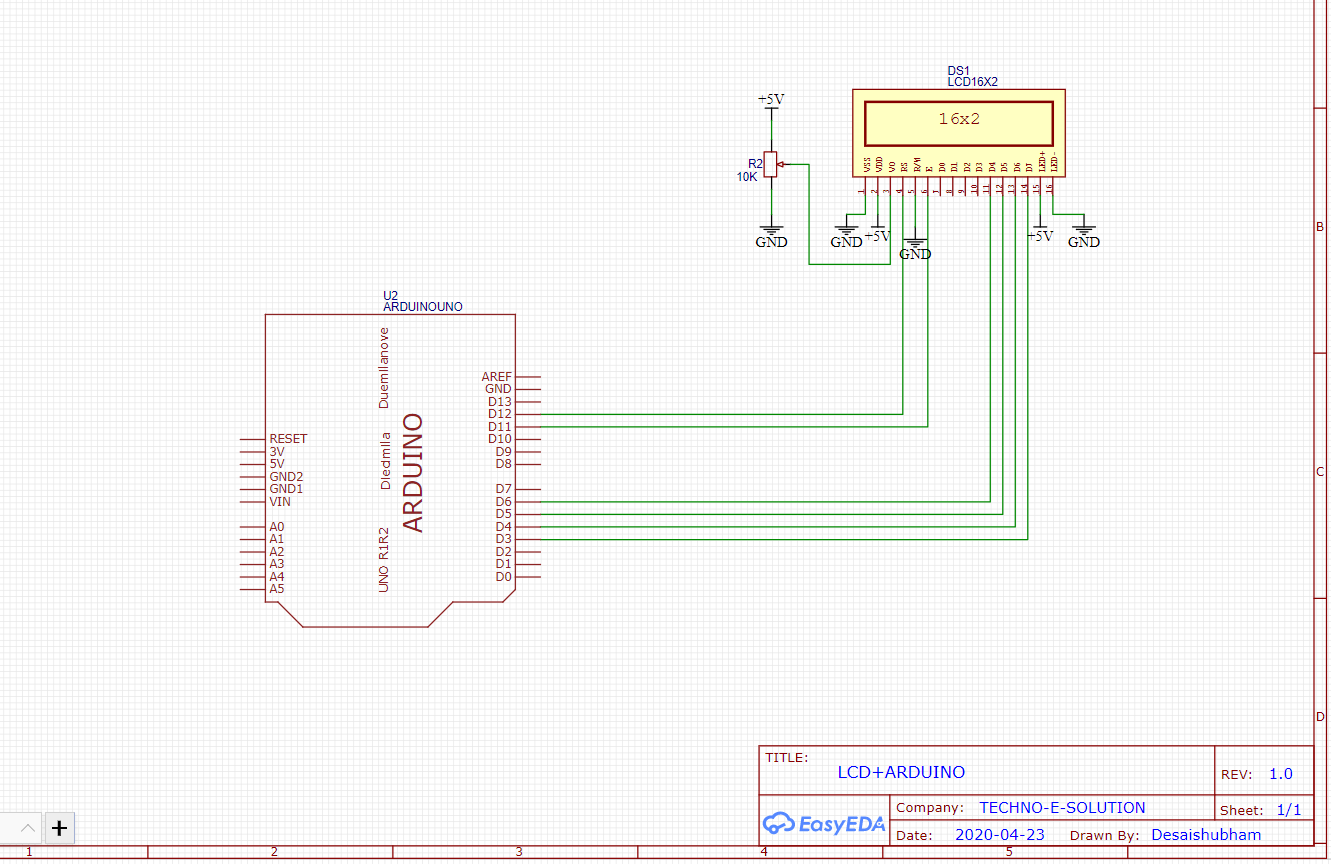
Circuit Diagram
Follow the Circuit Connection :-
LCD RS pin to digital pin 12
LCD Enable pin to digital pin 11
LCD D4 pin to digital pin 6
LCD D5 pin to digital pin 5
LCD D6 pin to digital pin 4
LCD D7 pin to digital pin 3
LCD R/W pin to ground
LCD VSS pin to ground
LCD VCC pin to 5V Connect
10K variable resistor (POT) :-
First to +5V and ground
Second to LCD VO pin (pin 3)
Last to GND


Comments
Please log in or sign up to comment.