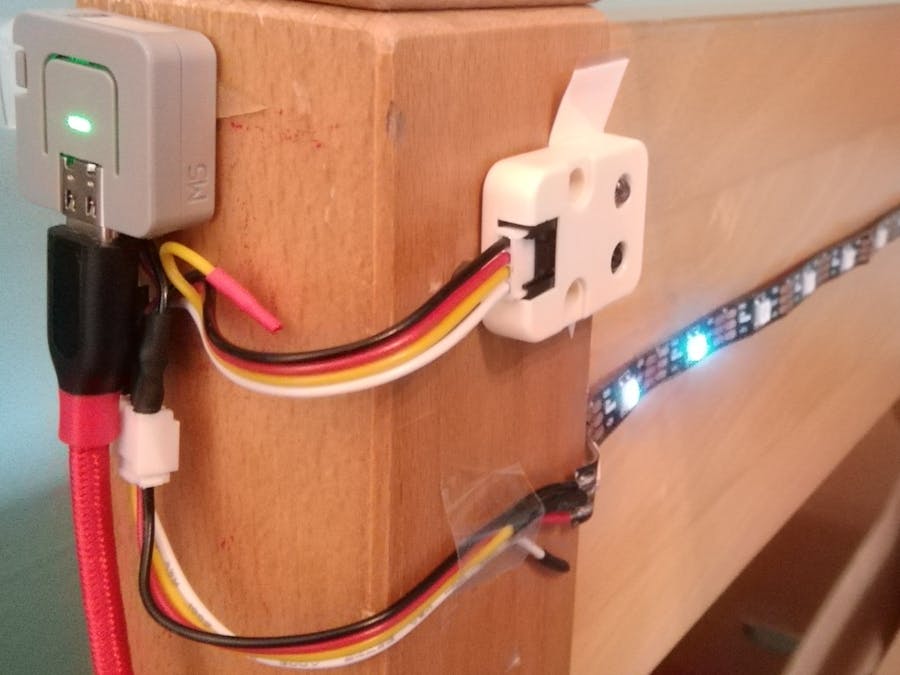
When my daughter's night lamp got broken, I quickly assembled a provisional one from an RGB led strip and an ESP32 NodeMCU development board, which I already had at hand.
Yet, the ESP32 module was rather large for this purpose, it had no case and the wiring was fragile. Hence, I replaced it by an Atom Lite ESP32. In addition to curing the previously mentioned drawbacks, the Atom Lite also has got a built-in button. This made it possible for my daughter to switch the led strip on and off, and to choose between two different brightness levels.
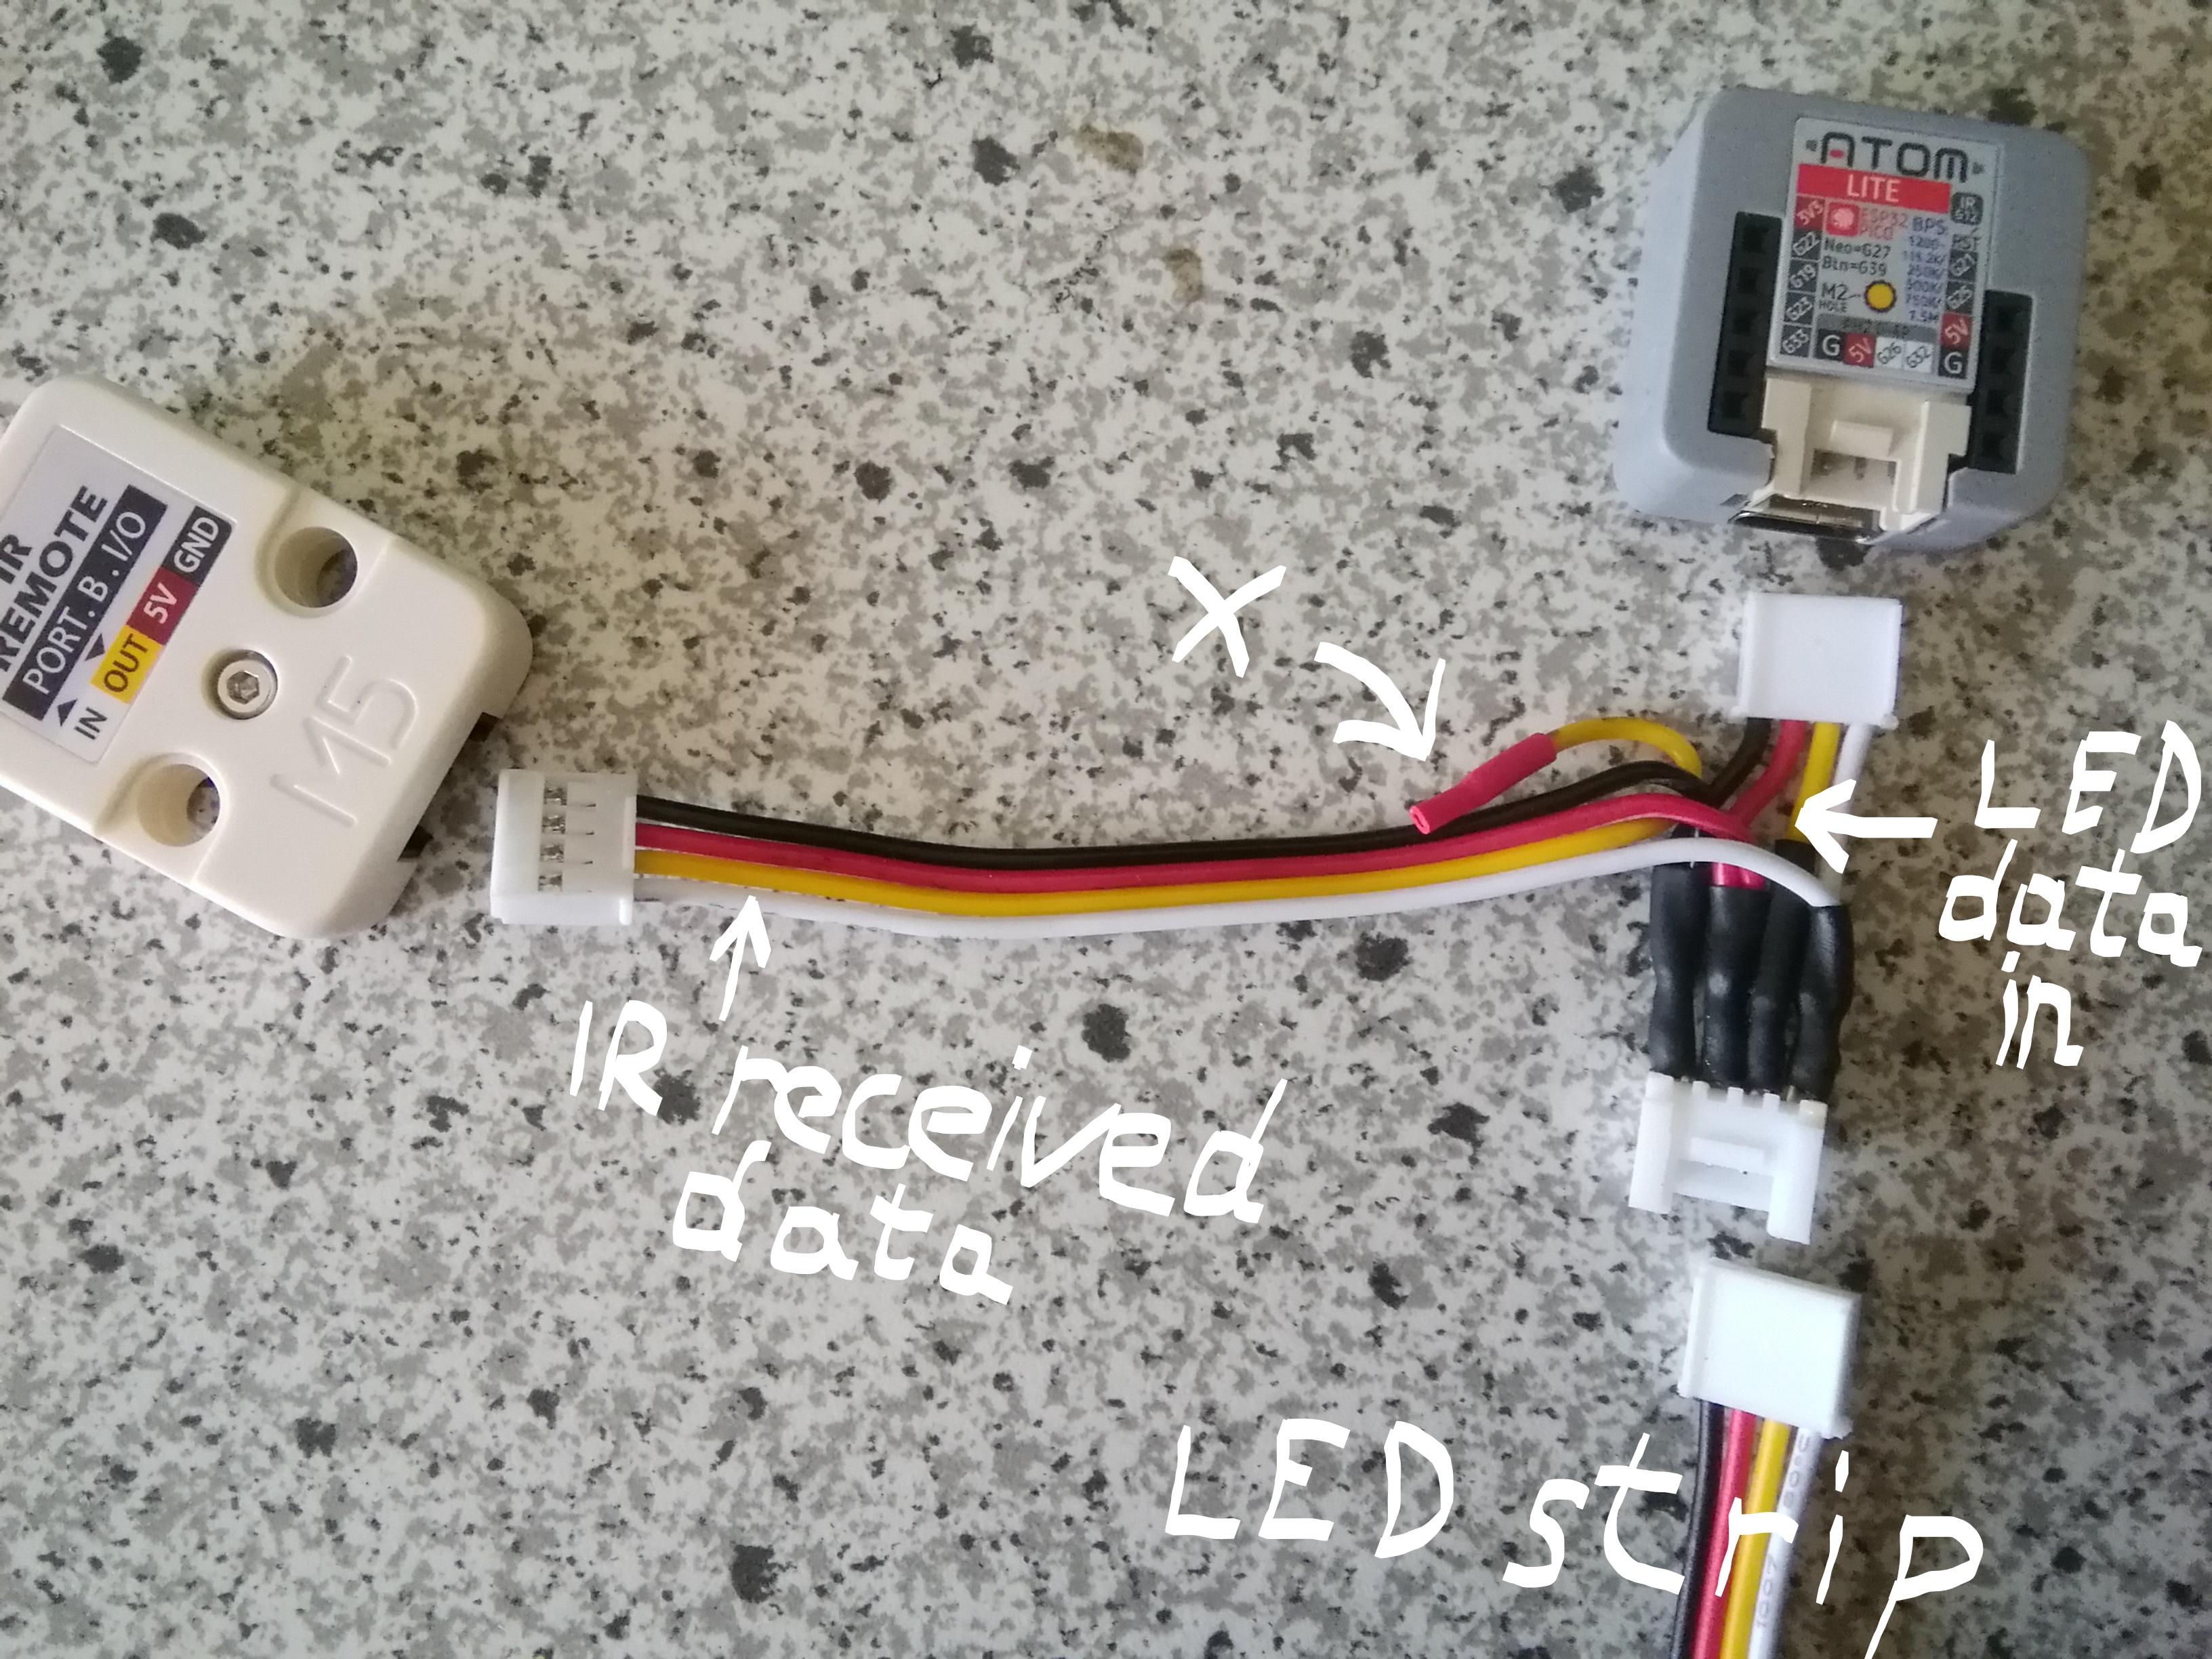
The latest evolution step of my project has been to extend it with IR remote control and changeable light effects according to my daughter's requirements. Therefore, a little bit of handicraft work was needed to connect both, the led strip and the IR unit to the grove port of the Atom Lite. For more details, see the picture and remarks in the "Schematics" section.
- Internal button: switch on and off
- IR remote: switch on/off, adjust brightness, adjust speed, change direction, pause/continue, choose light effect
- Led strip light effects: start-up animation, rainbow chase light, random sprites, color gradient, constant color
- Internal led: current state (on/off)
The maximum overall power consumption is about 250 mA for my led strip with 29 leds and brightness level limited to 20% in the software. Thus, I power the led strip via the 5V pin of the Atom Lite's grove port. The Atom Lite itself is powered with a standard USB 5V adapter and a USB-C cable.
In case more leds are used or a higher maximum brightness level is allowed in the software, the 5V pin of the Atom Lite should not be used as power source for the led strip.
Setup of the Programming EnvironmentI used Arduino IDE as programming environment for this project. Within Arduino IDE, firstly, the ESP32 package must be installed using the Arduino IDE board manager. Then you have to select ESP32 Pico Kit as target board. More detailed instructions for Atom Lite development using Arduino IDE can be found in the M5Stack documentration.
In addition, the libraries JC_Button, FastLED and IRRemoteESP8266 need to be installed using the Arduino IDE library manager.
// Library: JC_Button, https://github.com/JChristensen/JC_Button
#include <JC_Button.h>

// Library: FastLED, https://github.com/FastLED/FastLED
#include <FastLED.h>

// Library: IRRemoteESP8266, https://github.com/crankyoldgit/IRremoteESP8266
#include <IRremoteESP8266.h>The commented source code of this project is available in the corresponding GitHub repository. The master branch contains the original project for Arduino IDE. In addition, the PlatformIO branch contains a migrated version of the project for Visual Studio Code with the PlatformIO IDE extension.
There are a few things that need to be adjusted in the software to make it work for different hardware environments.
Number of leds of the led strip used:
const byte NUM_LEDS = 29;Command codes of the IR remote control used:
const uint64_t IR_ON_OFF         = 0xFF30CF; // Stand-By
const uint64_t IR_BRIGHTNESS_INC = 0xFFF00F; // Volume +
const uint64_t IR_BRIGHTNESS_DEC = 0xFF708F; // Volume -
const uint64_t IR_MODE_CHANGE    = 0xFF28D7; // Mode
const uint64_t IR_PLAY_PAUSE     = 0xFFA857; // Play Pause
const uint64_t IR_SLOWER         = 0xFF10EF; // Slower
const uint64_t IR_FASTER         = 0xFF6897; // Faster
const uint64_t IR_LEFT           = 0xFFC03F; // Left
const uint64_t IR_RIGHT          = 0xFFA05F; // Right
Pin assignments - depending e.g. on the cabling:
// M5SAtack Atom Lite: Grove connector GPIO pin (yellow cable)
// attached to Neopixel LED strip
const byte PIN_LEDSTRIP = 26;

// M5SAtack Atom Lite: Grove connector GPIO pin (white cable)
// attached to IR unit (receiver)
const byte PIN_IRRECV = 32;


Comments
Please log in or sign up to comment.