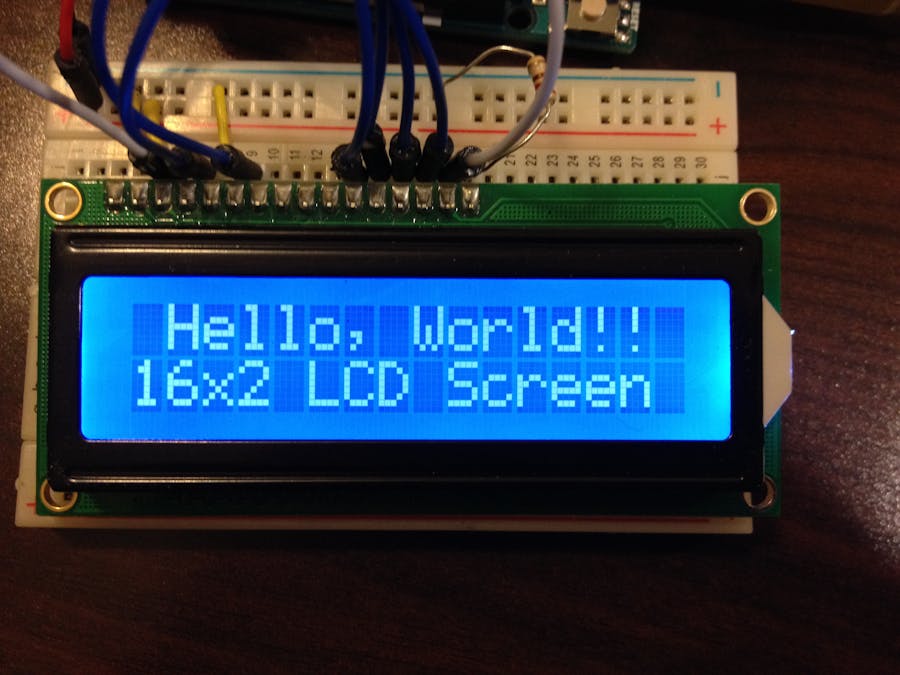
Have you ever wanted to display text on your project? Well here is a tutorial on how to hook-up and use a 16x2 LCD (Liquid Crystal Display)!
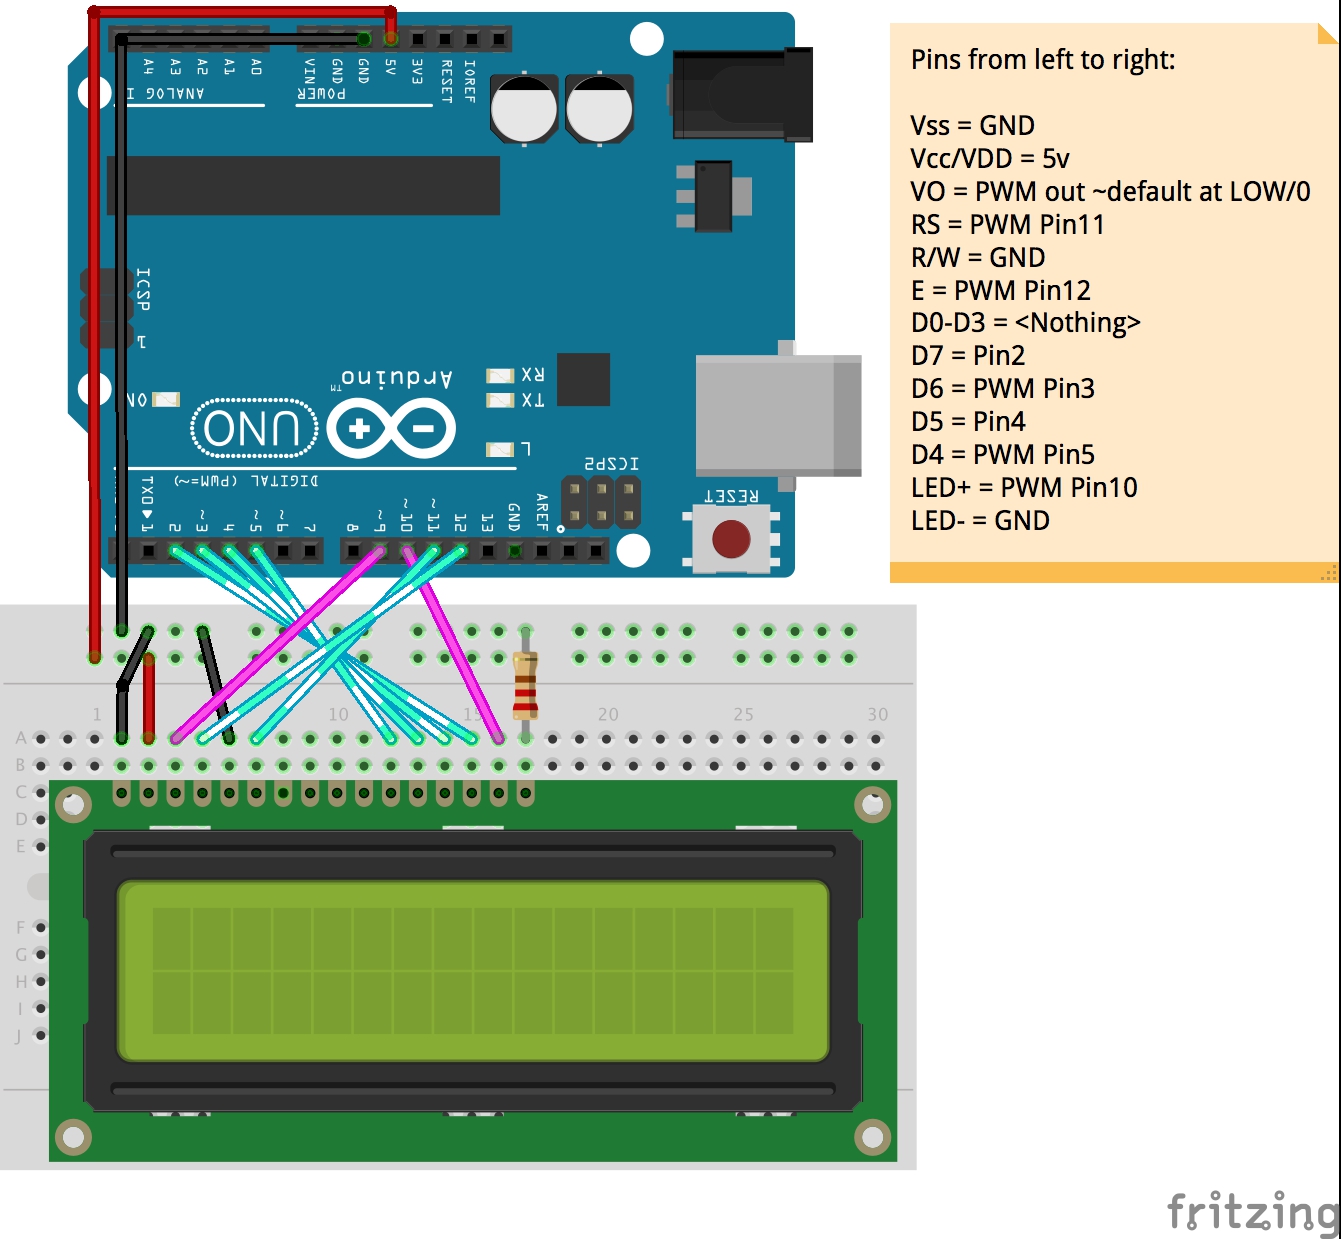
Once you gather the materials which are highlighted in the Components and Supplies section, use the picture of the circuit in the Schematics section as a reference to build the basic connection to the LCD. Please make sure you put the wires into the correct spot/port. At this point you are all set for programming the LCD!
#import <LiquidCrystal.h>
Start off the program by including the LCD library. This library should be already downloaded to the Arduino IDE. If for some reason it isn't, go to the Sketch menu >> Include Library >> Library Manager. In the top right text box, type in LiquidCrystal then look for the LiquidCrystal Library. Once you find the library click on it, select the latest version and hit install.
Initializing the LCD library is like initializing the servo motor library:
LiquidCrystal lcd(12, 11, 5, 4, 3, 2);
the numbers are the port numbers that are connected to the pins on the LCD from left to right (LCD is right-side-up).
Begin the LCD by using the code bellow:
lcd.begin(16,2); //16,2 for 16x2 LCD screen
In my case I am using a 16x2 LCD. You can find out the size of your LCD by counting how many boxes there are on the screen (the boxes, not pixels):
.
Here are three basic functions (in code) for the LCD:
#1
lcd.print("Hello");
The code above prints the word "Hello" on the LCD. "Hello" will appear at where the cursor is located. Be sure you check the output string you want is within the ranges of your LCD (16x2 can only have 16 character strings per row).
#2
lcd.setCursor(0,0);
This piece of code will set the cursor to the first row and first column of the LCD. LCD cursors are zero-indexed so zero would be the first number and one would be the second.
#3
lcd.clear();
It's pretty self explanatory, this line will clear the LCD screen and set the cursor to 0,0.
Please leave feed back on this tutorial, Thank you!
Bellow is a demo video with what you can do with the LCD setup provided in the Schematic section:


_ztBMuBhMHo.jpg?auto=compress%2Cformat&w=48&h=48&fit=fill&bg=ffffff)


Comments