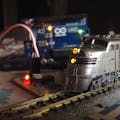
Getting started in model railways? Don't have enough budget to buy all those expensive train controllers? Don't worry! In this tutorial, I will show you how you can make your own low-budget train controller by hacking a servo motor. So, let's get started!
Step 1: Collect the EssentialsSo here is what you will need:
A standard servo motor(Plastic gear one is recommended since the mechanics of the servo motor will be unused.)
A screwdriver
A diagonal cutter
Some M-M jumper wires
A power feeder track(Use a suitable gauge of track that you have, I use N-gauge tracks)
Some F-F jumper wires
Step 2: Take Apart the Servo MotorStep 3: Disconnect the Motor WiresRemove the top gear housing and the output gear to expose the potentiometer. Push it down to free it from the servo motor's body and take the driver board out along with the potentiometer.
Step 5: Add Female Connectors to the Output Wires of the Driver Board
Doing so will make it easier to connect the servo driver's output to the L298N motor driver's input pins.
Step 6: Connect Jumper Cables to the L298N Motor Driver
Take a pair of jumper cables with female connectors on one side and bare wires on the other and connect the bare wires to the 5 volts and GND of the motor driver board. Using a pair of male to male jumper cables, connect the 12-volt input of the motor driver board(also marked as VIN or VMOT) and the GND to be later connected to a 12-volt power supply. Then, take another pair of male to male jumper wires and connect to any of the two motor outputs. Click on the image for help.
Step 7: Connect the Servo Driver Board
Connect the output wires of the servo drive to the input pins of the motor driver corresponding to the motor output the power feeder track will be connected to. For example, if the outputs 3 and 4 are being used(see image), connect the servo driver's output to the input pins marked 3 and 4.
Step 8: Connect the Servo Tester to the Servo Driver BoardStep 9: Connect the Servo Driver's Power Input to the 5 Volt Output of the Motor Driver
Step 10: Make the Test Layout
The test layout is just a loop of track made using N-gauge Kato Unitrack.
Step 11: Connect the Power Feeder Track to the Motor Driver's output
Here, I have used a computer's power supply to power the whole setup but you can also use a 12-volt power adapter.
Step 13: Get Your Train and Position It on the Tracks
If you want, you can test your setup by just using the locomotive.
Step 14: Power Up the SetupStep 15: Calibrate the Driver
After powering on the setup, press the button on the servo tester once. The middle LED should light up and the servo tester will command the servo driver to move the motor at 90 degrees angle(As it would normally do in a regular servo motor). Adjust the potentiometer on the servo driver until the locomotive stops moving.
Step 16: I'ts Done!Step 17: What's Next?!Since this model train driver uses a servo motor's driver board, it can easily be controlled using any microcontroller and can also be used with Wireless RC controllers to control the trains and even turnouts. Excited? Stay tuned for future projects related to this and all the best for your build!


_3u05Tpwasz.png?auto=compress%2Cformat&w=40&h=40&fit=fillmax&bg=fff&dpr=2)
Comments
Please log in or sign up to comment.