Hello readers. In this article, we will learn how to make a Gesture control robot using Arduino. You can control the movement of this robot using the gestures of your hand. We have to make two separate circuits, one we use as a transmitter circuit and the other we use as a receiver circuit. The circuit diagram and code for the project are given below. Read the article carefully and try to make it step by step. For more information regarding this project please visit the original post of this project also bookmark TECHATRONIC.COM as all my further projects and tutorials will be pre-uploaded there.
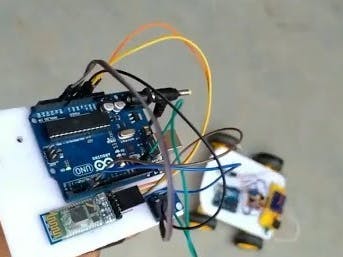
How does gesture control car work?There is serial communication between the two Arduino boards. One Arduino is used for sending the signals and the other Arduino is used for receiving those signals and move the robot accordingly. There is an accelerometer sensor that can sense the gesture of our hand. The transmitter sends the signals via an HC05 Bluetooth module that we use for wireless communication. We have to tie the transmitter circuit on our hands and the robot will move as we move our hands. For controlling the dc motors we have an L298N motor driver module.
Gesture Control Robot Circuit Diagram:-
Gesture control robot Arduino Code.NOTE: Upload these codes to the Arduino.
Receiver code.
//Receiver code
//all the best
#include<SoftwareSerial.h>
SoftwareSerial mybt(2,3);
char m=0,n=0;
void setup() {
pinMode(10, OUTPUT);
pinMode(11, OUTPUT);
pinMode(12, OUTPUT);
pinMode(13, OUTPUT);
Serial.begin(9600);
mybt.begin(9600);
}
void loop() {
if(mybt.available()>0)
{
m= mybt.read();
Serial.println(m);
if(m=='F')
{
digitalWrite(10, HIGH);
digitalWrite(11, LOW);
digitalWrite(12, HIGH);
digitalWrite(13, LOW);
}
else if(m=='B')
{
digitalWrite(10, LOW);
digitalWrite(11, HIGH);
digitalWrite(12, LOW);
digitalWrite(13, HIGH);
}
else if(m=='R')
{
digitalWrite(10, LOW);
digitalWrite(11, HIGH);
digitalWrite(12, HIGH);
digitalWrite(13, LOW);
}
else if(m=='L')
{
digitalWrite(10, HIGH);
digitalWrite(11, LOW);
digitalWrite(12, LOW);
digitalWrite(13, HIGH);
}
else if(m=='N')
{
digitalWrite(10, LOW);
digitalWrite(11, LOW);
digitalWrite(12, LOW);
digitalWrite(13, LOW);
}
else
{
digitalWrite(10, LOW);
digitalWrite(11, LOW);
digitalWrite(12, LOW);
digitalWrite(13, LOW);
}
} }
Transmitter Code.
//transmitter code
//all the best
#include
SoftwareSerial mybt(2,3);
int m=0, n=0;
void setup() {
pinMode(A0, INPUT);
pinMode(A1, INPUT);
mybt.begin(9600);
Serial.begin(9600);
}
void loop() {
m = analogRead(A0);
n = analogRead(A1);
//Serial.println(m);
//delay(500);
//Serial.println(n);
//delay(500);
if(n>=375)
{
mybt.write("F");
Serial.println("F");
}
else if(n<=320) { mybt.write("B"); Serial.println("B"); } else if(m>=375)
{
mybt.write("R");
Serial.println("R");
}
else if(m<=315)
{
mybt.write("L");
Serial.println("L");
}
else
{
mybt.write("N");
Serial.println("N");
}
}
You can also watch the full video on youtubeHAPPY LEARNING!


_ztBMuBhMHo.jpg?auto=compress%2Cformat&w=48&h=48&fit=fill&bg=ffffff)


_3u05Tpwasz.png?auto=compress%2Cformat&w=40&h=40&fit=fillmax&bg=fff&dpr=2)
Comments
Please log in or sign up to comment.