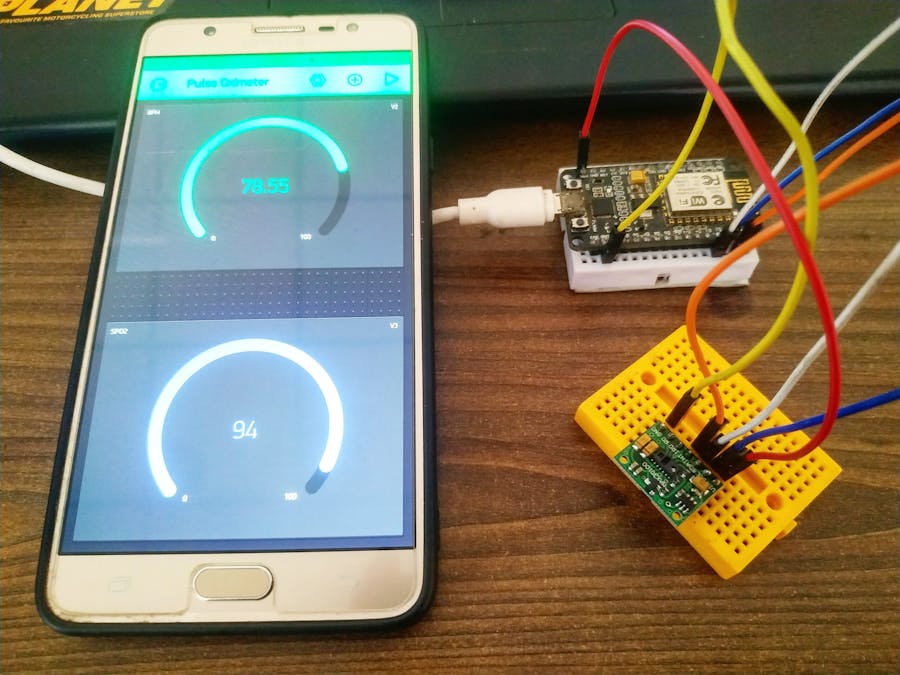
Welcome back readers, in this article we are going to teach you how to operate a MAX30101 pulse oximeter sensor with a nodemcu board. Follow the instructions carefully. The circuit diagram and code for this project are also given below. This system can read and display the SP02 rate of your body. We are using a MAX30101 pulse sensor with nodemcu. The readings can also be seen on the Blynk app. For more information about this project please visit the original post of this project and also bookmark TECHATRONIC.COM as all my further projects and tutorials will be pre-uploaded there.
About the projectMake the connections according to the diagram that is given below. Enter the SSID and password of your router or hotspot connection in the code so that nodemcu can connect to the internet. Just put your fingertip on the sensor. The pulse sensor will record the readings and you can see them on the serial monitor screen. The SP02 level will print continuously on the screen after a time delay of a second. Set up the Blynk app so that you can get the correct readings.
Materials required:- ESP8266 NodeMCU board
- MAX30101 Pulse oximeter sensor
- Blynk App and a smartphone
Circuit Diagram:
CODE for this project:NOTE: This is the code for the project, upload it to the nodemcu.
//TECHATRONIC.COM
// BLYNK LIBRARY
// https://github.com/blynkkk/blynk-library
// ESP8266 LIBRARY
// https://github.com/ekstrand/ESP8266wifi
// Arduino-MAX30100 LIBRARY
// https://github.com/oxullo/Arduino-MAX30100
// SimpleTimer LIBRARY
// https://github.com/jfturcot/SimpleTimer
#include <Wire.h>
#include <ESP8266WiFi.h>
#include <BlynkSimpleEsp8266.h>
#include "MAX30100_PulseOximeter.h"
#include <SimpleTimer.h>
#include <ESP8266WiFi.h>
#include <BlynkSimpleEsp8266.h>
// BPM GAUGE CONNECT V2
// SP02 GAUGE CONNECT V3
char auth[] = "your auth token";  // You should get Auth Token in the Blynk App.
char ssid[] = "your wifi ssid";              // Your WiFi credentials.
char pass[] = "your wifi password";             // Your WiFi Password.
#define REPORTING_PERIOD_MS   3000
SimpleTimer timer;
PulseOximeter pox;
uint32_t tsLastReport = 0;
void onBeatDetected()
{
;
}
void setup()
{
Serial.begin(115200);
Blynk.begin(auth, ssid, pass);
Serial.print("Initializing pulse oximeter..");
if (!pox.begin()) {
Serial.println("FAILED");
for (;;);
} else {
Serial.println("SUCCESS");
digitalWrite(1, HIGH);
}
pox.setIRLedCurrent(MAX30100_LED_CURR_24MA);
// Register a callback for the beat detection
pox.setOnBeatDetectedCallback(onBeatDetected);
timer.setInterval(3000L, getSendData);
}
void loop()
{
timer.run(); // Initiates SimpleTimer
Blynk.run();
// Make sure to call update as fast as possible
pox.update();
if (millis() - tsLastReport > REPORTING_PERIOD_MS) {
// to android cell phone application
Serial.print("BPM: ");
Serial.print(pox.getHeartRate());
//blue.println("\n");
Serial.print("  SpO2: ");
Serial.print(pox.getSpO2());
Serial.print("%");
Serial.println("\n");
Blynk.virtualWrite(V2, pox.getHeartRate() );
Blynk.virtualWrite(V3, pox.getSpO2());
tsLastReport = millis();
}
}
void getSendData()
{
}
Set Up the BLYNK App?Download the app and install it on your device.
We hope that you understand this project completely.
Thanks for reading!


_ztBMuBhMHo.jpg?auto=compress%2Cformat&w=48&h=48&fit=fill&bg=ffffff)


Comments
Please log in or sign up to comment.