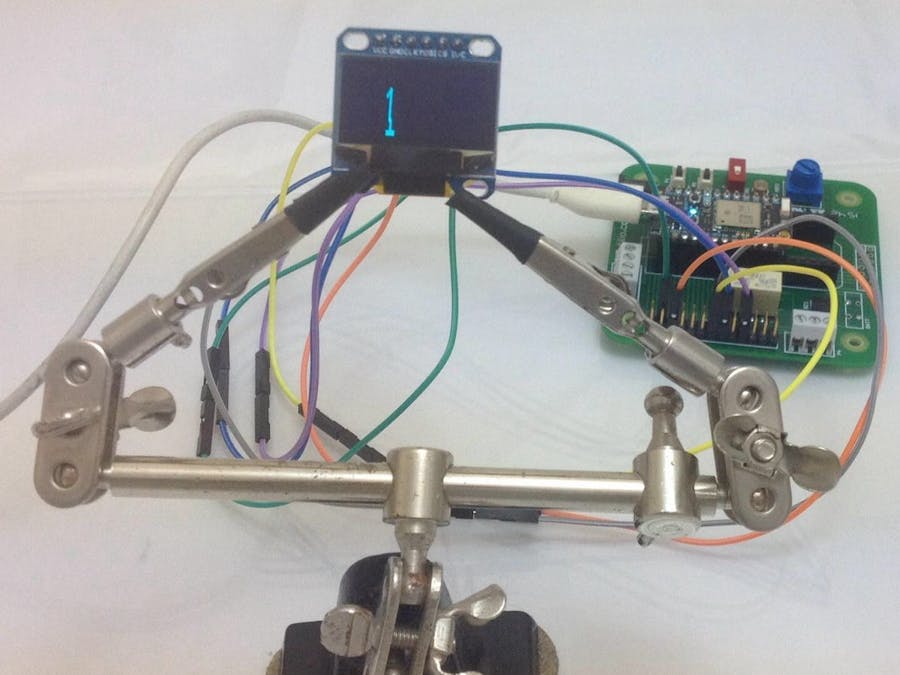
This tutorial will show you the integration of Rotilio Maker (link) wifi version (Particle Photon CPU on board) with an OLED SPI display and how to work with it using the SparkFun Micro OLED Library in order to visualize data coming from Rotilio Maker on board sensors.
Under the firmware point of view this tutorial demonstrate you how to manage from the IDE the inclusion of external library inside your code and Arduino firmare compatibility (and it's code reusability on Rotilio Maker platform).
First of all you need to update the firmware of your Rotilio Maker with the version of our tutorial : rotilio_oled.ino
CREATE A NEW APPTherefore create on the particle online IDE. A new app (i.e.: call it for example ROTILIO_OLED_SPI) and past on the code section the rotilio_oled.ino file content.
INCLUDE LIBRARIESPlease now take care at this two line of code placed at the beginning of the sketch:
#include "SparkFunMicroOLED/SparkFunMicroOLED.h"
#include "Particle_BaroSensor/Particle_BaroSensor.h"
For make it work you need to include the SparkFunMicroOLED and Particle_BaroSensor libraries.
For to do that, on the online Particle IDE, click on the left sidebar the flag named libraries.
At this point the IDE will show you a filter for search the existing libraries. Types for example SparkFunMicro and click on the output link.
The link forward you to a form where you can choose what to do with the library.
Please choose INCLUDE APP (The button in the middle of the last series ) and choose which app need the library: for us will be ROTILIO_OLED_SPI if you has followed our suggestion for the app name.
Be careful that the IDE will generate itself the inclusion code line, so delete the duplication at the end of the process before to compile the firmware.
Follow the same procedure also for the Particle Barosensors library starting from looking for Particle_Barosensor in the Particle IDE search form
Now we need to setup the Rotilio Maker firmware for the integration with the OLED SPI
The configuration can be made thanks a call at a public interface of an Arduino library class (MicroOLED ) used by the Spark Fun Micro OLED library included on the tutorial sketch
MicroOLED oled;
....
....
oled=MicroOLED(MODE_SPI, D7, D6, A6);
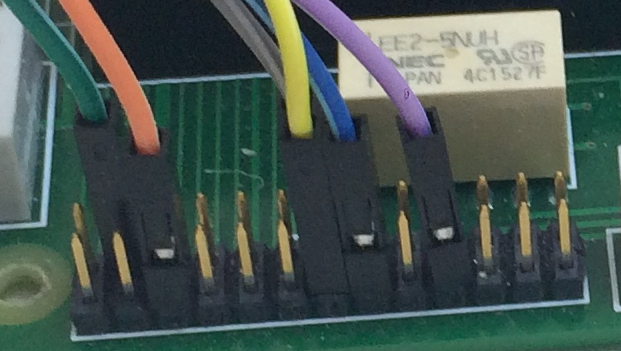
Where MODE_SPI represents the option for the OLED to work using SPI protocol, D7 is setted as the reset command pin,D6 works as digital pin to signal if incoming byte is a command or screen data, A6 works as serial data input.
You need to give energy supply to the OLED LCD display by connecting the GND pin to Rotilio GND pin and VCC pin to Rotilio 3.3 v pin.
The oder connection will be:
- Rotilio A5-->CS OLED
- Rotilio A6-->MOSI OLED
- Rotilio A3-->CCK OLED
- Rotilio D5-->D/C OLED
Below for convenience the Rotilio Maker pinout:
Inside the sketch's loop we call periodically , after to have cleared the OLED display, two functions (with three seconds of delay one before the other):
oled.clear(PAGE);
readVars();
delay(3000);
pixelExample();
Each functions call methods for interact with the display.
readVars give data from sensors and WiFi connection signal strength for compose a "page" on the OLED.
pixelExample is a piece of code grabbed from the tutorial of the Spark Fun OLED library.
ResultAfter connecting the OLED to the Rotilio Maker and at the end of the firmware transfer to your Rotilio (over the air thanks Particle IDE and cloud functionality) you can test the sketch.
We expect a result like that:


Comments
Please log in or sign up to comment.