


Hardware components | ||||||
 |
| × | 1 | |||
 |
| × | 1 | |||
When we want to connect our RPi that has GUI less OS and also you want to go headless (no monitor and no keyboard/mouse), you do below after putting OS image on SD card:
- An ssh file is created /boot
- wpa_supplicant.conf file is updated with SSID and AP and copied to /boot
- After RPi boots, it connects to the AP mentioned in the wpa config file
To perform above tasks, you need a laptop with card reader and then you need micro SD adapter. Following all this with so much hardware becomes more challenging when you take your RPi to a new network and you need to update your wpa config file again.
Now that is past now!
SolutionI came up with a very smart and easy to follow way that can help you easily connect your RPi to any network. Below are high level steps:
- Connect mobile to RPi via bluetooth
- Send updated wpa config file via bluetooth RPi
- Replace the existing wpa config file
- Reboot Pi
You must be thinking that I have made the things more complicated and added more tasks.
In order to automate all above, we need to create some services that will perform all tasks itself. There will be two main services:
- Service-1: Receives wpa config file from mobile phone via bluetooth
- Service-2: Moves config file to the right directory and then reboots the RPi
In order to create this service, we need to run some commands and perform some actions before we create service.
Run below command:
sudo apt-get install obexpushd
sudo nano /etc/systemd/system/dbus-org.bluez.service
2nd command will open a file. In that locate below line:
ExecStart=/usr/lib/bluetooth/bluetoothd
and add -C at end of it to make it look like:
ExecStart=/usr/lib/bluetooth/bluetoothd -C
Now its time to create Service-1. Create a folder where you want to receive the file from mobile (e.g. tmp in my case)
mkdir tmpRun below command now:
sudo nano /etc/systemd/system/obexpush.serviceAnd put below lines in it:
[Unit]
Description=OBEX Push service
After=bluetooth.service
Requires=bluetooth.service
[Service]
ExecStart=/usr/bin/obexpushd -B23 -o /home/pi/tmp -n (destination folder)
Restart=always
[Install]
WantedBy=multi-user.target
Save the file and exit. Enable the service using:
sudo systemctl enable obexpushif it asks to do daemon reload then do it.
sudo systemctl daemon-reloadThen start this service:
sudo systemctl start obexpush.serviceNext step is to make our RPi always in discoverable mode. This can be done by running:
sudo nano /etc/bluetooth/main.confIn this file uncomment DiscoverableTimeout = 0 (by removing # from start). Do daemon reload and restart bluetooth service:
sudo systemctl daemon-reload
sudo systemctl restart bluetooth.service
Next is to makes changes to rc.local. Run:
sudo nano /etc/rc.localGoto end of file, before exit 0 and put below lines:
sudo bluetoothctl <<EOF
power on
discoverable on
pairable on
Save and exit the file. Reboot RPi.
At this stage, your RPi will be is discovery mode and you can pair it using your mobile.
Service-2This service is created to move the wpa config file that will be sent by mobile. As we already have this file (wpa_supplicant.conf) in /etc/wpa_supplicant/ folder and if mobile sends the same file it can not be replaced. There is a workaround for that. We will receive the file in the tmp directory we created during Service-1 step and then move this file to /etc/wpa_supplicant/. In order to achieve this, we will create a python script (name it file_handler.py):
import os
import time

while(1):
	if(os.path.exists('/home/pi/tmp/wpa_supplicant.conf')):
		os.system('sudo mv /home/pi/tmp/wpa_supplicant.conf /etc/wpa_supplicant')
		time.sleep(4)
		os.system('sudo reboot -h now')
	else:
		print("no exist")
	time.sleep(2)
This script will check if there is any existing file in our tmp directory and if there is any then move it to the right folder and reboot RPi. After this, we need to make it executable and change its ownership to user pi
chmod +x file_handler.py
sudo chown pi file_handler.py
sudo chgrp pi file_handler.py
Now we are ready to create Service-2. Run:
sudo nano /etc/systemd/system/fileh.serviceand put below contents:
[Unit]
Description=File Handler
After=multi-user.target
[Service]
Type=simple
ExecStart=/usr/bin/python3 /home/pi/file_handler.py
Restart=always
[Install]
WantedBy=multi-user.target
Now do same like Service-1 to enable the service:
sudo systemctl daemon-reload
sudo systemctl enable fileh.service
sudo systemctl start fileh.service
At this stage we have enabled our RPi to receive the config file from mobile, move to the right folder and reboot. After the reboot, RPi will be connected to the required AP.
Another MagicLets do something that let us know that our RPi is able to connect to internet via that AP. For this, we will create another service using python.
Service-3Create a python file with name chknet.py and put below code in that:
from urllib.request import urlopen
import time
from gpiozero import LED
led = LED(17)
while(1):
time.sleep(5)
try:
urlopen("http://www.google.com/").read()
led.on()
except urllib2.URLError as err:
led.off()
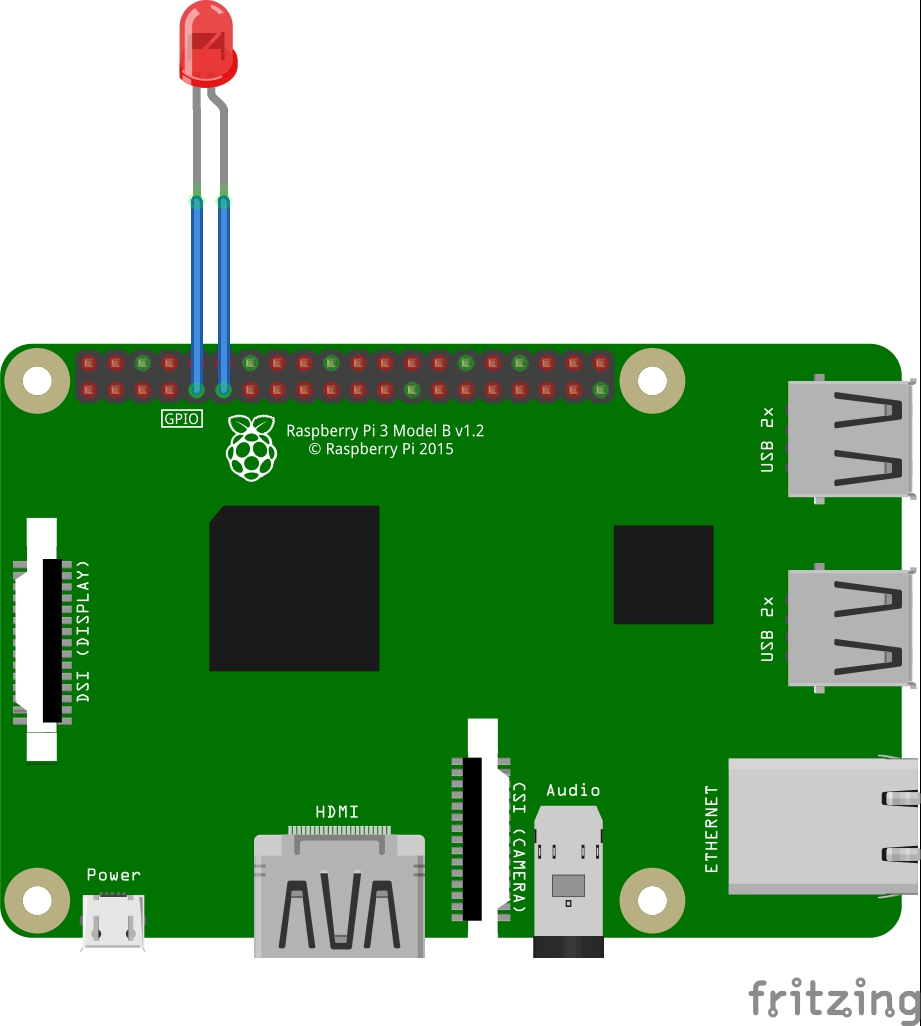
passThis script checks connectivity and turns on an LED connected to GPIO7. It requires gpiozero package that can be installed using:
sudo apt install python3-gpiozeroAfter this, we need to make it executable and change its ownership to user pi
chmod +x file_chknet.py
sudo chown pi file_chknet.py
sudo chgrp pi file_chknet.py
Next is to create a service, say chknetconn.service with below contents:
[Unit]
Description=net check
After=multi-user.target
[Service]
Type=simple
ExecStart=/usr/bin/python3 /home/pi/chknet.py
Restart=always
[Install]
WantedBy=multi-user.target
Enable and start service same way as you did for Service-1 and 2
Thats all. LED will turn on if your RPi has internet connectivity otherwise it will turn off. Connect LED as shown in schematics. Add a current limiting resistor if required.
How to useOpen bluetooth on your mobile and scan for devices. Once you see your RPi, click on it and pair it. Then goto the folder on your mobile where you kept the wpa config file. Select it and send it via bluetooth to your RPi. If you see successfully transferred message on your mobile, your RPi will reboot after few seconds. Once reboot complete, you will see LED turn on showing that the RPi is now connected to internet.


Comments
Please log in or sign up to comment.