At my local makespace we are lucky to have an amazing range of equipment, but space is limited and the equipment needs to justify being in the space. However it's not easy to tell how popular the various pieces of equipment are, some are obvious like the laser cutters, but other pieces of equipment not so.
Another issue faced is broken equipment, nobody wants to turn up to the space to use something and find it's broken, but members don't always remember to email the people responsible for the equipment to report a fault.
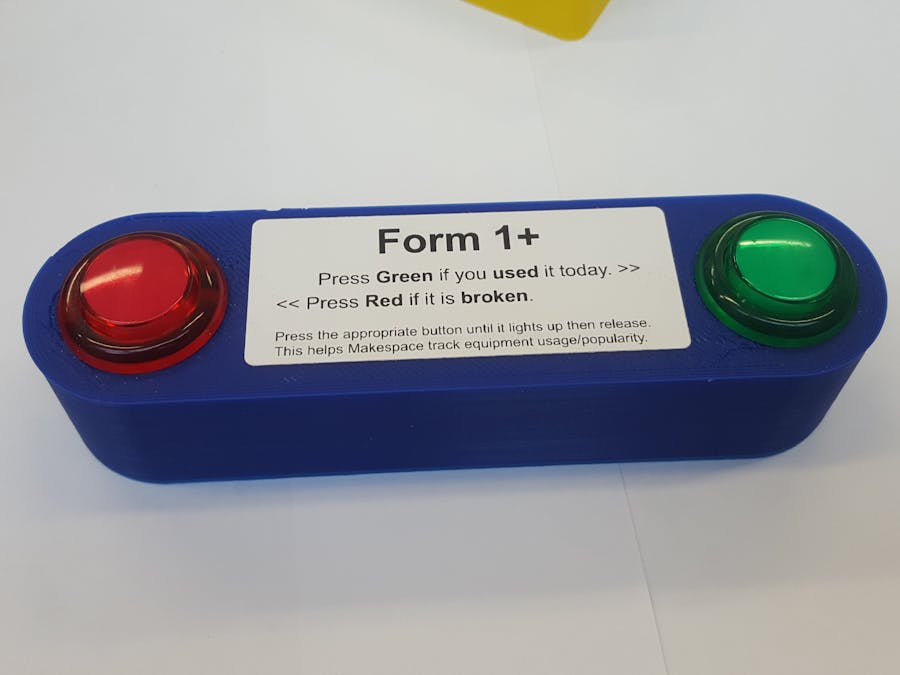
So I developed this simple double button solution to allow members to give simple feedback, press the green (happy) button to indicate that you used the equipment, the red (sad) button to indicate if the equipment is broken.
This happy sad button solution is not only useful for equipment monitoring, but can be extended to other uses, a common one might be conference feedback on a talk, happy/green - I liked the talk, sad/red - I didn't like the talk, or perhaps a sleeping / awake indicator for your home automation (red - I'm going to sleep do not disturb, green - I'm awake, boil the kettle). Obviously other button colors could be used.
Many solutions exist with a single button, such as the Amazon Dash button, however I was looking for something that could provide a surface for simple instructions as well as a way to communicate if the equipment had been used, or if it was faulty.
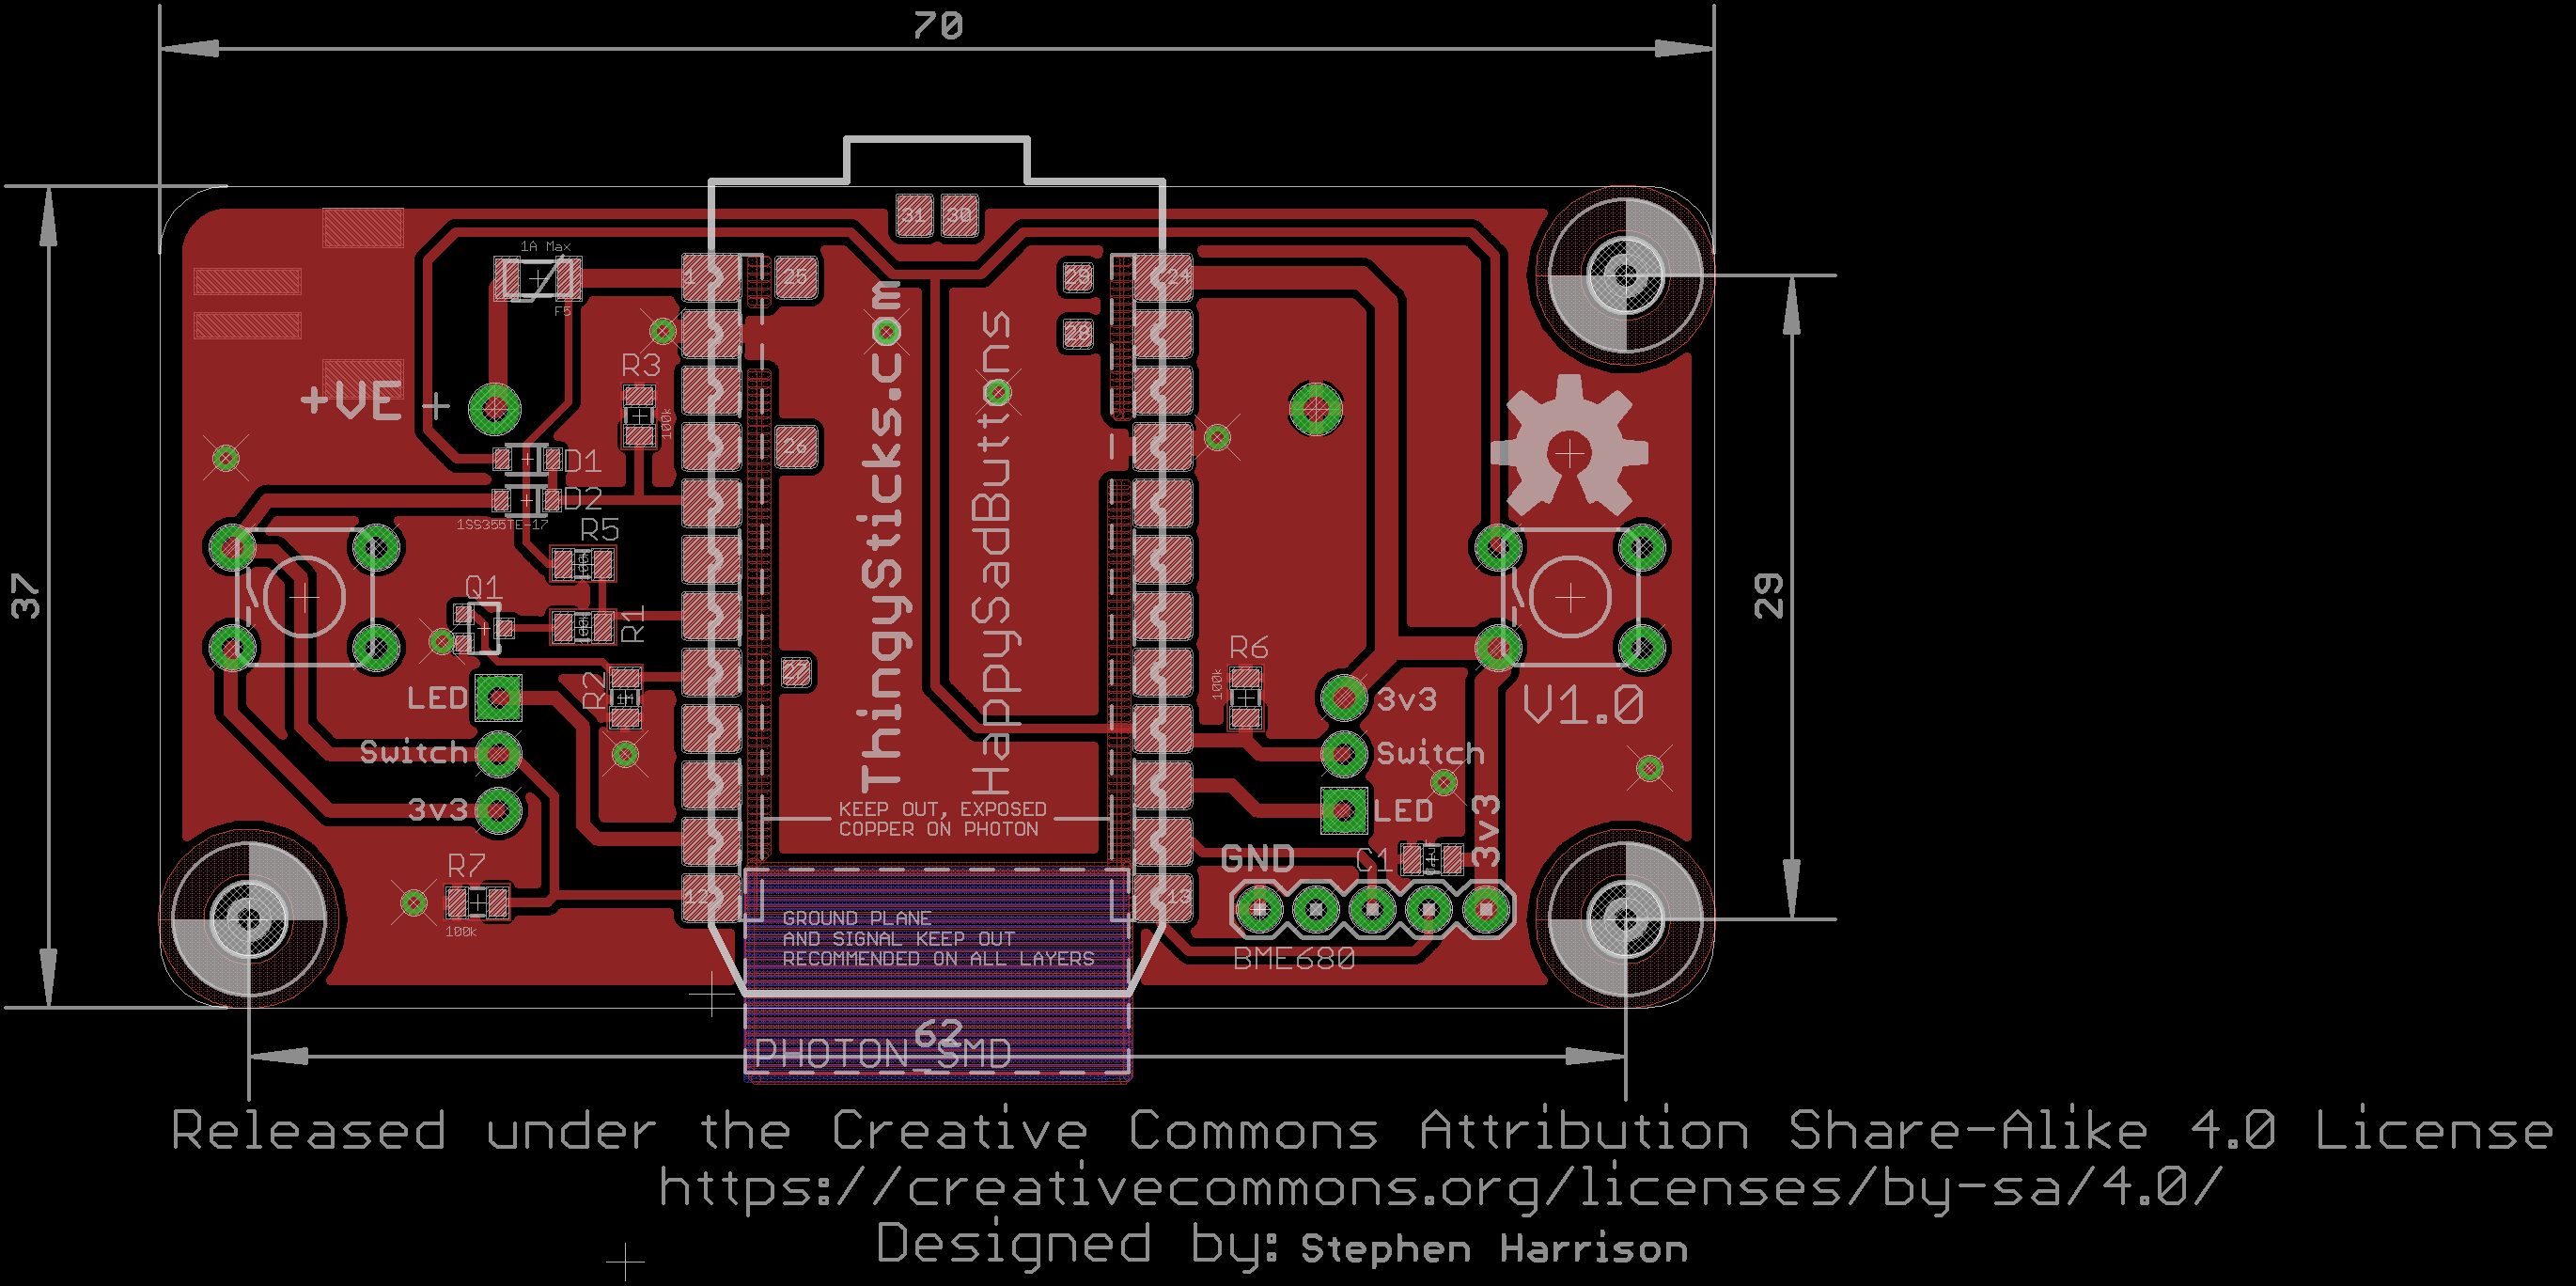
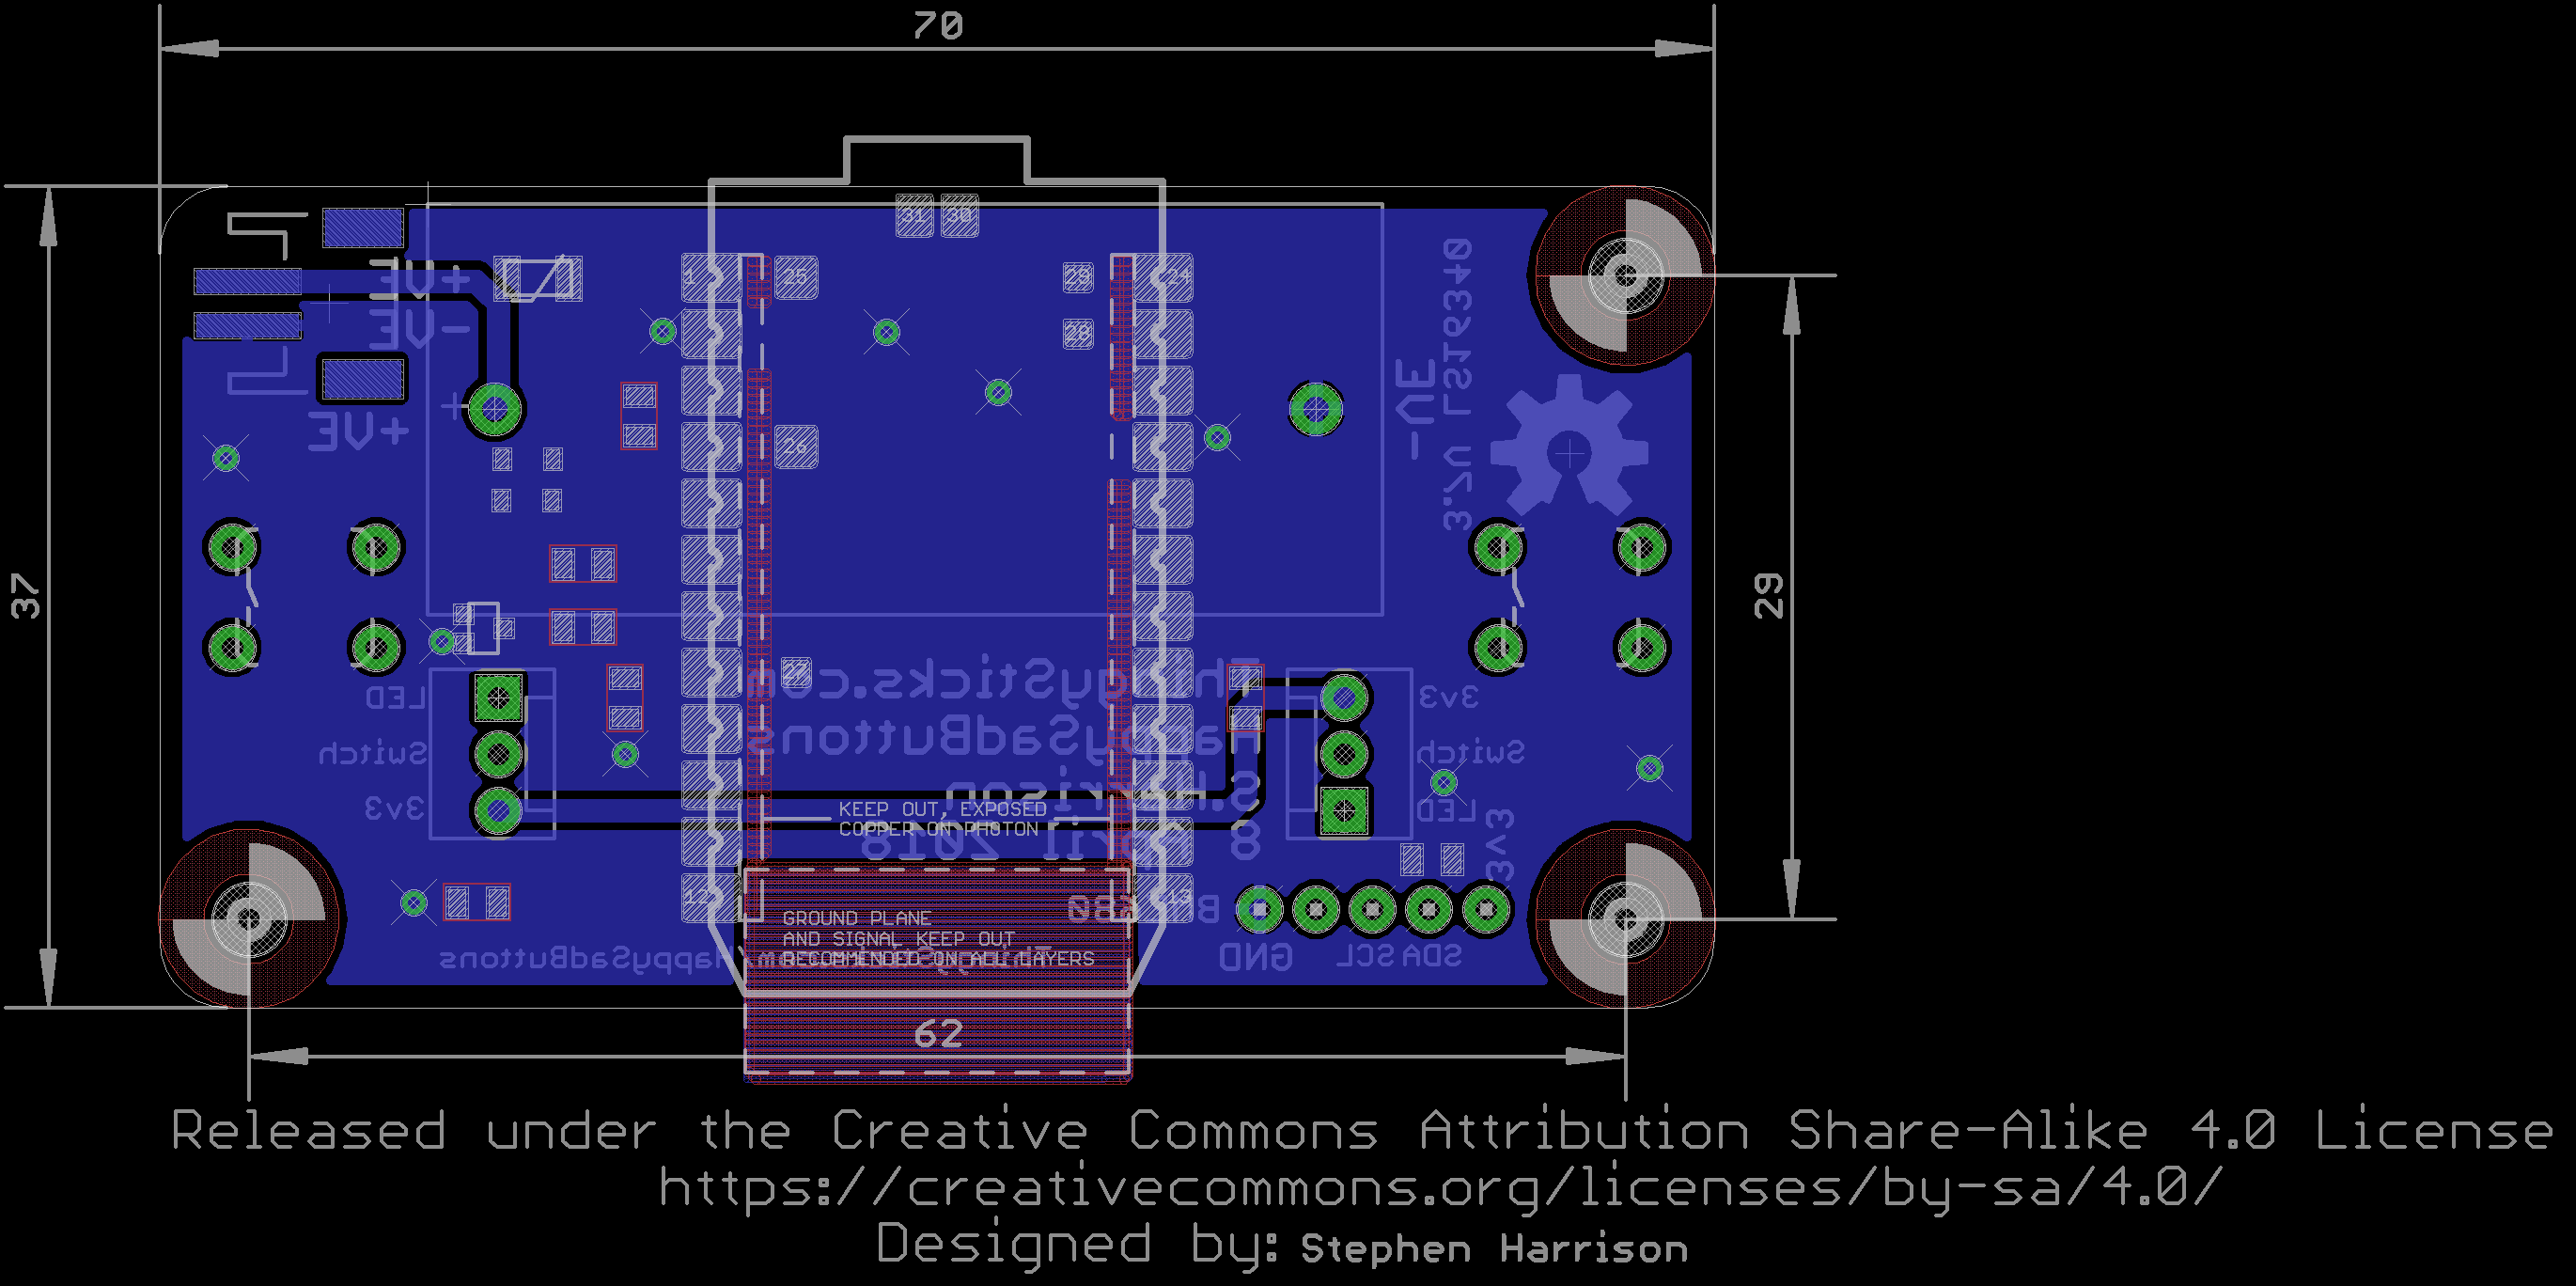
This project uses a Particle Photon in low power mode and two LED indicator buttons. The PCB is designed to also use simple PCB mounted press buttons if a smaller solution is required.
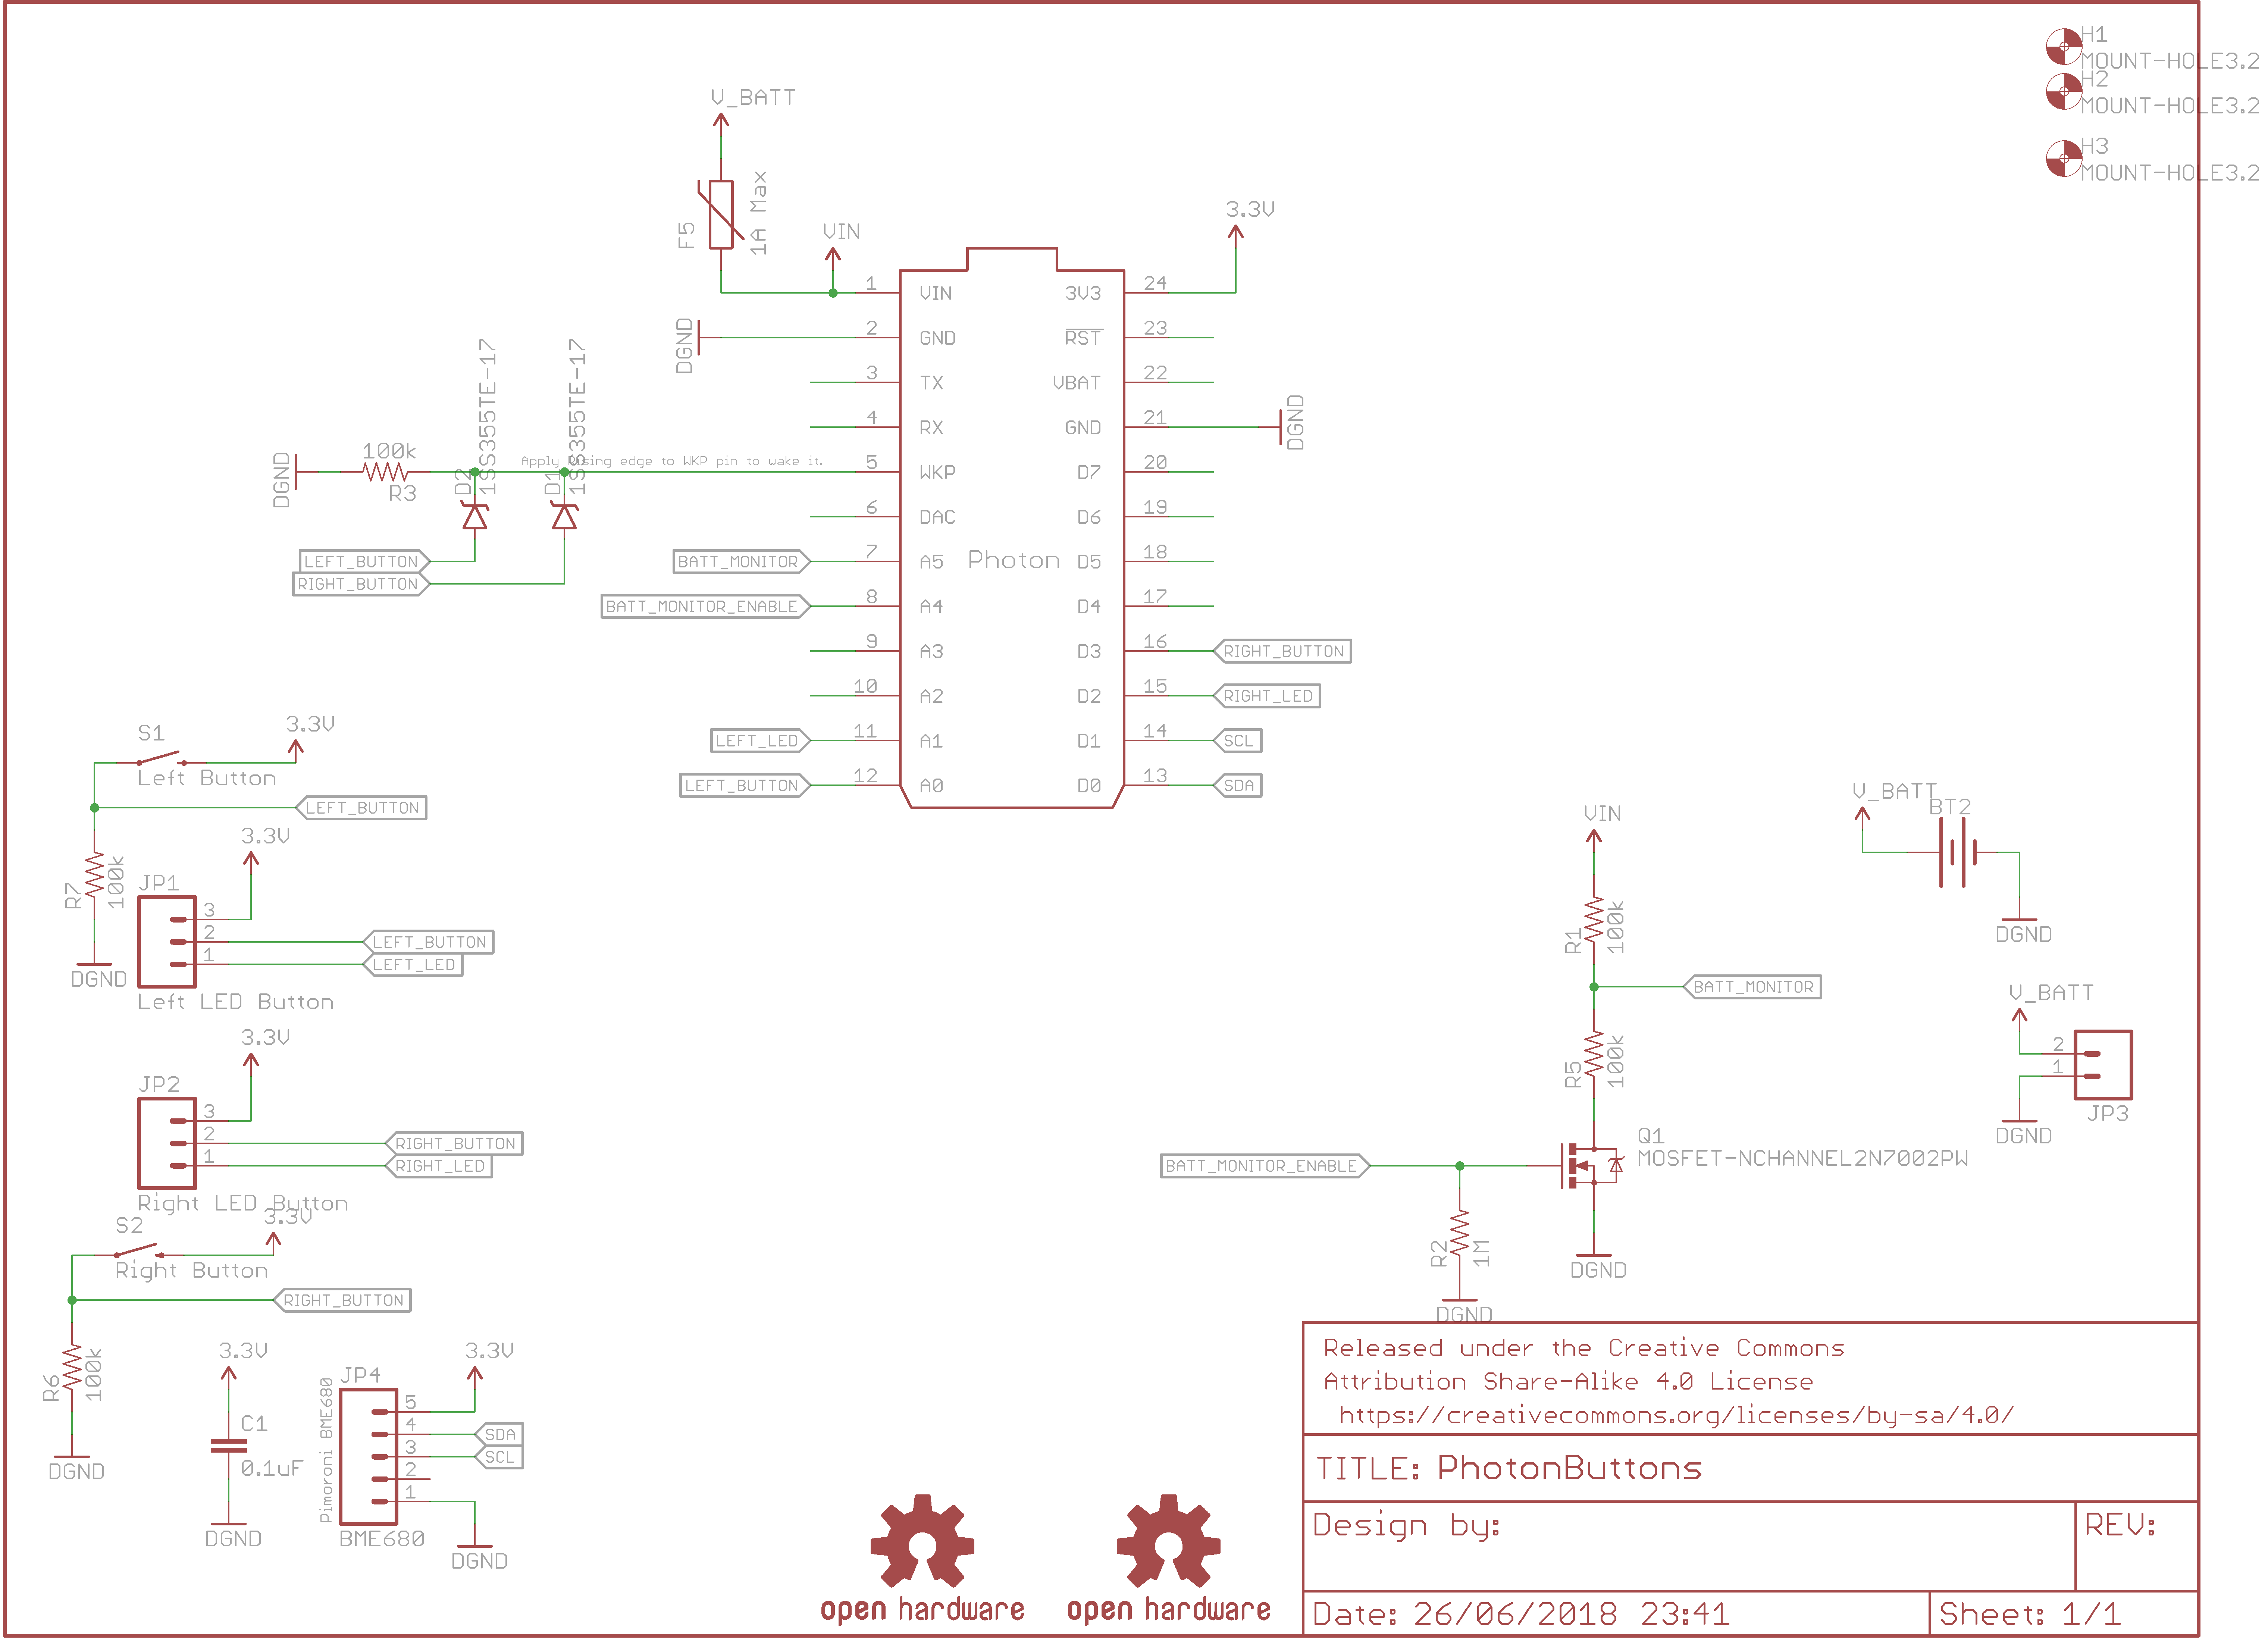
ElectronicsThe electronics is fairly simple. I elected to use a headerless Photon to reduce the height, it's only a few mm, but with an on-board battery and connectors I wanted to keep it as low profile as possible.
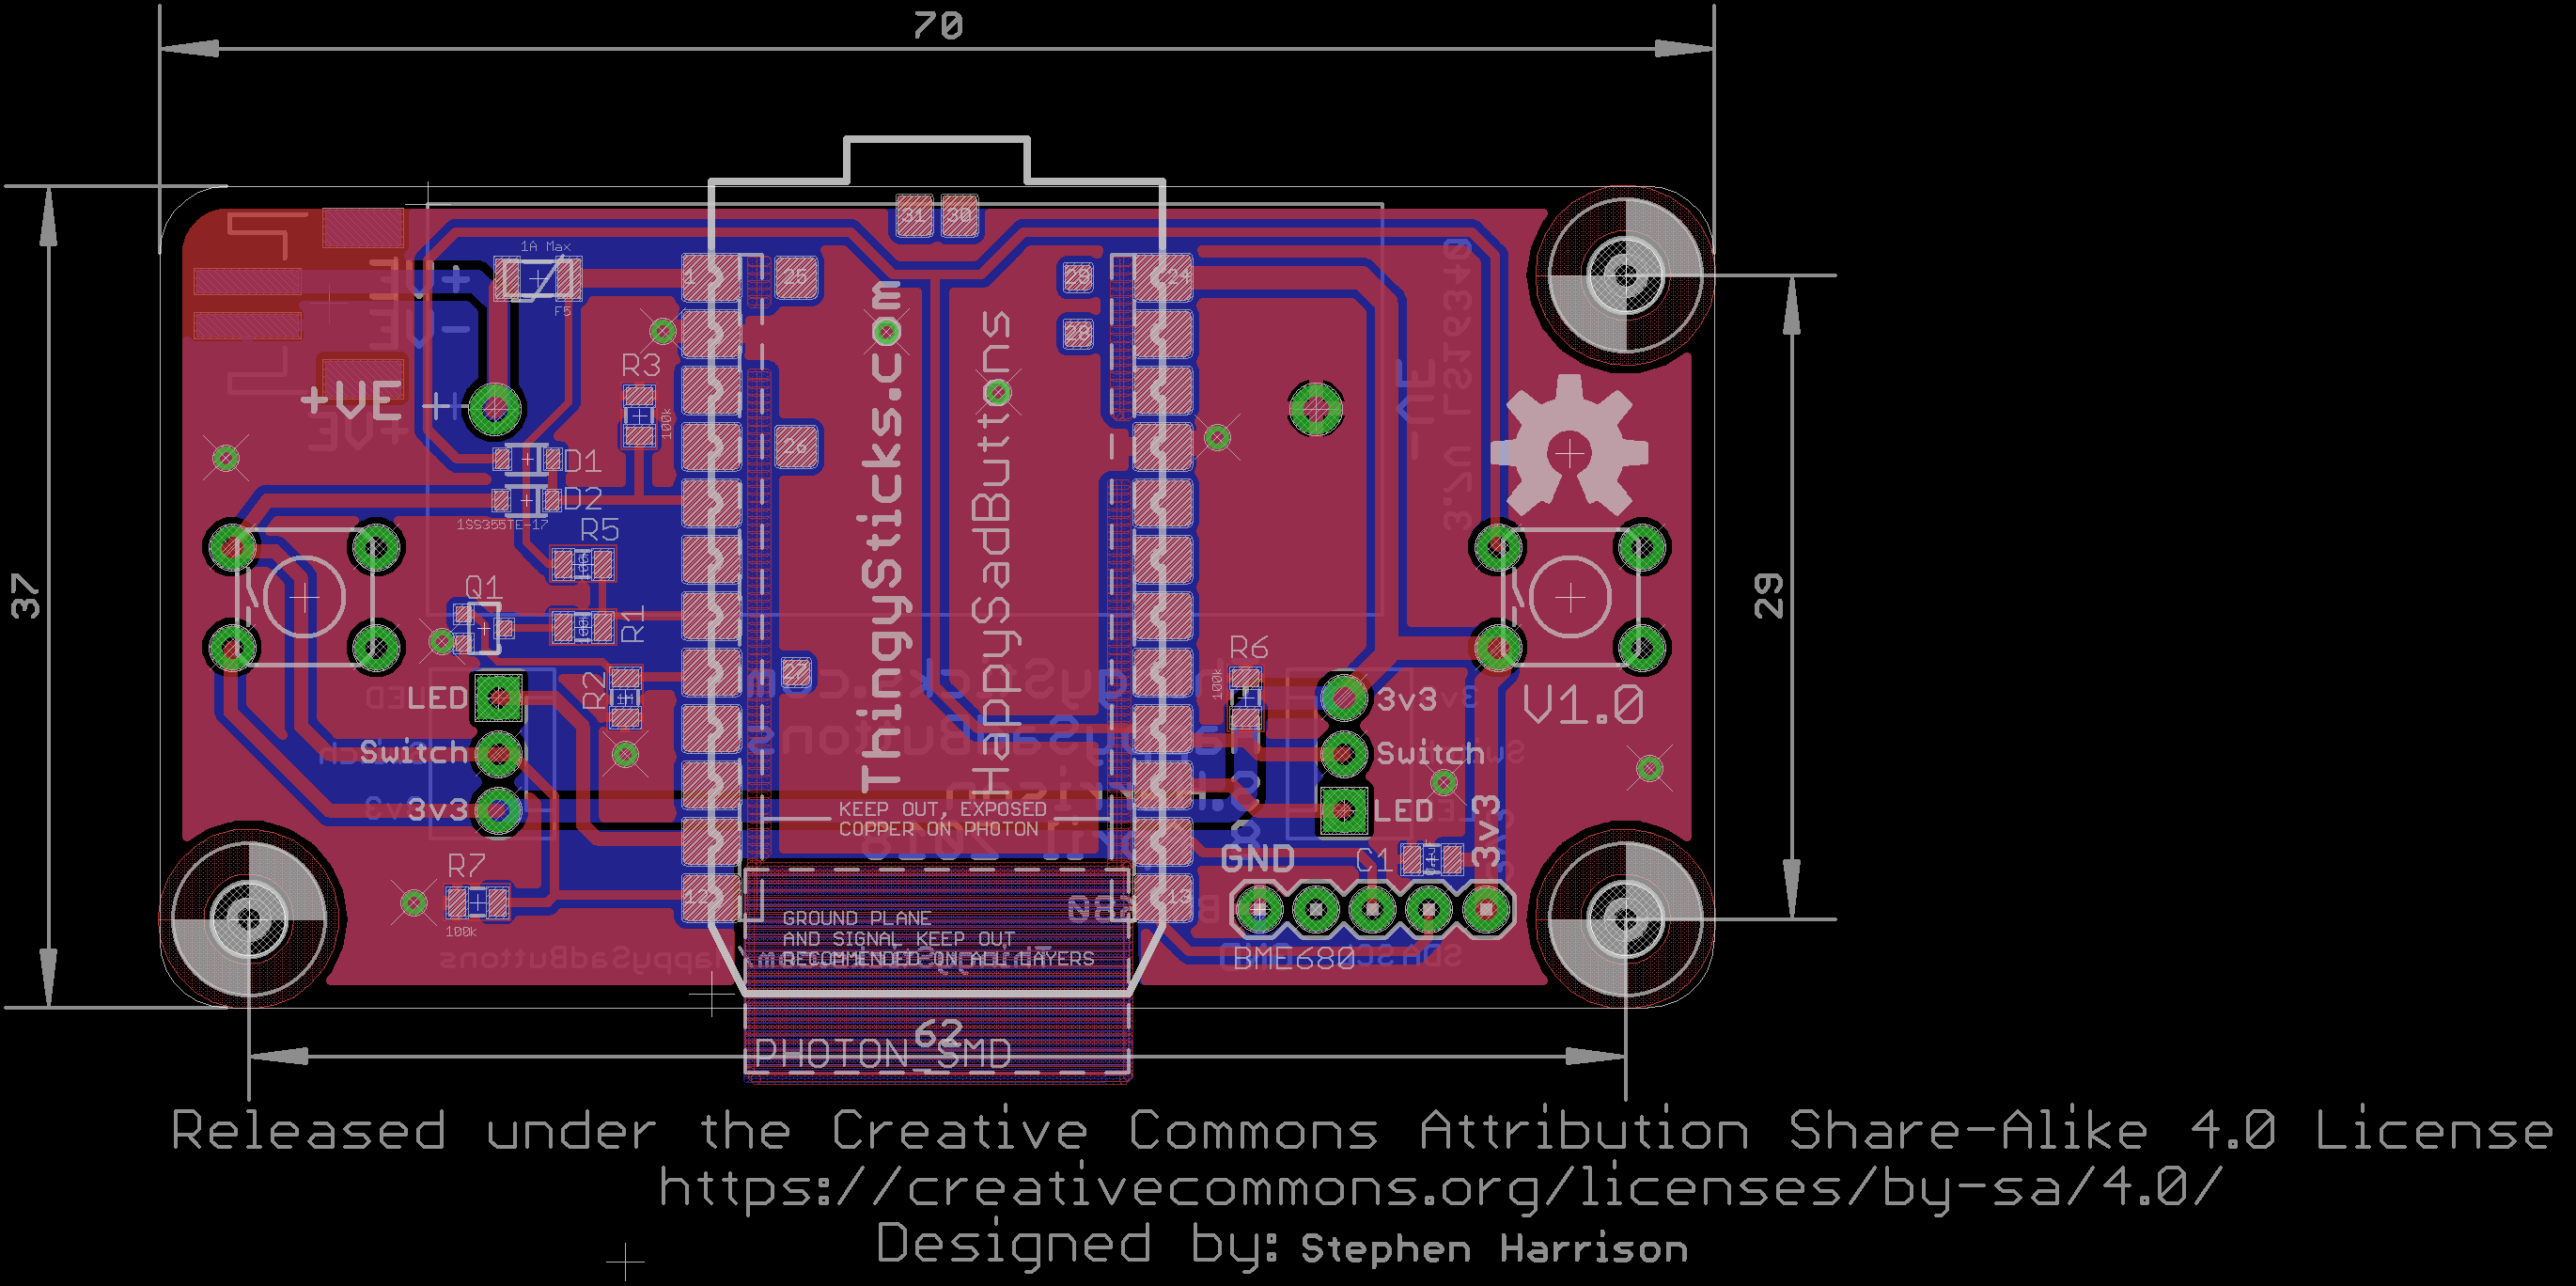
Connectors JP1 and JP2 are used for the buttons. I've used active high LED and button signals as the WKP wakeup pin on the Photon is active high.
When the Photon is put into deep sleep power consumption drops significantly allowing a long life on a battery, the Photon can be woken through a rising signal on the WKP pin, however we have 2 possible wake options (happy or sad button press) so these are fed via a diode to the WKP pin to make a cheap OR gate.
Battery voltage is monitored through the R1/R5 potential divider into A5 on the Photon and the mosfet Q1 is used to disconnect the divider to prevent drain on the battery (20uA is used by R1/R5 which is significant compared to the Photon in deep sleep). However it should be noted that with R5 disconnected from the ground the input at A5 will be the full battery potential (ca. 4.2V for a fresh battery), this can damadge the Photons ADC so we need to ensure that Q1 is enabled before measuring the analog value at A5.
JP4 allows for a environmental sensor such as the Pimoroni BME680 breakout board to be used so this solution can also monitor air quality (useful in a workshop or conference room environment).
Power is provided either by an on-board RCR123A battery (BT2) or the external JST connector (JP3). This is fed into the Photon's VIN via a fuse, however no protection is provided for the battery should the Photon be powered via USB.
Notice that to keep the footprint down the JST connector would slide in where the 123A battery is, so only one battery configuration can be used.
Whilst rechargeable batteries are used, these need to be removed to recharge them. At this stage of the project I didn't fancy designing in a charger and I also wanted to case to be sealed as Makespace is mighty dusty, especially in the workshop. Perhaps the next version could include a QI charger option, or connectors on the base for power input without having to create a hold in the case.
The Enclosure is 3D printed in 2 parts, heatfit inserts are use for the PCB mounting and to screw the two parts of the case together, and is sized to allow for a Dymo printed label to be fitted giving instructions on the use. No special slicer settings need to be used, a brim might help with warping if that is an issue, no supports are required.
The base (or lid) is hollowed out for the buttons and in between, this is actually enough to see the Photons status LED which comes in useful.
Two almost identical buttons appear to be available, one smaller than the other. The OpenSCAD file can be modified to allow for different sized buttons.
// How big the cutout for the buttons is.
// Large buttons = 29mm
// Small buttons = 25mm
buttonInner = 29;
The Photon is placed in Semi automatic mode, this means that it won't connect to the WiFi on power up, but we can request the device connects to allow the Particle Cloud publish to be made, the device will then automatically process the cloud functionality.
In normal automatic mode their is a significant delay whilst the Photon connects to the WiFi after pressing a button before the LED for that button is switched on, this makes for a poor feedback mechanism. With Semi automatic the LED is turned on almost instantly and kept alight whilst the Photon connects to WiFi and publishes the counts.
SYSTEM_MODE(SEMI_AUTOMATIC);
When a button is pressed the Photon wakes from deep sleep, runs the setup code then loop.
Setup ensures all the pins are in the appropriate mode and reloads the happy/sad press counts from EEPROM.
void setup() {
   pinMode(D7, OUTPUT);
   setupButtons();
   setupBatteryMonitor();
   setupBmeSensor();
   readCounts();
   hasBme = false;
}
The loop function checks which button was pressed and publishes an appropriate message.
If no button was pressed then the Photon was woken by the RTC, this happens ever 120 minutes (this could be reduced when doing environmental monitoring), this allows the device to report back the battery level and to indicate it's still functioning if it hasn't been used for a while.
void loop() {
   checkButton(HappyButtonPin, HappyLedPin, 1, 0, "Happy button pressed!");
   checkButton(SadButtonPin, SadLedPin, 0, 1, "Sad button pressed!");
   if (counter == 0 && !anyButtonPressed) {
       publish(0, 0, "Environental check...");
   }
   delay(1000);
   if (counter > sleepAfterCounts) {
       // Deep sleep for a couple of hours
       // to help preserve battery life.
       System.sleep(SLEEP_MODE_DEEP, 120 * 60);
   }
   counter++;
}
A little de-bounce is added to ensure a button is pressed, then if the input is still high the appropriate counter is incremented, the LED for the button is activated, the counts stored in EEPROM and the values pushed to the Particle Cloud.
Once the information has been transmitted the LED is switched off and the device allowed to go back into deep sleep to conserve power.
Trying to update the firmware on a development deployment through the Particle Cloud is difficult when the device goes to sleep. Here I've added a 60 second delay after a button press to keep the device awake allowing me to update the firmware. However for a deployed solution the Particle Products solution can be used, this allows the device to check the firmware version and update automatically when it connects to the cloud and so the delay would not be needed which would improve battery life.
void checkButton(int buttonPin, int buttonLedPin, int happyIncrement, int sadIncrement, String message) {
   if (digitalRead(buttonPin)) {
       // Debug helper.
       digitalWrite(D7, HIGH);
       delay(30);
       // Debounce to ensure the button is actually pressed.
       if (digitalRead(buttonPin)) {
           anyButtonPressed = true;
           // Keep awake for a bit longer to help with
           // software updates rather than having to get to the device.
           sleepAfterCounts = 60;
           // Light the LED to show it's being updated.
           digitalWrite(buttonLedPin, LOW);
           // Store & Publish
           happyPressedCount+=happyIncrement;
           sadPressedCount+=sadIncrement;
           storeCounts();
           publish(happyIncrement, sadIncrement, message);
           // wait for the button to be released to save
           // repeat messages.
           while(digitalRead(buttonPin)) {
               delay(200);
               digitalWrite(D7, LOW);
               delay(200);
               digitalWrite(D7, HIGH);
           }
       }
       // Turn off the LEDs.
       digitalWrite(D7, LOW);
       digitalWrite(buttonLedPin, HIGH);
   }
}
The publish function pushes the button counts and battery voltage to Tinamous via the Particle Cloud using a simple json object.
void publish(int happy, int sad, String message) {
   float batteryMilliVolts = readBatteryLevel();
   Particle.connect();
   delay(1000);
   Particle.publish("status", message, 120, PRIVATE);
   delay(1000);
   String json = "{'SadPressedCount': " + String(sadPressedCount);
   json+= ", 'HappyPressedCount': " + String(happyPressedCount);
   json+= ", 'Happy': " + String(happy);
   json+= ", 'Sad': " + String(sad);
   json+= ", 'Battery_mv': " + String(batteryMilliVolts);
   json+= ", 'Version': '0.6' ";
   json+= "}";
   // TODO: BME680 details as well if available.
   if (hasBme) {
       //json+= ", 't': " + String(temperature);
       //json+= ", 'h': " + String(humidity);
       //json+= ", 'voc': " + String(vod);
   }
   Particle.publish("json",  json, 120, PRIVATE);
   delay(1000);
   counter = 0;
}
Note the 1000ms second delay after the publish, this gives the Photon a chance to send the message in case it is instantly put to sleep after the publish when it might not have been fully transmitted.
MonitoringTinamous has a Particle Bot that connects to the Particle Cloud, no WebHooks or other device functionality is needed to connect up the devices.
The Tinamous ParticleBot connects to the Particle Cloud and processes the event stream provided. It accepts json, senml or simple measurement events and will parse the data and store it within Tinamous, allowing charting, dashboards and notifications.
We can look at the chart within Tinamous to see device usage:
Here you can see that somebody indicated they used the Form 1+ printer on the 12 and 19th of June (4th and 24th as well, but these were me testing the buttons!), on the 21st of June the battery went flat and the happy pressed count was reset as I had not been using EEPROM storage at that time.
Fault NotificationWhen the sad button is pressed a status message is published to Tinamous of "Sad button pressed!", this is shown on the Tinamous timeline.
To get a notification we can setup a status message based notification in Tinamous.
Add a new Notification and select "A Status Message is posted" type.
Add the status message text to match against (don't include the ! as this breaks the matching):
Add a filter for only the devices that are tagged with "HappySadButtons":
Set to trigger every time the message is posted:
Set to send an email when triggered:
Finally give it a sensible name and create the notification:
The notification shows up in our list:
When the sad button is pressed I get an email...






Comments
Please log in or sign up to comment.