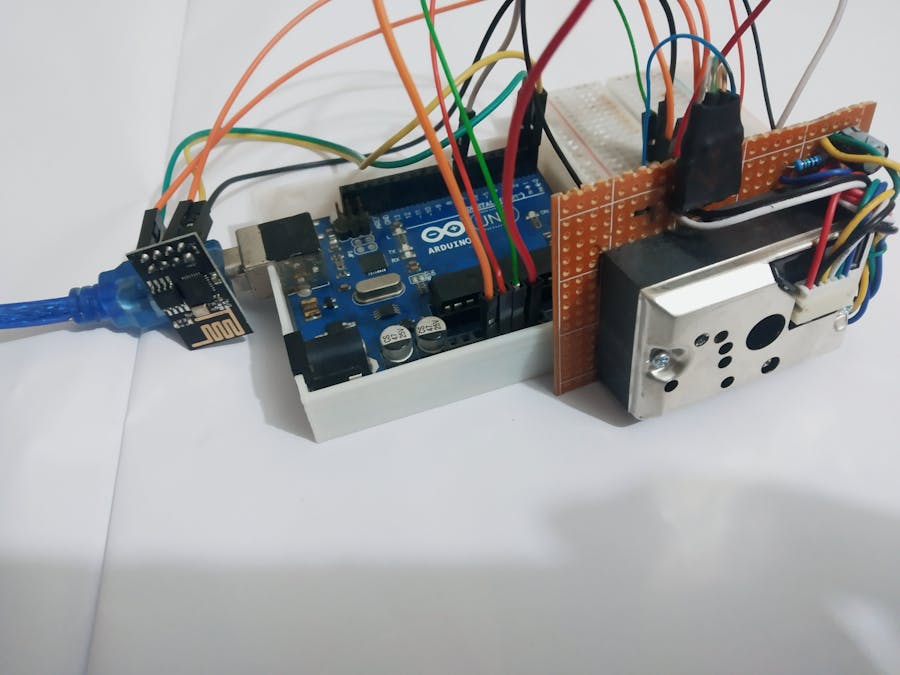
In this project I have made a IOT based Dust density monitor which can measure the surrounding dust and send the data through internet and I can graphically monitor the long term value of the dust density in a place. This can helps to make future project like improving the air pollution and many other projects.
Sharp gp2y1014au0f is a particulate sensor uses an IR LED and when the particle in the air enters into the sensor the light bounce off towards a photo-detector. This technique is called laser scattering. The intensity of the scattered(Bounced) light depends on the dust particles. The more the dust particle the grater the bouncing or scattering happens. This intensity change of light on the photo detector changes the output voltage of the sensor. And we can read the output voltage and measure the dust density on the air.
I get the sensor as a kit. The kit includes:
- 1x GP2Y1014AU0F sensor
- 1 x 6-pin pig-tail cable for interfacing with the sensor easily
- 1 x 150 ohm resistor
- 1 x 220uF capacitor
As it has 6 connector and I have to add the resistor and the capacitor, I have made a module with It.
I make this project IOT based, so I use an Arduino UNO microcontroller and a ESP8266 (ESP01) Wi-Fi module, for internet connectivity. I use Blynk (IOT platform) app for visualize the data send by the Arduino.
Arduino and ESP01
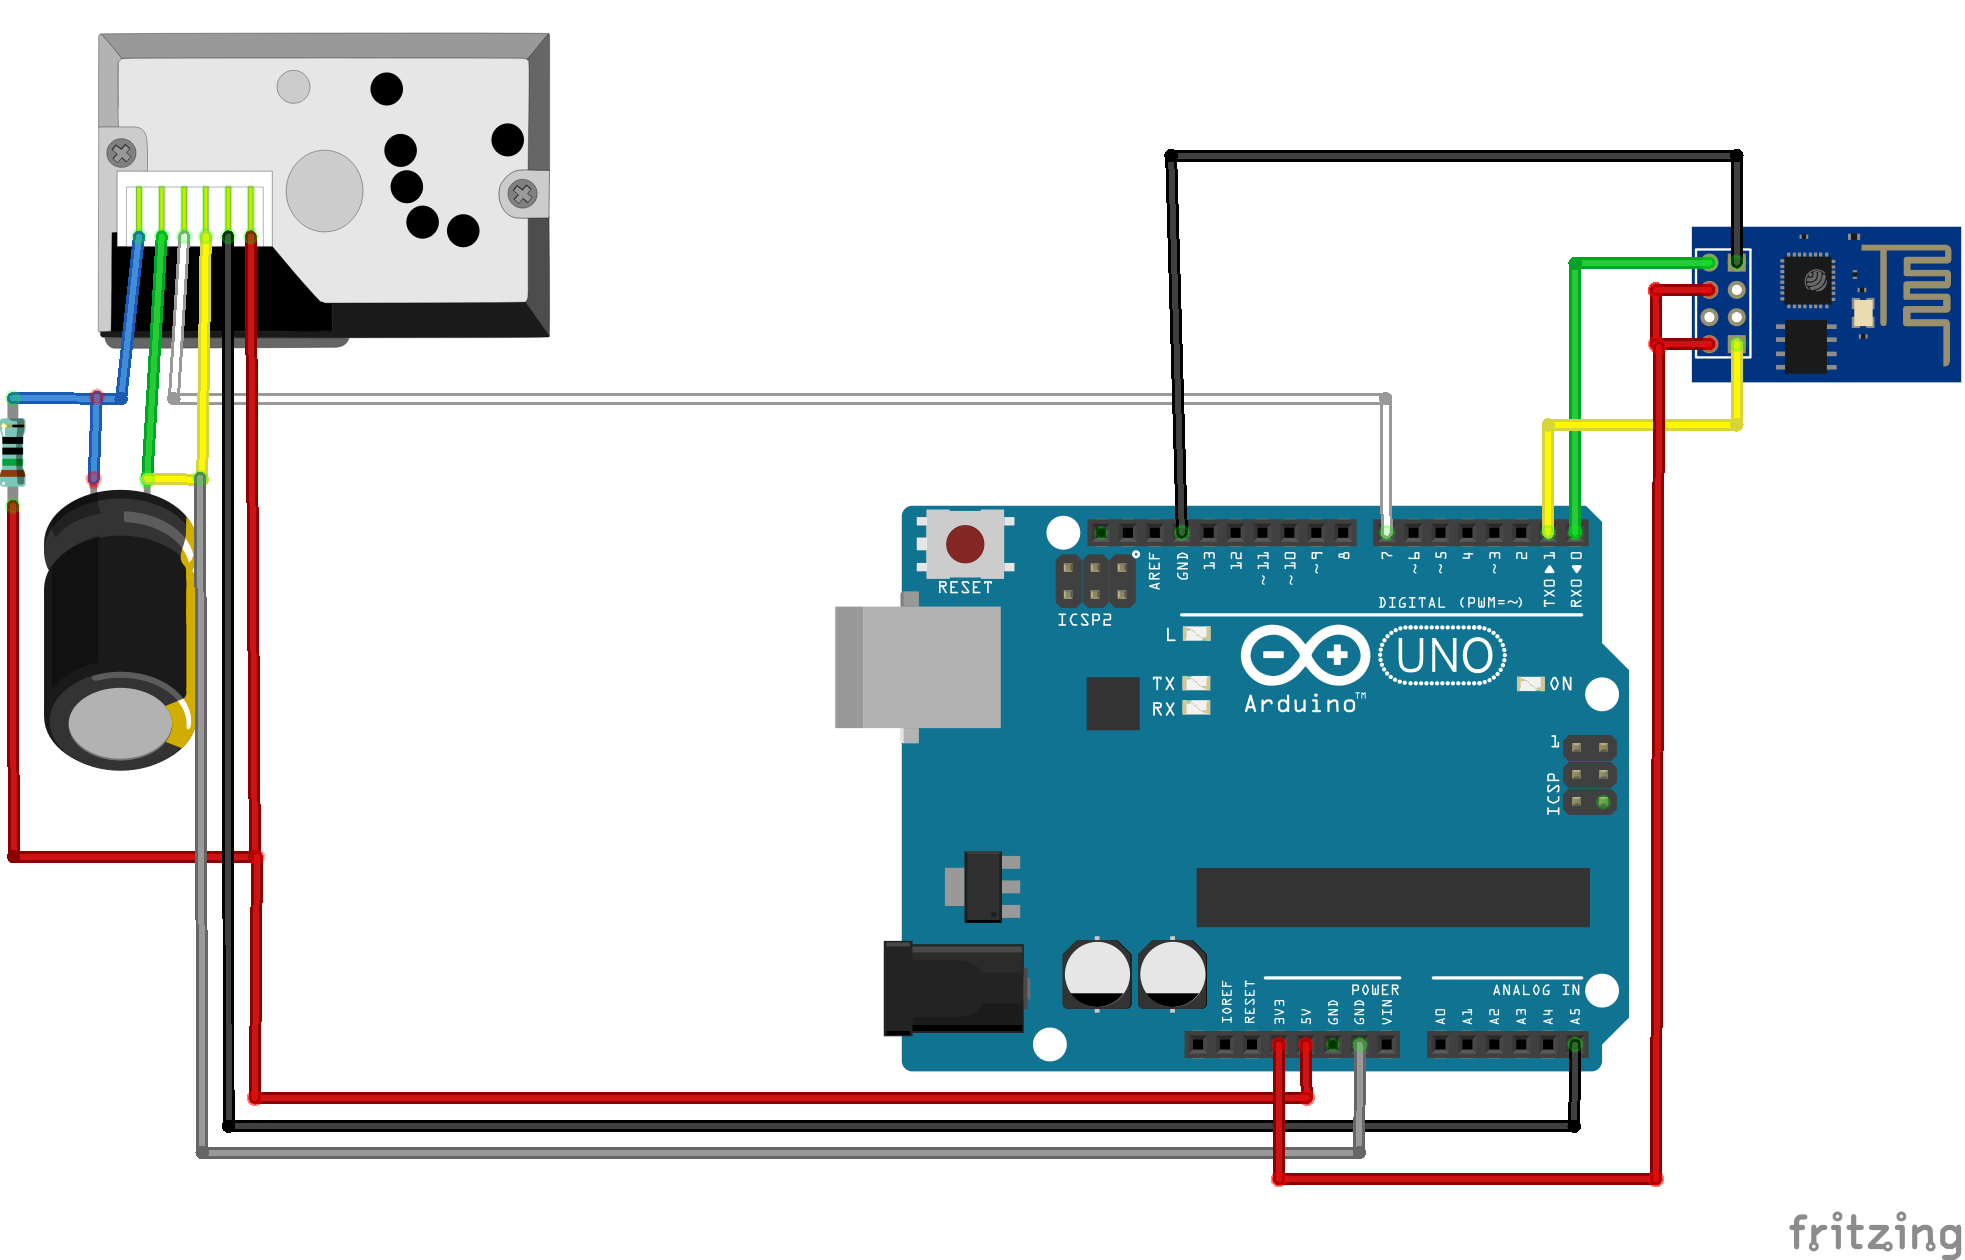
To add Wi-Fi to the Arduino UNO I connect a ESP-01 module with it. Before that you may have to update the ESP8266 Module's firmware. To know how to upload firmware to your ESP01 module you can visit this link.
connect-
- Arduino RX to ESP01 TX
- Arduino TX to ESP01 RX
- Arduino 3.3V to ESP01 VCC and Chip select pin
- Arduino GND to ESP01 GND
Arduino and GP2Y1014AU0F
The IR emitter in the GP2Y1014AU0F has to control via pulse from Arduino to operate. And the output from the sensor is analog signal so it should be connected to the analog pin of the Arduino. So I connect the sensor and the Arduino accordingly.
connect-
- Arduino D7 to sensor LED
- Arduino A5 to sensor VOUT
First of all we have to include some library
#include <ESP8266_Lib.h>
#include <BlynkSimpleShieldEsp8266.h>
#include <SimpleTimer.h>
According to the sensor datasheet at first the IR LED have to be turned on and wait for 280µs before taking a reading. Then read the voltage values from the analog pin. This operation takes about 50µs, So give a 50µs delay and then turn off the IR led. According to the datasheet the IR led should be pulse on and off once every 10ms so it have to wait for the remaining (10000-280-50)µs = 9670µs.
 digitalWrite(led,LOW);
 delayMicroseconds(280);
 SensorOut = analogRead(SensorPin);
 delayMicroseconds(50);
 digitalWrite(led,HIGH);
 delayMicroseconds(9670);
Then to calculate the dust density we need some value from the datasheet, K is the sensitivity of the sensor, it is 0.5V/100µgm/m^3. Voltage_noDust is the voltage when no dust is present on the air. this voltage varies from 0.1V-1V. You may have to tune this value.
After that using some simple calculation we can measure the dust density
 SensorVo = SensorOut*(5.0/1024);
 Dust = (SensorVo-Voltage_noDust)*100/K;
Then using Blynk.virtualWrite(V1,Dust); function send the dust density value to the cloud. This value is send once every second.
The rest of the code is explained by comment.Blynk App Setup
Follow the steps
After Uploading the code check if everything works properly.
You can export the excel data from the app, and send it to your email address and then use the data for further analysis.


_ztBMuBhMHo.jpg?auto=compress%2Cformat&w=48&h=48&fit=fill&bg=ffffff)


Comments
Please log in or sign up to comment.