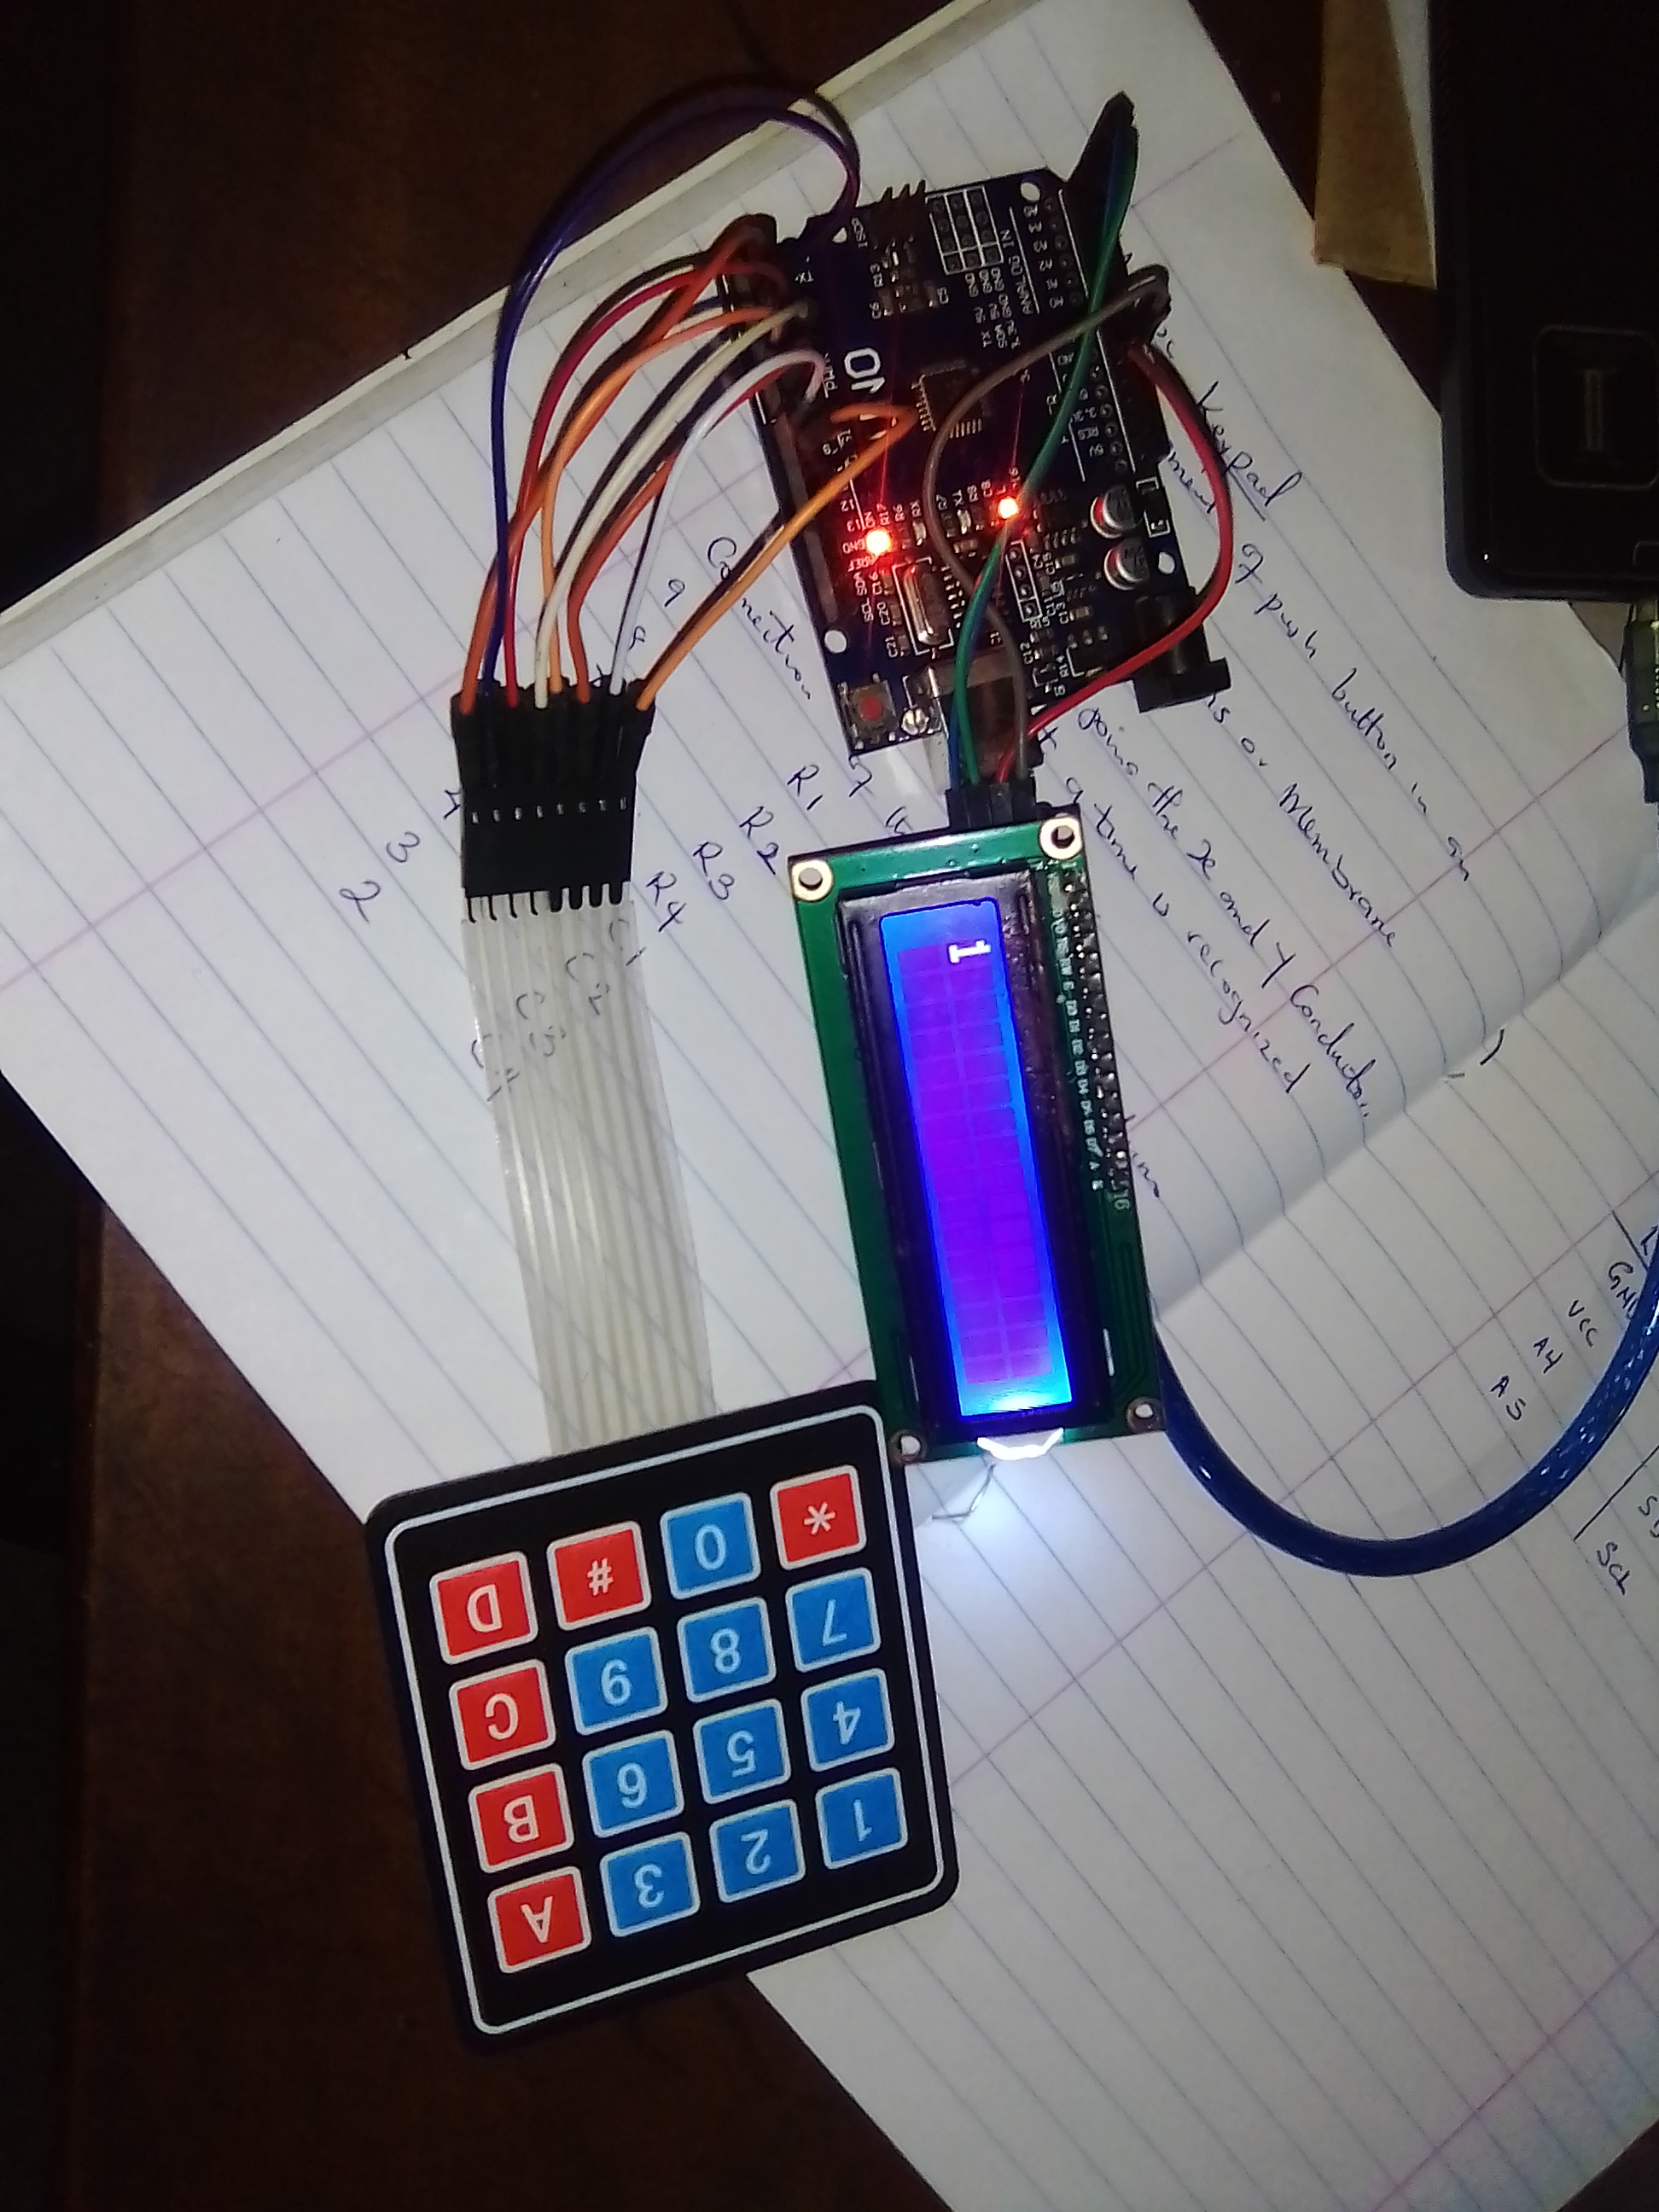
#include <Wire.h>
//#include <LiquidCrystal_I2C.h>
#include <Keypad.h>
#include <LCD_I2C.h>

LCD_I2C lcd(0x27); // Default address of most PCF8574 modules, change according

const byte ROWS = 4;
const byte COLS = 4;

char hexaKeys[ROWS][COLS] = {
  {'1', '2', '3', 'A'},
  {'4', '5', '6', 'B'},
  {'7', '8', '9', 'C'},
  {'*', '0', '#', 'D'}
};

byte rowPins[ROWS] = {9, 8, 7, 6};
byte colPins[COLS] = {5, 4, 3, 2};

Keypad customKeypad = Keypad(makeKeymap(hexaKeys), rowPins, colPins, ROWS, COLS);


void setup(){
   lcd.begin();
  lcd.backlight();
 //lcd.init();
}

void loop(){
  char customKey = customKeypad.getKey();
  if (customKey){
    lcd.clear();
    lcd.setCursor(0, 0);
    lcd.print(customKey);
  }
}


_ztBMuBhMHo.jpg?auto=compress%2Cformat&w=48&h=48&fit=fill&bg=ffffff)


_E7iug1MOOJ.png)
_E7iug1MOOJ.png)


Comments
Please log in or sign up to comment.